If you’re on the hunt for a cookie that’s pure buttery bliss and just melts the second it hits your mouth, this Danish Butter Cookies (Melt in Your Mouth) Recipe is hands down my go-to. I absolutely love how these turn out every time—crispy on the edges, tender in the middle, and that signature rich buttery flavor that feels like a little hug in cookie form. Whether you’re baking for a casual afternoon tea or a festive holiday spread, these cookies bring that effortless charm and buttery goodness everyone adores.
When I first tried making these, I was amazed at how simple ingredients like butter, sugar, and flour come together with a tiny magic trick of resting the dough to create that delicate texture. You don’t need any fancy gadgets or weeks of baking experience—just a mixer, a piping bag, and a little patience. The Danish Butter Cookies (Melt in Your Mouth) Recipe is perfect if you want a fuss-free recipe that makes you look like you spent hours in the kitchen, but really only takes about an hour start to finish.
Why You’ll Love This Recipe
- Buttery, Melt-in-Your-Mouth Texture: The unique combination of all-purpose and cake flour gives these cookies their signature delicate crunch and soft center.
- Simple Ingredients, Big Flavor: Just a handful of pantry staples come together to create classic Danish cookies you’ll want to bake again and again.
- Perfect for Gifting or Sharing: These cookies hold up well and look beautiful when piped into different shapes—great for holiday tins or special occasions.
- Easy to Make with Clear Steps: The detailed directions and tricks ensure even beginner bakers can feel confident creating bakery-quality cookies at home.
Ingredients You’ll Need
Each ingredient plays a crucial role in building the classic flavor and texture of Danish butter cookies. I always recommend using quality European-style butter for that extra richness, and measuring your flours carefully to get the perfect melt-in-your-mouth bite.
- European salted butter: Opt for butter with a higher fat content for the best flavor and texture; it should be room temperature, not melted.
- Granulated sugar: Adds sweetness and helps create light, fluffy cookies when creamed with butter.
- Salt: Enhances flavor and balances the sweetness; use kosher or fine salt depending on your preference.
- Egg yolks: Provides richness and helps bind the dough beautifully.
- Vanilla extract: Adds a warm, inviting aroma that complements the buttery flavor perfectly.
- Whole milk: Just enough to soften the dough so you can pipe it easily; feel free to add a bit more if needed.
- All-purpose flour: Provides structure but keeps the cookies tender with the help of cake flour.
- Cake flour: Key to achieving that tender, melt-in-your-mouth texture by keeping the cookies soft yet crisp.
- Coarse sugar for decorating: Optional but adds a lovely sparkle and a gentle crunch on top.
Variations
I love switching things up to keep this Danish Butter Cookies (Melt in Your Mouth) Recipe exciting. Whether it’s adding a sprinkle of cinnamon for warmth or dipping half the cookies in melted chocolate, playing around with flavors makes the baking process even more fun and personal.
- Chocolate-Dipped: Once cooled, dip one half of the cookies into melted dark or milk chocolate and let them set—my family goes crazy for this twist!
- Spiced Cookies: Add a teaspoon of cinnamon or cardamom to the dry ingredients for a cozy, fragrant spin during fall and winter.
- Gluten-Free Version: Substitute all-purpose and cake flour with a gluten-free baking blend, but expect a slightly different texture.
- Brown Butter Option: For a nutty depth, try browning the butter before creaming, though this changes the classic flavor slightly.
How to Make Danish Butter Cookies (Melt in Your Mouth) Recipe
Step 1: Prep Your Workspace and Chilling Plan
Make sure you’ve cleared some space in your refrigerator to chill the cookie sheets once the dough is piped—this step is key to preventing the cookies from spreading too much during baking. Line two baking sheets with parchment paper or silicone mats so your cookies don’t stick later on.
Step 2: Cream the Butter, Sugar, and Salt
In a stand mixer fitted with a paddle attachment, beat your room temperature butter on medium speed until it’s smooth and creamy—this usually takes about 1-2 minutes. Slowly add in the granulated sugar and salt, then crank the speed to medium and whip until the mixture turns lighter in color and fluffy, which adds wonderful airiness to your cookies.
Step 3: Incorporate Egg Yolks, Vanilla, and Milk
With the mixer on low, add in the egg yolks, vanilla extract, and whole milk little by little. Keep mixing until everything is combined well but don’t overdo it—if the batter looks too stiff to pipe after you add flour, feel free to add an extra tablespoon of milk here to loosen it up a bit.
Step 4: Mix the Dry Ingredients and Combine
In a separate bowl, whisk together the all-purpose and cake flours to make sure there are no lumps. Add this flour mix to your wet ingredients in two parts, scraping down the sides each time to ensure even mixing but stop as soon as the flour disappears—overmixing will make your cookies tough.
Step 5: Pipe and Chill Your Cookies
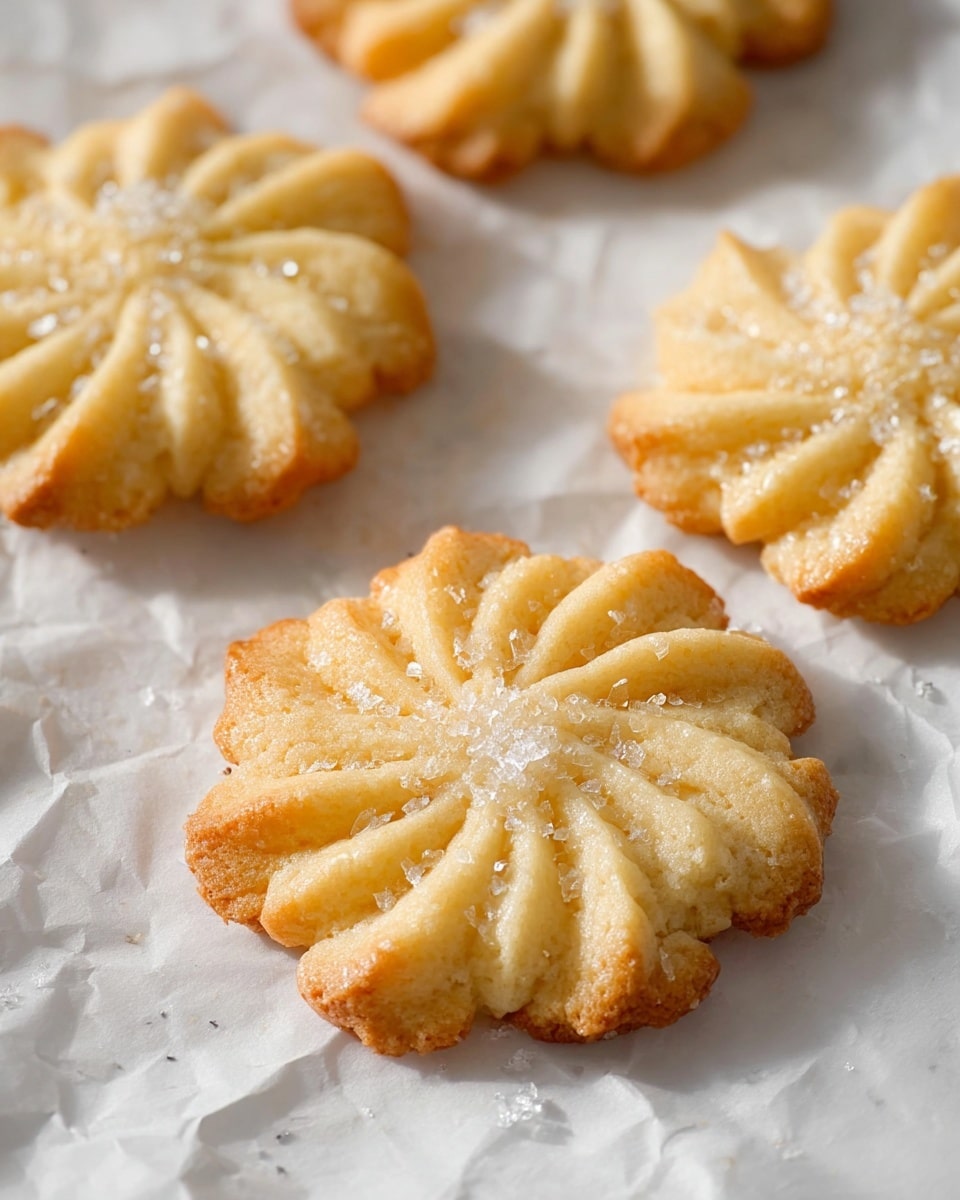
Fill a piping bag fitted with a ½-inch open star tip with your dough and pipe 2-inch shapes directly onto your prepared baking sheets. Leave at least 2 inches between each cookie for even baking. Sprinkle with coarse sugar if desired, then pop the trays in your fridge for 20-30 minutes to chill.
Step 6: Bake to Golden Perfection
Preheat your oven to 350°F and place the baking rack in the center. Bake the chilled cookies for 10-15 minutes, or until the edges have just started to turn a light golden brown. Don’t walk away—the difference between perfect and overdone is just a couple of minutes here. Let them cool on the baking sheet for 5 minutes before transferring to a wire rack to cool completely.
Pro Tips for Making Danish Butter Cookies (Melt in Your Mouth) Recipe
- Use Room Temperature Butter: I learned this the hard way—too cold butter won’t cream well, and too warm butter makes a greasy dough. Aim for cool but soft butter for smooth mixing.
- Don’t Skip the Chilling: Chilling the piped cookies keeps their shape and prevents spreading; I always set an alarm so I don’t forget this important step.
- Watch Baking Time Closely: Since cookie sizes can vary, start checking at 10 minutes—you want golden edges but a pale middle for that perfect melt-in-your-mouth texture.
- Measure Flour Accurately: I use a kitchen scale to avoid dense cookies; spoon and level your flour if you’re measuring by volume.
How to Serve Danish Butter Cookies (Melt in Your Mouth) Recipe
Garnishes
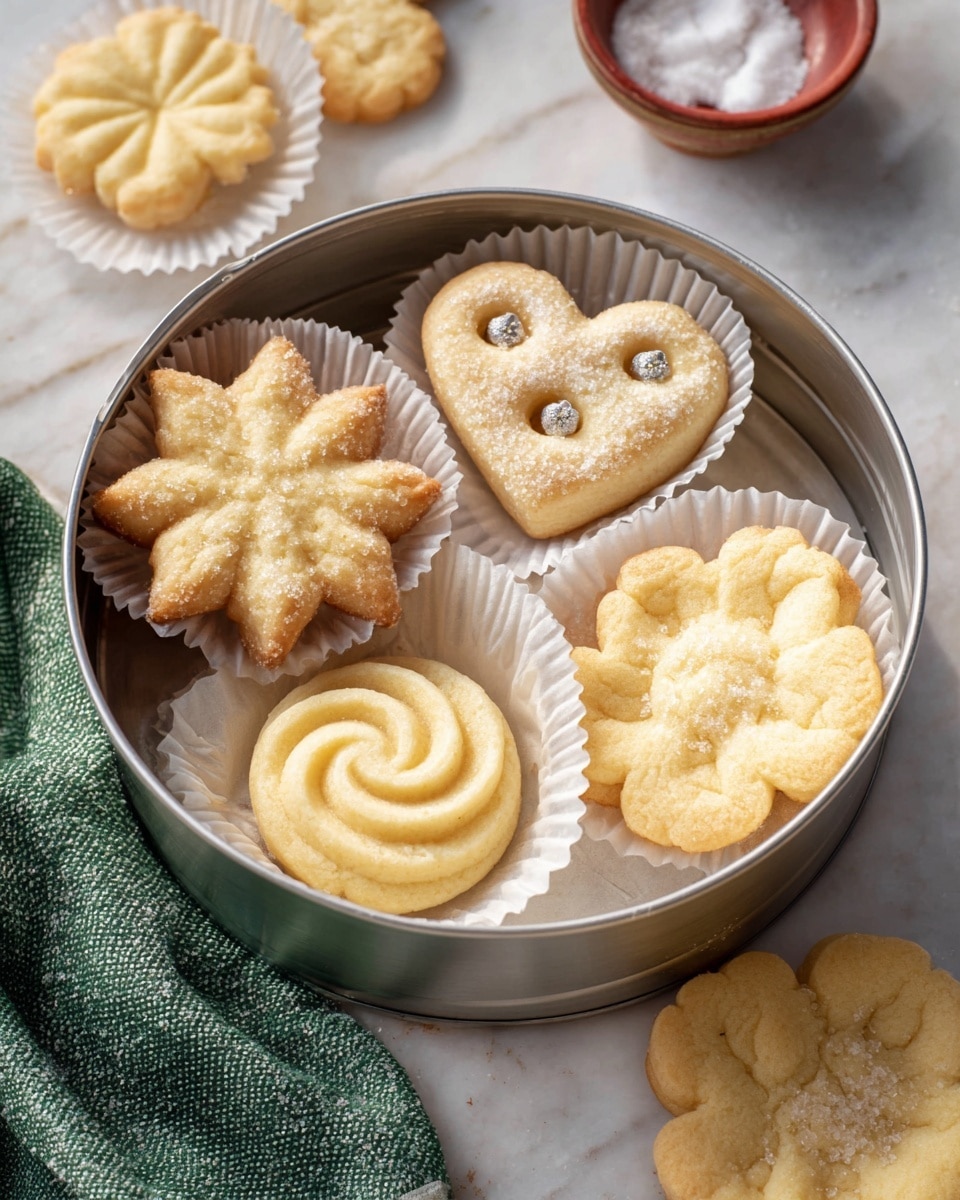
I usually sprinkle the cookies with coarse sugar right before chilling—they catch the light and add such a lovely crunch. For special occasions, colorful sprinkles or finely chopped nuts work beautifully. Sometimes I dip them halfway in chocolate for an eye-catching and delicious finish.
Side Dishes
These cookies are a dream paired with a warm cup of tea or coffee—my personal favorite is Earl Grey or a mild green tea. They also shine alongside vanilla ice cream or a delicate fruit compote for a simple dessert.
Creative Ways to Present
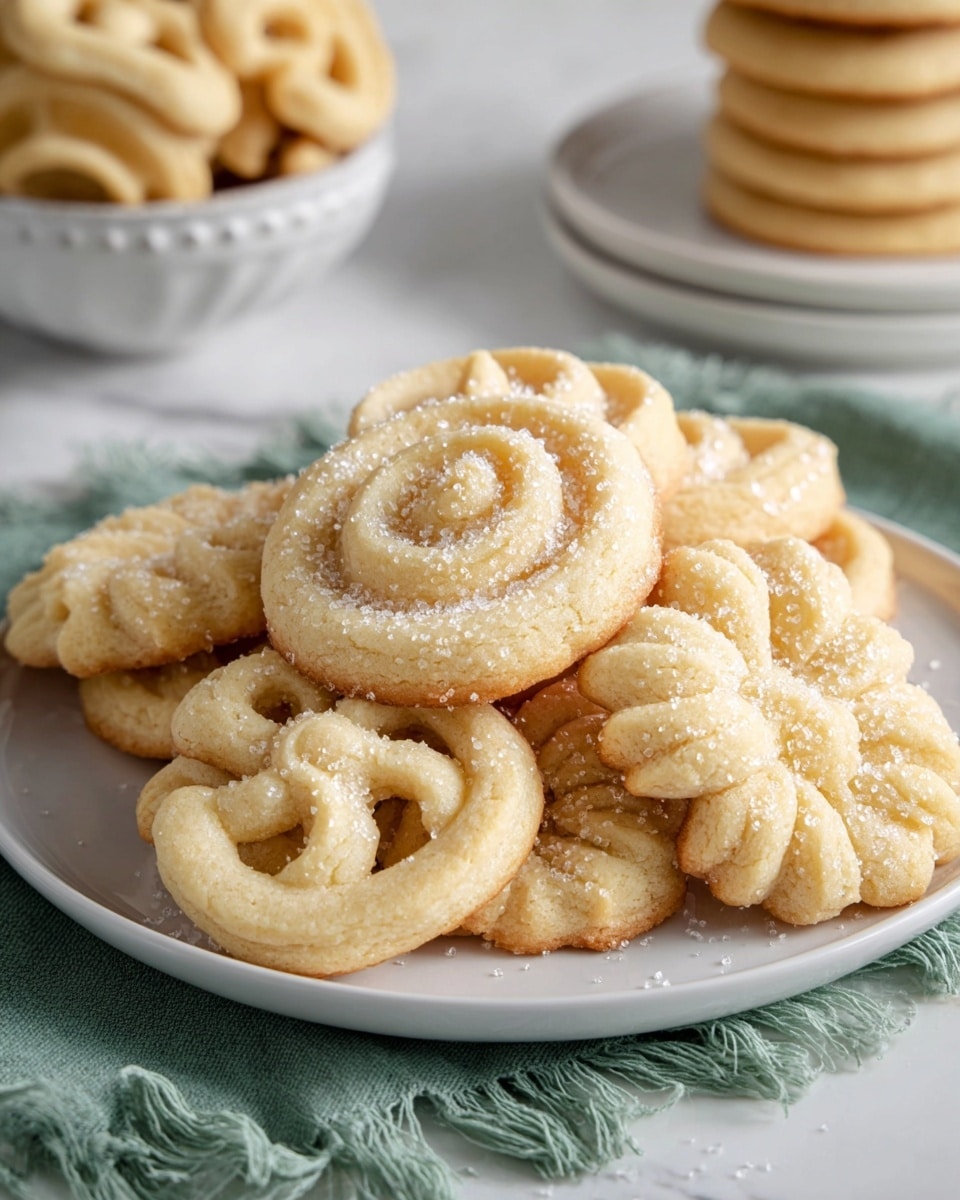
For holiday gifting, I arrange them in decorative tins layered with parchment paper and tied with a ribbon—that always scores smile points with friends and family. For gatherings, I pipe the dough into different shapes like pretzels and flowers to keep things fun and visually appealing.
Make Ahead and Storage
Storing Leftovers
I store leftover Danish butter cookies in an airtight container at room temperature, where they stay fresh and crisp for up to 5 days. Placing a slice of bread inside the container can help maintain moisture balance and keep them perfect.
Freezing
You can freeze the unbaked, piped cookie dough on baking sheets for up to 2-3 months—just cover tightly with plastic wrap first. When you’re ready, bake them straight from the freezer, adding a couple of minutes to the baking time; the texture remains beautifully tender.
Reheating
If you want to refresh your cookies after storing, pop them in a 300°F oven for 5 minutes—this crisp ups the edges and brings back that freshly baked magic without drying them out.
FAQs
-
Can I use unsalted butter instead of salted?
Yes! If you’re using unsalted butter, just add an extra ¼ teaspoon of kosher salt to balance the flavor. This helps achieve the right savory contrast that makes Danish butter cookies so delicious.
-
Why do I need to chill the cookies before baking?
Chilling the piped cookies firms up the butter, preventing them from spreading too thin while baking, which keeps their pretty shapes intact and ensures that satisfyingly tender texture.
-
Can I skip cake flour and use only all-purpose flour?
Absolutely! Using cake flour adds extra tenderness and a finer crumb, but if you only have all-purpose flour, just increase the amount to 260 grams and your cookies will still turn out nicely.
-
What piping tip should I use for these cookies?
I recommend a ½-inch open star tip for that classic ridged look. If you don’t have one, a round tip or even a sturdy plastic sandwich bag with a small hole cut in the corner can work in a pinch.
-
How long can I store these cookies?
Stored properly in an airtight container at room temp, they keep up to 5 days. For longer storage, freeze them in airtight containers for up to 3 months without losing their signature texture.
Final Thoughts
This Danish Butter Cookies (Melt in Your Mouth) Recipe has such a special place in my baking repertoire because it delivers that perfect balance of buttery richness and delicate crumb every single time. Sharing these cookies with friends or family always brings an instant smile, and the simplicity behind the process means you can make a batch almost anytime. Trust me, once you try this recipe, you’ll keep coming back to it for cozy afternoons, celebrations, or just whenever you need a sweet little moment of comfort.
Print
Danish Butter Cookies (Melt in Your Mouth) Recipe
- Prep Time: 15 minutes
- Cook Time: 15 minutes
- Total Time: 1 hour 30 minutes
- Yield: 24 cookies
- Category: Dessert
- Method: Baking
- Cuisine: Danish
Description
Danish Butter Cookies are classic melt-in-your-mouth treats made with a perfect blend of European salted butter, sugar, and vanilla. These crisp yet tender cookies are piped into decorative shapes and lightly baked to golden perfection. They are ideal for festive occasions or everyday indulgence.
Ingredients
Butter Mixture
- 1 cup (227 g) European salted butter, room temperature
- 1/2 cup (100 g) granulated sugar
- 1/8 teaspoon salt
Wet Ingredients
- 2 egg yolks
- 2 teaspoons (10 g) vanilla extract
- 1 tablespoon (15 g) whole milk, plus more if needed
Dry Ingredients
- 2 cups (220 g) all-purpose flour
- 1/2 cup (50 g) cake flour
For Decorating
- Coarse sugar for decorating
Instructions
- Prepare for baking. Make space in your refrigerator for a baking sheet to chill shaped cookies for 20-30 minutes. Line two baking sheets with parchment paper or silicone mats and set them aside.
- Cream butter, sugar, and salt. In a stand mixer fitted with a paddle attachment, cream the softened butter on medium speed until smooth. While running on low speed, slowly add sugar and salt, then mix on medium speed until light and fluffy.
- Add egg yolks, vanilla, and milk. Gradually mix in the egg yolks, vanilla extract, and milk while continuing to mix on medium speed until fully incorporated. Scrape down the bowl’s sides to ensure even mixing.
- Combine dry ingredients and add to the mixture. Whisk together all-purpose flour and cake flour in a separate bowl. Add the flour mixture to the mixer in two additions, scraping down the sides of the bowl as needed. Mix on low speed until the dough is homogeneous and no flour streaks remain. Add an additional tablespoon of milk if the dough is too stiff to pipe.
- Pipe the cookies. Transfer the dough to a piping bag fitted with a ½-inch open star tip. Pipe 2-inch cookies in various shapes (rosettes, pretzels, circles, squares) spaced 2 inches apart on the prepared baking sheets. Sprinkle with coarse sugar or festive sprinkles if desired. Chill in the refrigerator for 20-30 minutes to prevent spreading.
- Preheat oven and bake. Preheat the oven to 350°F (175°C) and place the rack in the middle position. Bake cookies for 10-15 minutes or until the edges are just lightly golden brown.
- Cool the cookies. Allow cookies to cool on the baking sheet for 5 minutes, then transfer them to a wire rack to cool completely to room temperature.
Notes
- Use room temperature butter, about 67°F (19°C), for easier mixing and better texture.
- Bring eggs to room temperature before mixing by placing them in warm water for 5 minutes.
- Avoid overmixing the dough to prevent toughness due to gluten development.
- Watch cookies carefully while baking as time varies with size and shape.
- You can use all-purpose flour only (260 grams) instead of the mix for a similar texture.
- Weigh flour accurately with a kitchen scale for best results. Fluff and spoon flour if using measuring cups.
- If using unsalted butter, add ¼ teaspoon kosher salt to the dough.
- Store cookies in an airtight container at room temperature for up to 5 days, or freeze for up to 3 months.
- Chill shaped but unbaked cookies up to 2 days covered, or freeze unbaked dough for 2-3 months; bake frozen dough a few minutes longer without thawing.
Nutrition
- Serving Size: 1 cookie
- Calories: 110 kcal
- Sugar: 6 g
- Sodium: 45 mg
- Fat: 7 g
- Saturated Fat: 4.5 g
- Unsaturated Fat: 2 g
- Trans Fat: 0 g
- Carbohydrates: 12 g
- Fiber: 0.3 g
- Protein: 1.5 g
- Cholesterol: 35 mg

