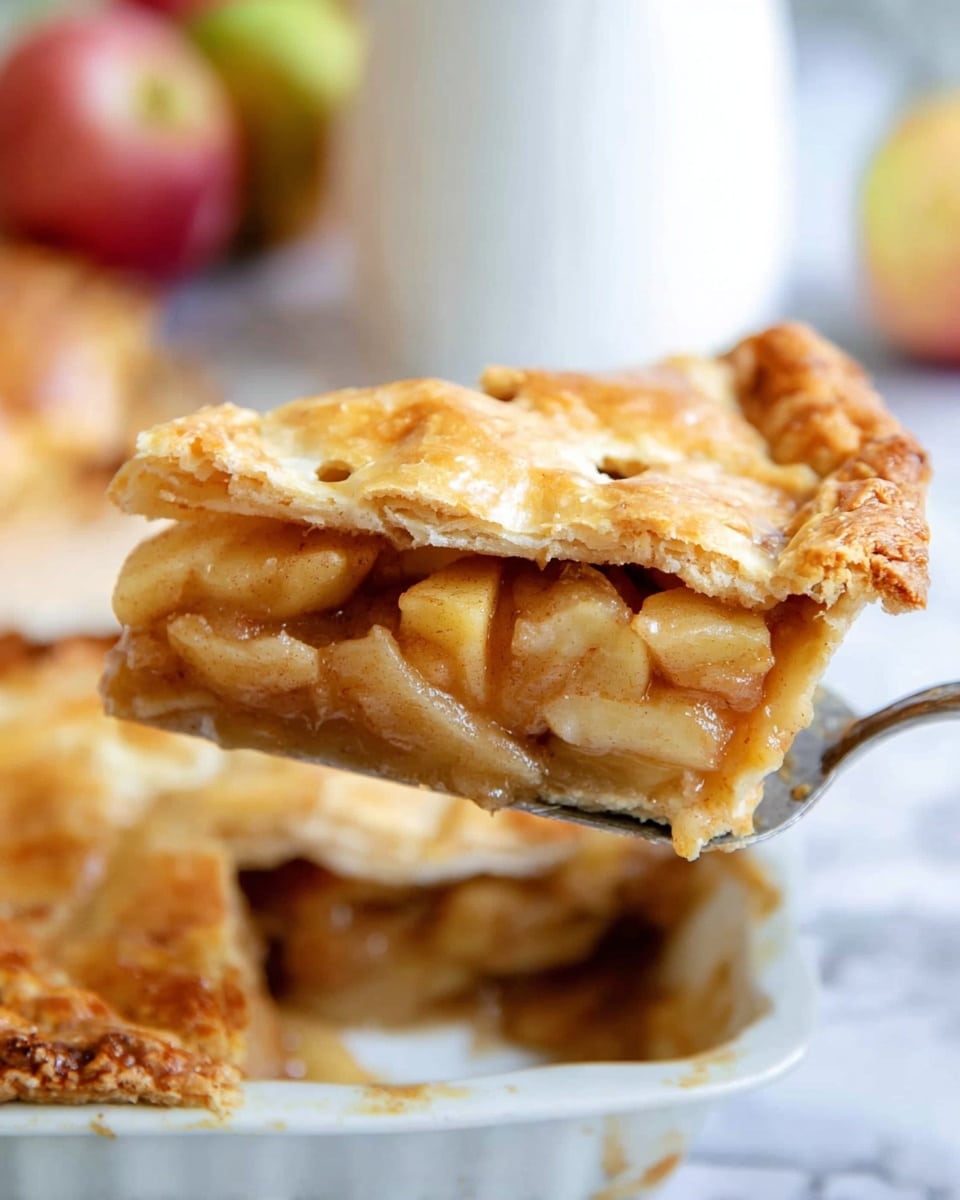
I absolutely love this Apple Slab Pie Recipe because it brings that perfect combination of cozy, homey flavors with a rustic charm that just feels like a warm hug on a chilly day. It’s not your ordinary pie — this one bakes in a large rectangular pan, making it perfect for big family gatherings or potlucks where you need a dessert that feeds everyone without fuss.
When I first tried this recipe, I was blown away by how tender and flaky the crust turned out, even though it’s a bit more hands-on than your store-bought options. You’ll find that the apple filling bursts with just the right balance of sweetness and spice, making each bite inviting and comforting. Trust me, this Apple Slab Pie Recipe is worth every minute you spend making it!
Why You’ll Love This Recipe
- Feeds a crowd with ease: This slab pie turns out enough slices to satisfy a big family or party without extra pies.
- Perfectly flaky homemade crust: The combo of shortening and butter creates a tender crust that’s golden and flaky every time.
- Balanced apple spice filling: A wonderful mix of cinnamon and nutmeg complements the tart and sweet apples beautifully.
- Great make-ahead potential: You can prep the dough and filling ahead, then easily bake when ready for fresh pie goodness.
Ingredients You’ll Need
This Apple Slab Pie Recipe uses simple pantry staples that beautifully come together for that perfect comforting pie. Pro tip: picking crisp, tart apples gives the filling the best texture and flavor.
- All-purpose flour: Used in the crust and filling for structure; choose unbleached for added tenderness.
- Salt: Enhances the flavor in the crust so it’s not flat tasting.
- Shortening: Keeps the crust tender and flaky with a light texture.
- Butter: Adds rich flavor and flakiness to the crust; use cold and cubed.
- Vegetable oil: Helps bind the dough for a smooth texture without heaviness.
- Milk: Acidulated with lemon juice to tenderize the dough and add flavor depth.
- Lemon juice: Keeps the apples from browning and brightens the flavor.
- Apples: Pick a mix of tart and sweet such as Granny Smith and Fuji for the best pie filling.
- Sugar: Sweetens the filling and crust dust, balancing the tart apples.
- Ground cinnamon: Classic warm spice that pairs perfectly with apples.
- Ground nutmeg: Adds a subtle depth and warmth to the spice mix.
- Egg: For the egg wash to give the crust a beautiful golden shine.
- Water: Mixed with egg for brushing crust; helps it brown nicely.
Variations
I love how flexible this Apple Slab Pie Recipe is, so I often tweak it depending on the season or what’s in my pantry. Don’t hesitate to personalize it to your taste—it’ll still turn out amazing!
- Adding raisins or dried cranberries: My family enjoys the chewy bursts of sweetness; it’s a fun texture variation I highly recommend trying.
- Using whole wheat flour: For a nuttier crust, swapping half the white flour with whole wheat works beautifully in this recipe.
- Lower sugar option: Reduce the sugar in the filling slightly if you prefer a less sweet pie; the apples provide natural sweetness anyway.
- Spice adjustments: Feel free to add a pinch of ground ginger or cloves for a different spice profile that still complements apples perfectly.
How to Make Apple Slab Pie Recipe
Step 1: Crafting Your Flaky Pie Crust
Start by mixing flour and salt in a large bowl; this forms the base of your crust. Cut in the shortening and cold cubed butter until you see pea-sized bits—this step is crucial because it creates those layers that bake into a flaky crust. I use a pastry cutter, but your fingers work well too, just don’t overwork it or the crust can get tough.
Step 2: Bringing the Dough Together
Combine milk and lemon juice—it might look a bit curdled, but that’s exactly what you want! Add the vegetable oil and milk mixture to your flour and butter blend, stirring until a soft dough forms. This is where I usually rely on my hands to gently knead the dough just enough to bring it together, but not too much. Divide the dough into two discs, wrap them tightly, and chill for about 30 minutes while you prepare the filling.
Step 3: Preparing the Apple Filling
Peeling and chopping apples is the most satisfying step to me—it smells incredible! Toss them in a bowl with sugar, flour, cinnamon, and nutmeg until each piece is evenly coated. This mixture thickens nicely as it bakes, so your filling won’t run all over the pan. I’ve learned that using a mix of apple varieties keeps the texture interesting and flavorful.
Step 4: Assembling Your Apple Slab Pie
Roll one dough disc on a lightly floured surface to about 13×18 inches—it doesn’t have to be perfectly even, a rustic look adds charm! Lay it gently into a 10×15-inch jelly roll pan and let the edges drape over. Then sprinkle the crust dust (a combo of sugar and flour) over the bottom crust for extra texture and sweetness. Pour the apple filling on top, spreading it evenly before rolling out the second dough disc and placing it over the filling.
Fold the edges back and tuck them neatly into the pan, then pinch or crimp with a fork to seal. Don’t forget to cut vents in the top crust — this lets steam escape and prevents sogginess. Finally, brush the top with egg wash and lightly sprinkle sugar for that enticing golden finish.
Step 5: Baking to Perfection
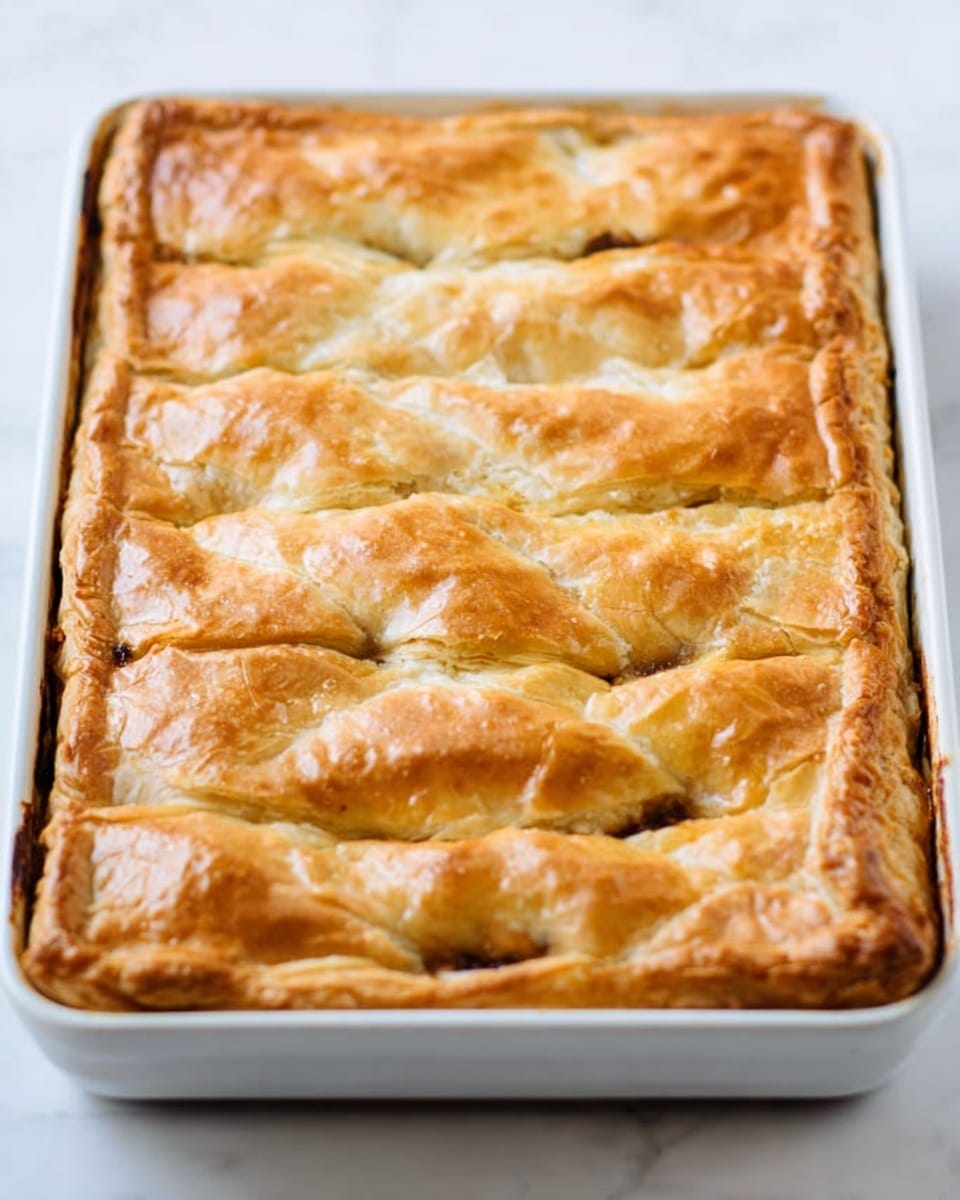
Bake the slab pie at 400°F for 30 minutes, then tent it loosely with foil and continue baking for another 20-25 minutes. This prevents the crust from burning while the filling bubbles up beautifully. The top should be a gorgeous golden brown and the apples should be tender and syrupy. My best tip here is to let the pie cool for at least 2 hours before slicing — it sets up perfectly and makes serving so much easier!
Pro Tips for Making Apple Slab Pie Recipe
- Keep butter cold: This helps create those flaky layers in the crust that everyone loves.
- Don’t skip chilling the dough: Resting the dough allows the gluten to relax, making rolling easier and crust tender.
- Use a pizza stone if you have one: I put mine in the oven while preheating to get a really crisp bottom crust.
- Allow cooling time: Cutting too soon makes the filling runny; patience pays off with perfectly set slices.
How to Serve Apple Slab Pie Recipe
Garnishes
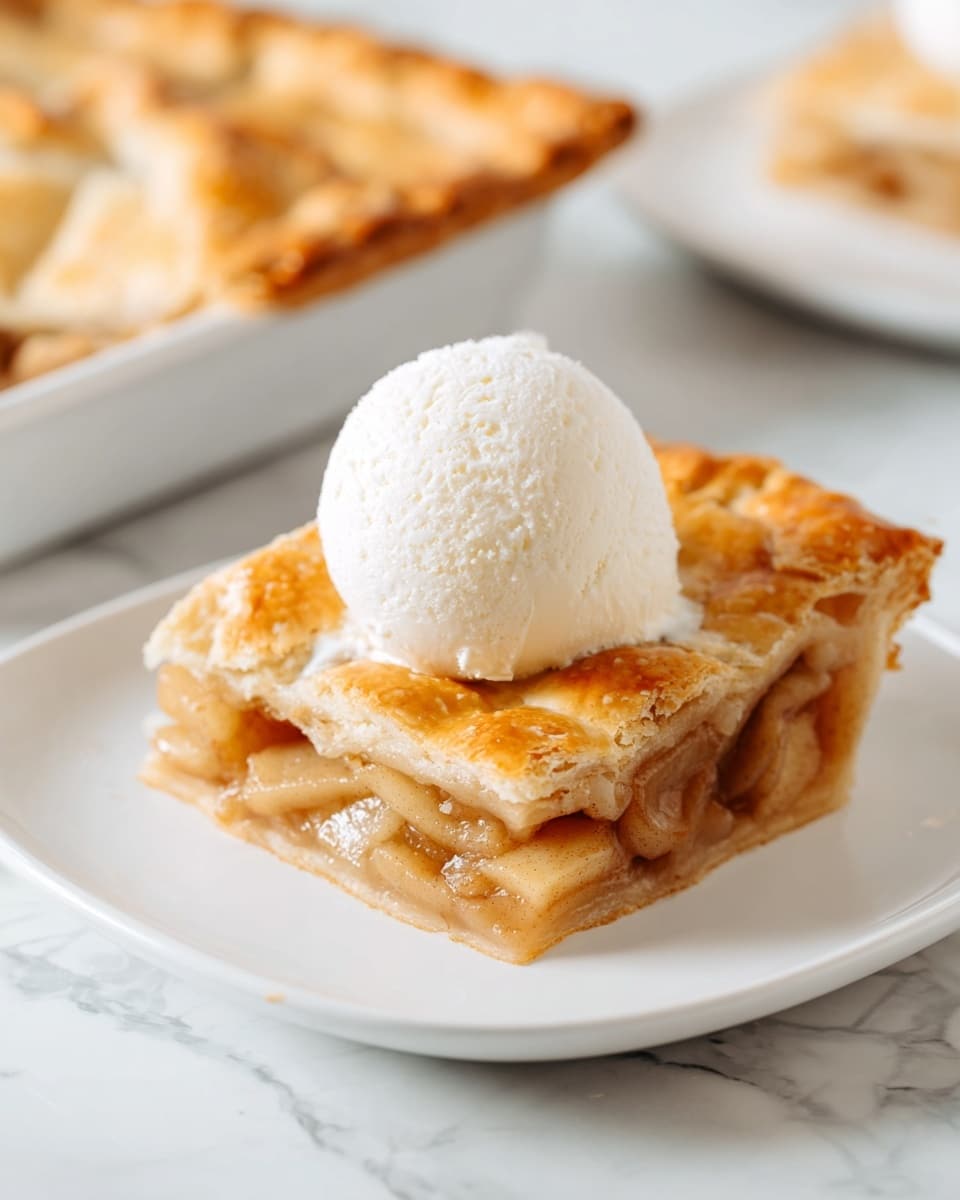
I love serving this pie slightly warm topped with a scoop of vanilla ice cream or a dollop of fresh whipped cream—both bring out the apple’s warmth and spice beautifully. Sometimes, a light dusting of cinnamon sugar on top adds an extra little sparkle that my family adores.
Side Dishes
This slab pie shines on its own but pairs wonderfully with a hot cup of coffee or tea, making it a perfect afternoon treat. For a festive brunch, I like adding a simple green salad or roasted nuts on the side for texture contrast.
Creative Ways to Present
If you’re bringing the Apple Slab Pie Recipe to an event, try baking it in smaller halves or cutting into neat squares arranged on a pretty platter. I once added edible flowers around the edges for a fall party—it was a real showstopper and everyone loved the rustic vibe with a touch of elegance.
Make Ahead and Storage
Storing Leftovers
After enjoying your pie, cover leftovers tightly with plastic wrap or foil and keep them in the fridge. From my experience, this keeps the pie fresh for up to 3 days without losing the crust’s flaky texture or the filling’s juiciness.
Freezing
You can freeze unbaked assembled slab pie by wrapping it well in freezer-safe foil and placing it in the freezer for up to 2 months. When I’ve done this, baking directly from frozen just requires adding about 10-15 extra minutes to the baking time.
Reheating
To reheat slices, I place them in a preheated 350°F oven for about 10 minutes. This revives the crispness of the crust and warms the filling without making it soggy, which microwave reheating sometimes does.
FAQs
-
Can I use store-bought pie crust for this Apple Slab Pie Recipe?
You absolutely can! Using store-bought crust will save time and still yield a delicious pie, though making your own crust ensures extra flakiness and flavor that’s hard to beat. Just make sure the crust fits your slab pan dimensions.
-
What type of apples works best in the Apple Slab Pie Recipe?
I recommend mixing tart apples like Granny Smith with sweeter varieties like Fuji or Honeycrisp. This blend offers a balanced flavor and keeps the filling from being too mushy or overly sweet.
-
How can I prevent a soggy bottom crust?
Sprinkling crust dust (flour and sugar mix) on the bottom crust before adding filling helps absorb moisture. Also, prebaking the bottom crust a little before filling can help, but it’s not necessary in this recipe if you follow the instruction closely.
-
Can I make this Apple Slab Pie Recipe vegan?
Yes! Replace butter and shortening with vegan-friendly fats like coconut oil or vegan margarine. Swap the egg wash brush for a plant-based milk with maple syrup to get that nice golden crust.
-
How long should I let the pie cool before slicing?
Cooling for at least 2 hours is key. It allows the filling to set and prevents it from spilling out when sliced, making for cleaner, more beautiful pieces.
Final Thoughts
This Apple Slab Pie Recipe has become my go-to for when I’m serving dessert to a crowd but still want that homemade touch that everyone notices and loves. It’s a bit of a project, but honestly, the warmth of fresh apple pie generously sliced and shared makes every step worth it. I encourage you to try it out—you’ll find it’s a joy to make and an absolute hit every time you bring it to the table.
Print
Apple Slab Pie Recipe
- Prep Time: 45 minutes
- Cook Time: 55 minutes
- Total Time: 3 hours 40 minutes
- Yield: 24 slices
- Category: Dessert
- Method: Baking
- Cuisine: American
Description
This classic Apple Slab Pie features a golden, flaky crust filled with a spiced apple filling. Perfectly balanced with cinnamon and nutmeg, this large rectangular pie is ideal for serving a crowd at family gatherings or holiday celebrations.
Ingredients
Pie Crust
- 4 cups all-purpose flour
- 2 teaspoons salt
- 1 ¼ cup shortening
- ½ cup cold butter, cut into small cubes
- 1 tablespoon vegetable oil
- ¾ cup milk
- 1 tablespoon lemon juice
Apple Pie Filling
- 10-12 cups apples (about 4 pounds), peeled and chopped
- ⅔ cup sugar
- ¼ cup all-purpose flour
- 1 ½ teaspoons ground cinnamon
- ½ teaspoon ground nutmeg
Crust Dust
- 2 tablespoons all-purpose flour
- 2 tablespoons sugar
Egg Wash
- 1 egg, beaten
- 1 tablespoon water
Instructions
- Prepare the Crust: Mix flour and salt in a large bowl. Cut in shortening and cold butter cubes until the mixture resembles small peas in size. This step ensures a flaky texture for the crust.
- Combine Liquids: In a small bowl, combine milk and lemon juice, then add vegetable oil. Pour this mixture into the flour mixture, stirring until a soft dough forms. You may need to use your hands to bring the dough together.
- Chill the Dough: Divide dough into two equal portions. Flatten each into a disc, wrap in plastic, and refrigerate for about 30 minutes to firm up the dough making it easier to roll out.
- Prepare the Filling: Peel and chop apples into small pieces. In a large bowl, sprinkle sugar, flour, cinnamon, and nutmeg over the apples and stir until coated evenly. This mixture provides the flavorful filling.
- Preheat Oven: Set the oven to 400°F (200°C). If available, place a pizza stone in the oven rack to preheat. This helps to bake the pie crust evenly.
- Roll Out Bottom Crust: On a lightly floured surface, roll one disc of dough into a 13×18 inch rustic rectangle about ⅛ inch thick. Place this dough into a 10×15 inch jelly roll pan with edges hanging over the sides.
- Apply Crust Dust: Sprinkle the mixture of 2 tablespoons flour and 2 tablespoons sugar over the bottom crust for a slight texture and sweetness contrast.
- Add Filling: Pour the prepared apple filling evenly over the bottom crust in the pan.
- Roll Out Top Crust: Roll the second dough disc into the same size rectangle and gently lay over the apple filling.
- Seal the Edges: Fold the edges of the top and bottom crust back, tucking it into the pan. Pinch and crimp the edges by hand or with a fork to seal the pie and create a decorative border.
- Vent the Pie: Cut several slits into the top crust to allow steam to escape during baking.
- Egg Wash and Sugar: Brush the surface gently with beaten egg mixed with water to give a glossy finish, then sprinkle sugar on top for a sweet crunch.
- Bake the Pie: Bake the pie at 400°F for 30 minutes. Then, loosely tent with foil and continue baking for 20-25 more minutes until the crust is golden and the filling is bubbling.
- Cool Before Serving: Remove pie from the oven and allow to cool for at least 2 hours to let the filling set for clean slices.
Notes
- Storage: Keep leftover pie covered with plastic wrap in the pan to maintain freshness for up to 3 days.
- Oven & Baking Sheets: Use light-colored baking sheets or pans to avoid over-browning. Dark baking sheets may require adjusted baking times.
Nutrition
- Serving Size: 1 slice
- Calories: 220 kcal
- Sugar: 15 g
- Sodium: 150 mg
- Fat: 10 g
- Saturated Fat: 3 g
- Unsaturated Fat: 6 g
- Trans Fat: 0 g
- Carbohydrates: 32 g
- Fiber: 3 g
- Protein: 2 g
- Cholesterol: 25 mg


![Vegan Chicken Noodle Soup [Stove, Instant Pot, Crockpot] Recipe](https://recipesara.com/wp-content/uploads/2025/09/0_0-1757167886653-768x960.jpeg)
