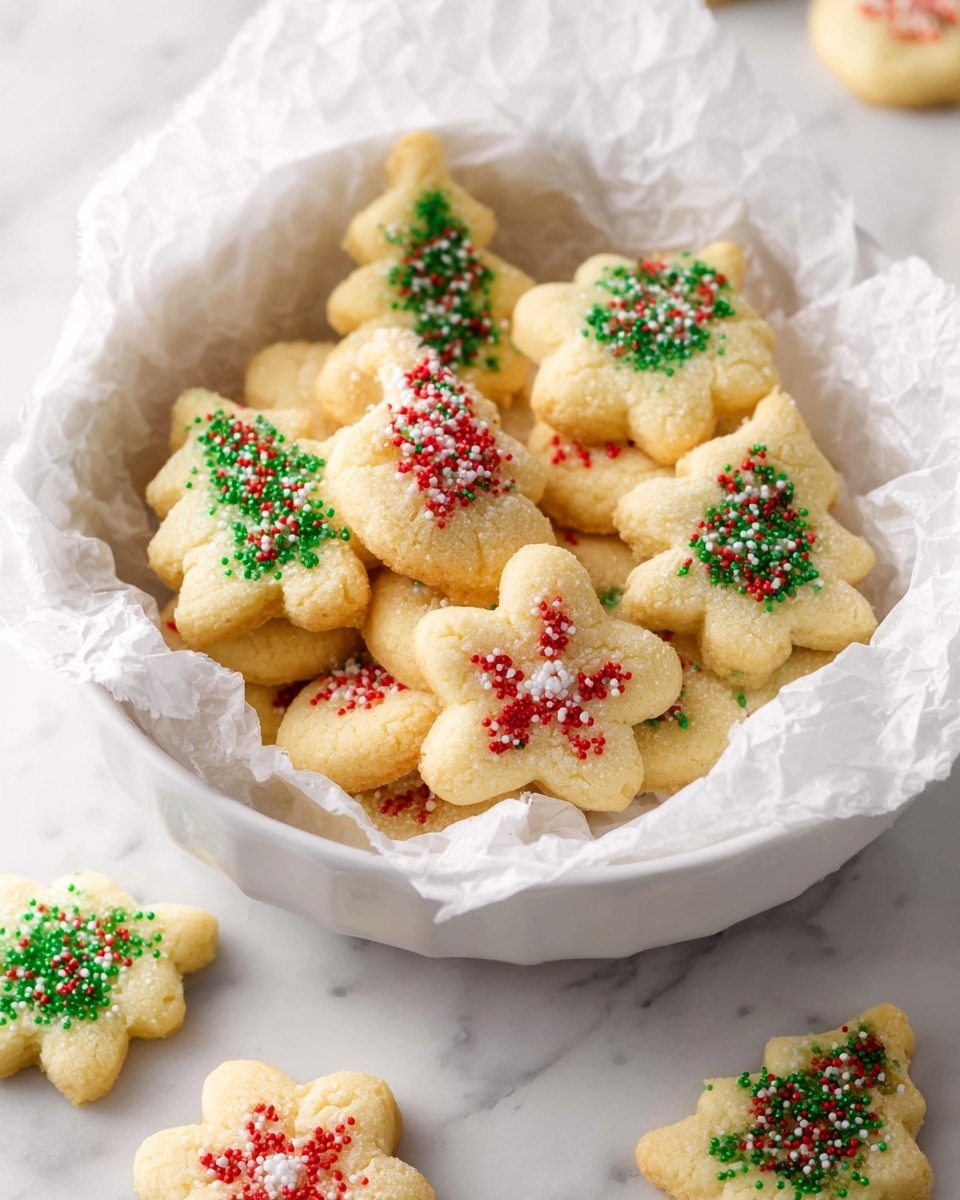
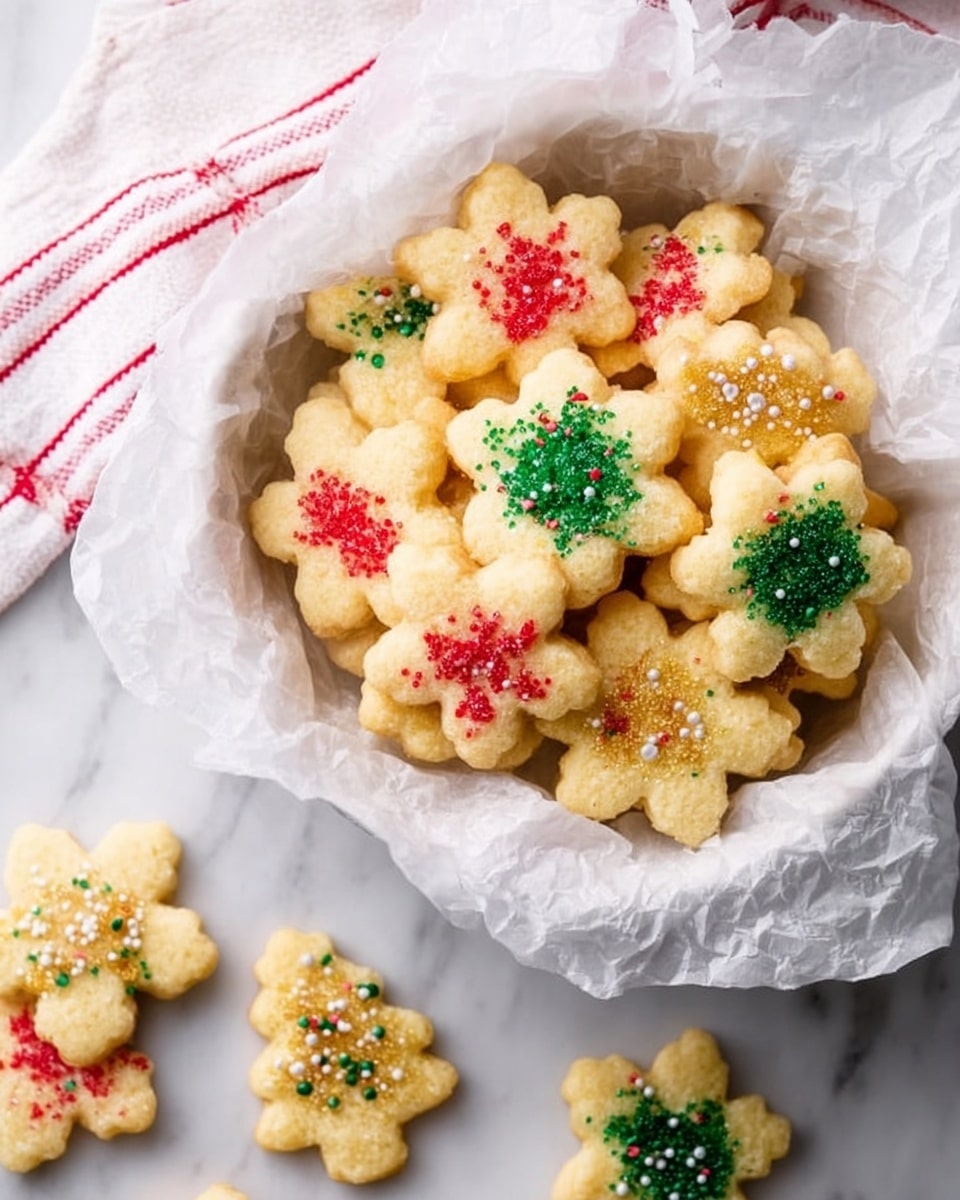
If you’re searching for that perfect festive treat that brings back warm holiday memories, you’re going to absolutely love this Spritz Butter Christmas Cookies Recipe. I first made these cookies on a chilly December evening, and ever since, they’ve become a beloved tradition in my family. They’re buttery, lightly sweet, and that delicate green hue just screams Christmas cheer. Plus, decorating them turns into an excuse for some playful kitchen fun. Stay with me—I’ll share all my tips so these cookies turn out just perfect for your holiday celebrations!
Why You’ll Love This Recipe
- Classic buttery flavor: These cookies have that perfect melt-in-your-mouth texture every time.
- Fun and festive to make: Pressing out shapes and decorating is a joy for all ages.
- Easy to customize: You can tweak the color and sprinkles to match any holiday vibe.
- Reliable results: Once you master this recipe, you’ll have a staple cookie for years to come.
Ingredients You’ll Need
Each ingredient in this Spritz Butter Christmas Cookies Recipe plays a simple but important role to ensure that buttery-rich taste and perfect texture. I like sticking to the basics here, but I’ll share tips on picking the best versions of each to boost your results.
- Unsalted butter: Room temperature butter blends more easily and helps create that tender crumb.
- Granulated sugar: For the classic sweetness and just enough crunch.
- Large egg: Binds everything together while adding moisture.
- Vanilla extract: It’s the secret to deep flavor—don’t skimp here!
- Green food coloring: I prefer gel because it gives a more vibrant color without watering down the dough.
- All-purpose flour: Provides structure and that classic cookie chew.
- Kosher salt: Just a pinch to balance sweetness and enhance flavors.
- Sprinkles or colored sugar: For that festive sparkle and extra fun during decorating.
Variations
I’m all about making this Spritz Butter Christmas Cookies Recipe your own. Over the years, I’ve played around with flavors and decorations to keep it fresh and exciting—after all, cookie creativity is part of the fun!
- Flavor swaps: Once, I added a teaspoon of almond extract instead of vanilla, and wow, it gave the cookies a lovely nutty twist my family loved.
- Color variations: Don’t limit yourself to green! I’ve tried red for poinsettias and even pastel tones for a winter theme—food gel colors work best.
- Dietary modifications: For a dairy-free version, try vegan butter substitutes; just note it changes the texture slightly but still delicious.
- Decorative ideas: Instead of sprinkles, I sometimes use crushed candy canes for a minty crunch that’s perfect for the holidays.
How to Make Spritz Butter Christmas Cookies Recipe
Step 1: Prep and Cream the Butter and Sugar
First things first: preheat your oven to 375°F (190°C). I like to get the oven ready before I start mixing because the dough comes together pretty quickly. Then, using an electric mixer on medium speed, beat together your softened butter and granulated sugar until fluffy and light—this usually takes about 2 to 3 minutes. This step is where the air gets incorporated, so your cookies end up tender and melt-in-your-mouth. Don’t rush it; you want that perfect creamy texture.
Step 2: Add the Egg, Vanilla, and Green Color
Once the butter and sugar mix is beautifully fluffy, add in the egg and vanilla extract. Keep beating until everything is fully combined. Now comes the fun part: adding the green food coloring. Whether you use liquid or gel, add it drop by drop while mixing until you reach your ideal holiday green. I personally like a soft pale green—about four drops of gel coloring—because anything too dark starts to look a little “Grinch-y” (and not in a good way!).
Step 3: Incorporate Flour and Salt
Next, sprinkle in your flour and kosher salt, then stir gently with a wooden spoon or spatula. Here’s a tip: don’t overmix at this stage—just enough to bring everything together. You want a smooth dough but still tender. The dough should be soft but not sticky, perfect for pressing out shapes.
Step 4: Shape and Decorate
Now, pack your dough into a cookie press fitted with your favorite holiday disk—wreaths and trees are my go-to shapes, but honestly, pick whatever feels festive to you. Press the cookies onto an ungreased cookie sheet; don’t bother with parchment paper here because I discovered that the dough’s slight stickiness helps the shapes release perfectly. Space your cookies about one inch apart. If you want, sprinkle some colored sugar or tiny festive sprinkles on top for that extra holiday sparkle.
Step 5: Bake Until Delightfully Golden
Bake your cookies in the preheated oven for 7 to 9 minutes. Keep a close eye on them—they should just start turning a light golden color along the edges but still look pale on top. When I first tried baking these a bit longer, they got a little too crisp for my liking, so I learned timing is everything here. After baking, transfer the cookies to a wire rack to cool completely before storing.
Pro Tips for Making Spritz Butter Christmas Cookies Recipe
- Butter at Room Temperature: I learned that too cold butter won’t cream properly, and too soft butter makes dough runny—aim for soft but still cool.
- Don’t Overmix Flour: Stir flour until just combined to keep cookies tender rather than tough.
- Cookie Press Magic: Use an ungreased pan so the dough “grabs” onto the surface and maintains the beautiful shapes.
- Watch Baking Time: I always set a timer and start checking at 7 minutes to avoid overbaking your delicate cookies.
How to Serve Spritz Butter Christmas Cookies Recipe
Garnishes
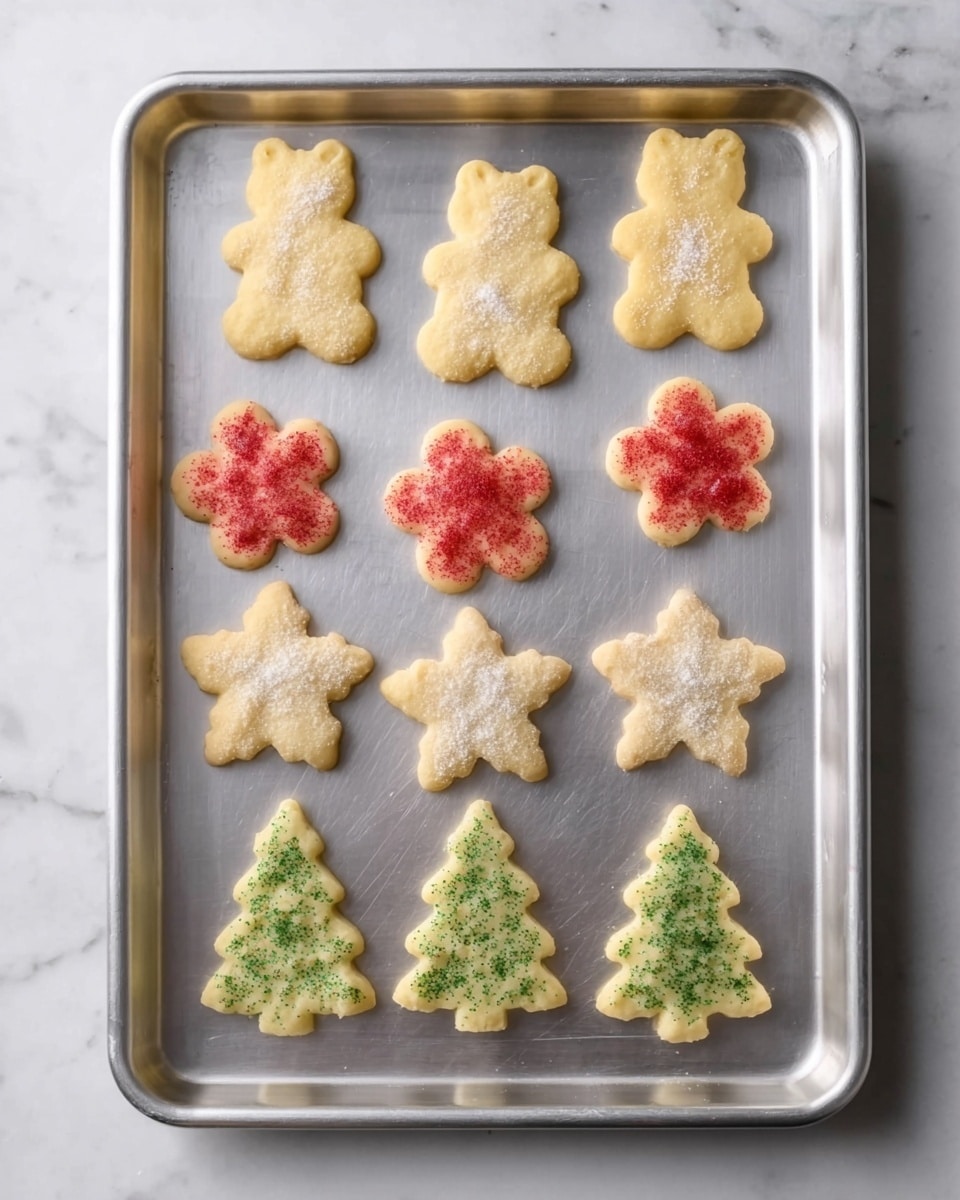
I usually keep it simple with fine colored sugar or tiny holiday sprinkles that add just the right amount of sparkle without hiding the beautiful shape. Sometimes, a light dusting of powdered sugar after baking adds an extra wintery touch that guests adore.
Side Dishes
These cookies pair wonderfully with a hot cup of cocoa or spicy mulled cider. During holiday gatherings, I often arrange them next to a cheese board or alongside other classic Christmas treats for a festive cookie platter everyone loves to nibble on.
Creative Ways to Present
Last year, I baked multiple batches in different shapes and colors, then tied them up in clear cellophane with a festive ribbon as gifts for neighbors. You can also arrange these cookies in wreath shapes on platters or layer them in holiday tins for a charming presentation that’s sure to impress.
Make Ahead and Storage
Storing Leftovers
I store these cookies in an airtight container at room temperature, and believe me, they keep their freshness for up to a week. A tip I learned: place a slice of bread inside the container with the cookies to help maintain softness. It really works!
Freezing
You can freeze unbaked dough or baked cookies. I like to do the dough because then, I just press out fresh shapes when I’m ready. Wrap the dough tight in plastic wrap and store it in a freezer bag for up to three months. To bake, let it thaw slightly to room temp and proceed as usual.
Reheating
If your cookies soften too much or lose their fresh-baked feel, a few seconds in a warm oven (around 300°F) can revive their crisp edges without overbaking. I highly recommend this little trick before serving leftover cookies to guests.
FAQs
-
Can I make Spritz Butter Christmas Cookies Recipe without a cookie press?
Absolutely! If you don’t have a cookie press, you can roll the dough into small balls and flatten them slightly with the back of a fork or your fingers. The texture and flavor remain just as delicious, even if the shapes aren’t as fancy.
-
What type of food coloring should I use?
I recommend gel food coloring because it provides vibrant colors without adding extra liquid, which can affect the dough’s consistency. Liquid food coloring works, too—just use less and add it gradually.
-
How long do these cookies keep fresh?
Stored in an airtight container at room temperature, these cookies stay fresh and tasty for about a week. For longer storage, freezing is your best bet.
-
Can I use salted butter instead of unsalted?
You can, but reduce or omit the additional salt in the recipe to avoid making the cookies too salty. I personally prefer unsalted butter as it gives me full control over the salt level.
-
Do I have to decorate the cookies before baking?
Decorating before baking with sprinkles or colored sugar is traditional and they stick beautifully, but if you prefer, you can also decorate after baking using icing or melted chocolate.
Final Thoughts
This Spritz Butter Christmas Cookies Recipe has been part of my holiday baking for years, and no matter how many times I make them, they never fail to bring joy. I love how the simple ingredients come together into something so festive and delicious, and I’d bet you’ll feel the same. Whether you’re baking with family, gifting neighbors, or just treating yourself with a cup of tea, these cookies make the season feel even brighter. Give them a try—you may just find your new holiday classic.
Print
Spritz Butter Christmas Cookies Recipe
- Prep Time: 15 Minutes
- Cook Time: 10 Minutes
- Total Time: 25 Minutes
- Yield: About 4 dozen cookies
- Category: Dessert
- Method: Baking
- Cuisine: American
Description
These Spritz Butter Christmas Cookies are classic festive treats made with a rich butter dough, lightly sweetened and flavored with vanilla and a touch of green food coloring for a holiday vibe. Crisp around the edges and tender inside, they are pressed into beautiful shapes using a cookie press and decorated with colorful sprinkles or sugar, perfect for celebrations and sharing.
Ingredients
Cookie Dough
- 2 sticks (1 cup) unsalted butter, room temperature
- 1 cup granulated sugar
- 1 large egg
- 2 1/2 teaspoon vanilla extract
- Green food coloring (liquid or gel), about 4 drops of gel or to desired color
- 2 1/2 cup all-purpose flour
- 1/2 teaspoon kosher salt
Decoration
- Sprinkles or colored sugar, for decorating
Instructions
- Preheat oven: Heat the oven to 375°F (190°C) to prepare for baking the cookies.
- Mix butter and sugar: Using an electric mixer on medium speed, beat the room temperature butter and granulated sugar together in a large bowl until the mixture is light and fluffy, about 2-3 minutes.
- Add egg and vanilla: Beat in the egg and vanilla extract until fully combined, ensuring a smooth batter.
- Add food coloring: Slowly add green food coloring drop by drop, mixing continuously until you achieve a pale green hue. Approximately 4 drops of gel food coloring will give a soft green color.
- Incorporate dry ingredients: Stir the all-purpose flour and kosher salt into the mixture using a wooden spoon until just combined to form a dough.
- Shape the cookies: Fit a cookie press with your choice of decorative disk (wreath, tree, or other). Press the dough onto an ungreased cookie sheet about 1 inch apart. The stickiness of the dough helps release shapes from the press. Decorate with sprinkles or colored sugar if desired.
- Bake the cookies: Bake in the preheated oven for 7 to 9 minutes or until the cookie edges are lightly golden at the bottom, indicating they are done.
- Cool and store: Transfer cookies to a wire rack and allow to cool completely. Store cooled cookies in an airtight container at room temperature to maintain freshness.
Notes
- Do not grease the cookie sheet or use parchment paper; the dough’s stickiness helps release the shapes cleanly.
- Adjust the green food coloring gradually to avoid overly dark or unappetizing colors.
- Sprinkles or colored sugar add a festive touch but are optional.
- Allow cookies to cool fully before storing to prevent moisture buildup and sogginess.
- This recipe yields about 4 dozen cookies depending on the size of your cookie press shapes.
Nutrition
- Serving Size: 1 cookie (estimated)
- Calories: 90
- Sugar: 6g
- Sodium: 40mg
- Fat: 6g
- Saturated Fat: 3.5g
- Unsaturated Fat: 2.3g
- Trans Fat: 0g
- Carbohydrates: 9g
- Fiber: 0.2g
- Protein: 1g
- Cholesterol: 20mg

