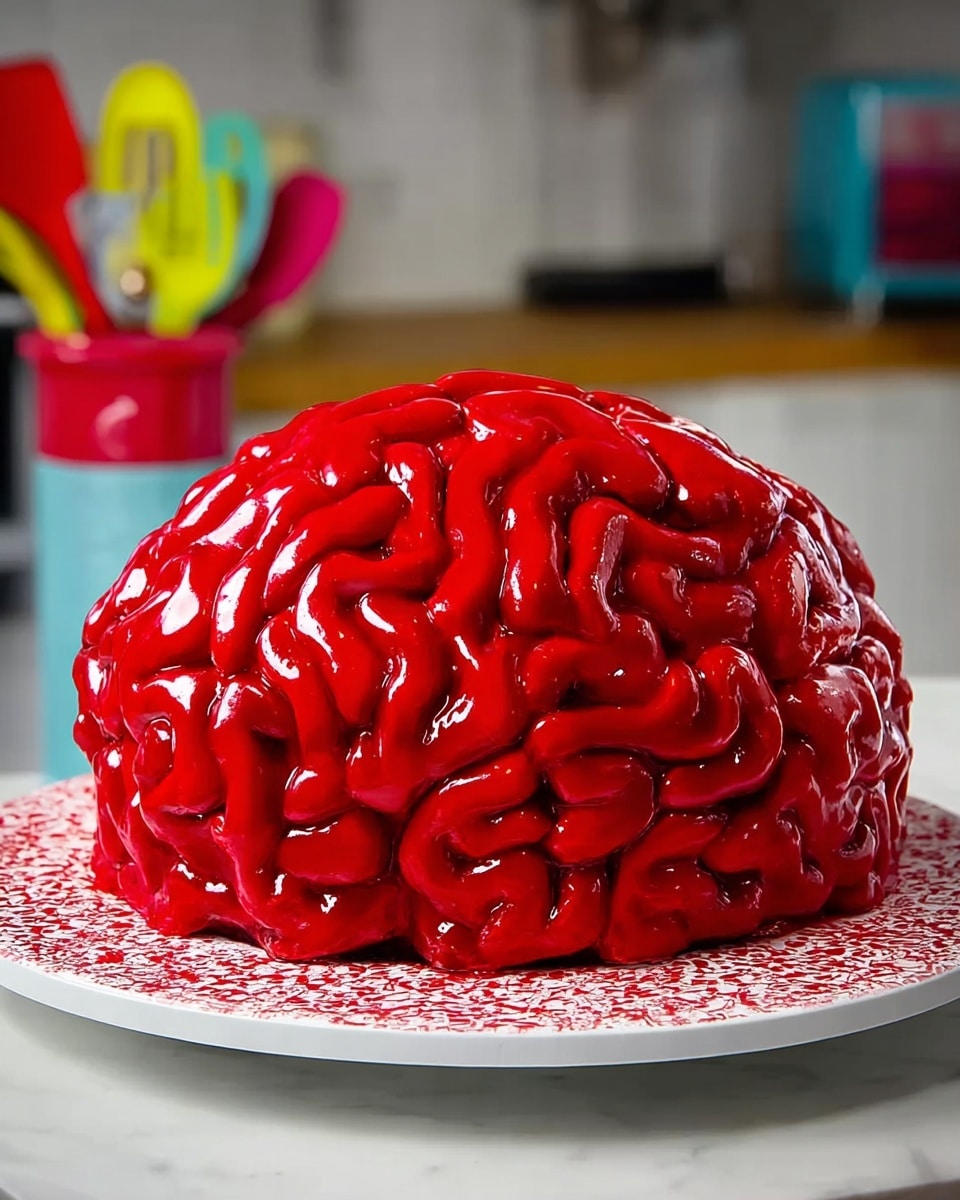
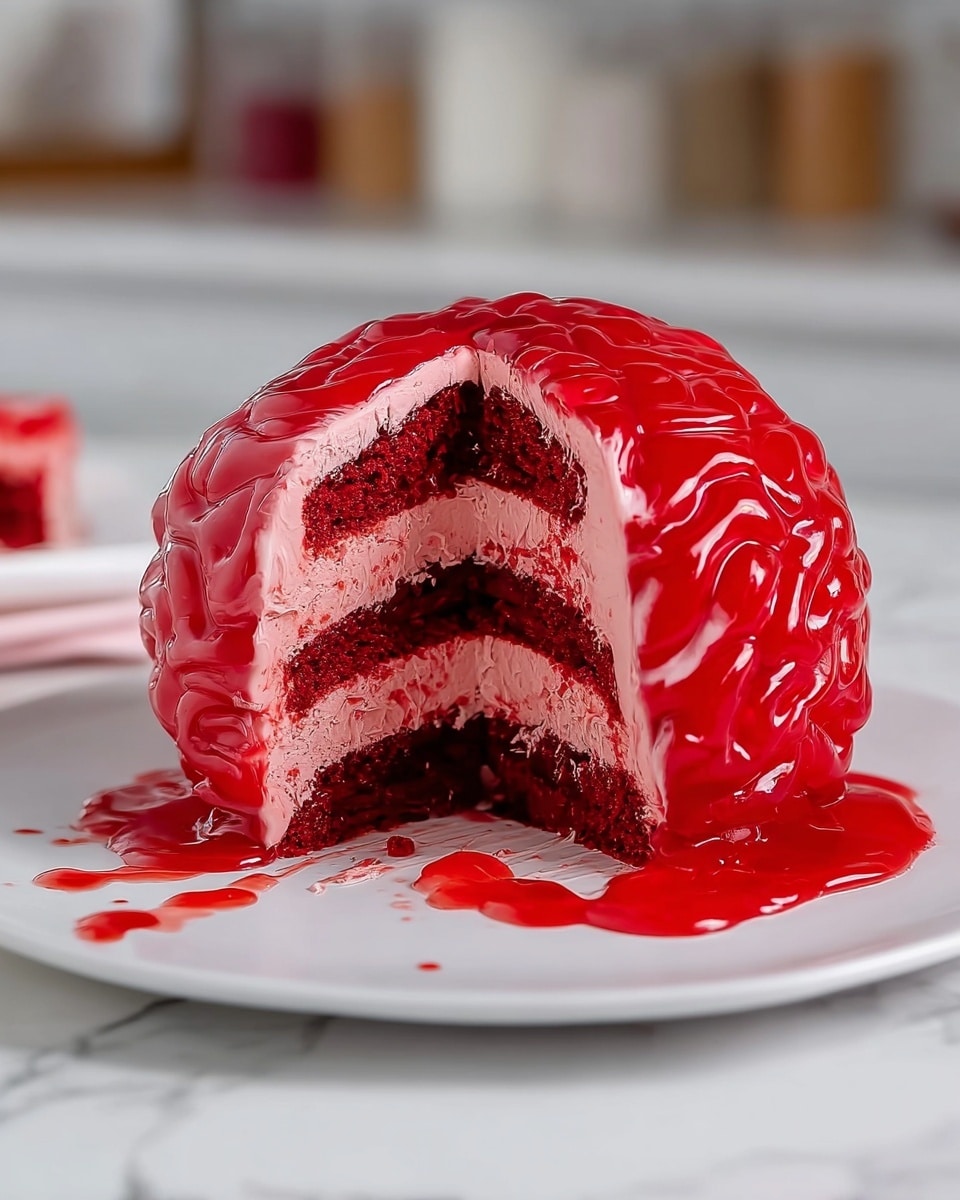
If you’re looking for a show-stopping dessert that’s as fun to make as it is to eat, you’re in the right place. This Brain Cake Recipe is absolutely fan-freaking-tastic — think moist red velvet layers carved and frosted to look like a realistic brain, with raspberry jam that oozes like fresh blood. I promise, whether you’re making this for Halloween or just to impress some friends with your baking skills, this cake will blow their minds. Keep reading, because I’ll walk you through every step to nail this spooky masterpiece!
Why You’ll Love This Recipe
- Visual Wow Factor: This brain cake is the ultimate Halloween centerpiece that doubles as a delicious dessert.
- Moist & Flavorful: Thanks to the buttermilk and oil combo, the cake stays incredibly tender and rich.
- Tangy & Sweet Balance: The cream cheese buttercream layered with raspberry jam makes every bite a perfect tangy-sweet treat.
- Step-by-Step Friendly: I break down the process, so even if you’re new to cake decorating, you’ll feel confident.
Ingredients You’ll Need
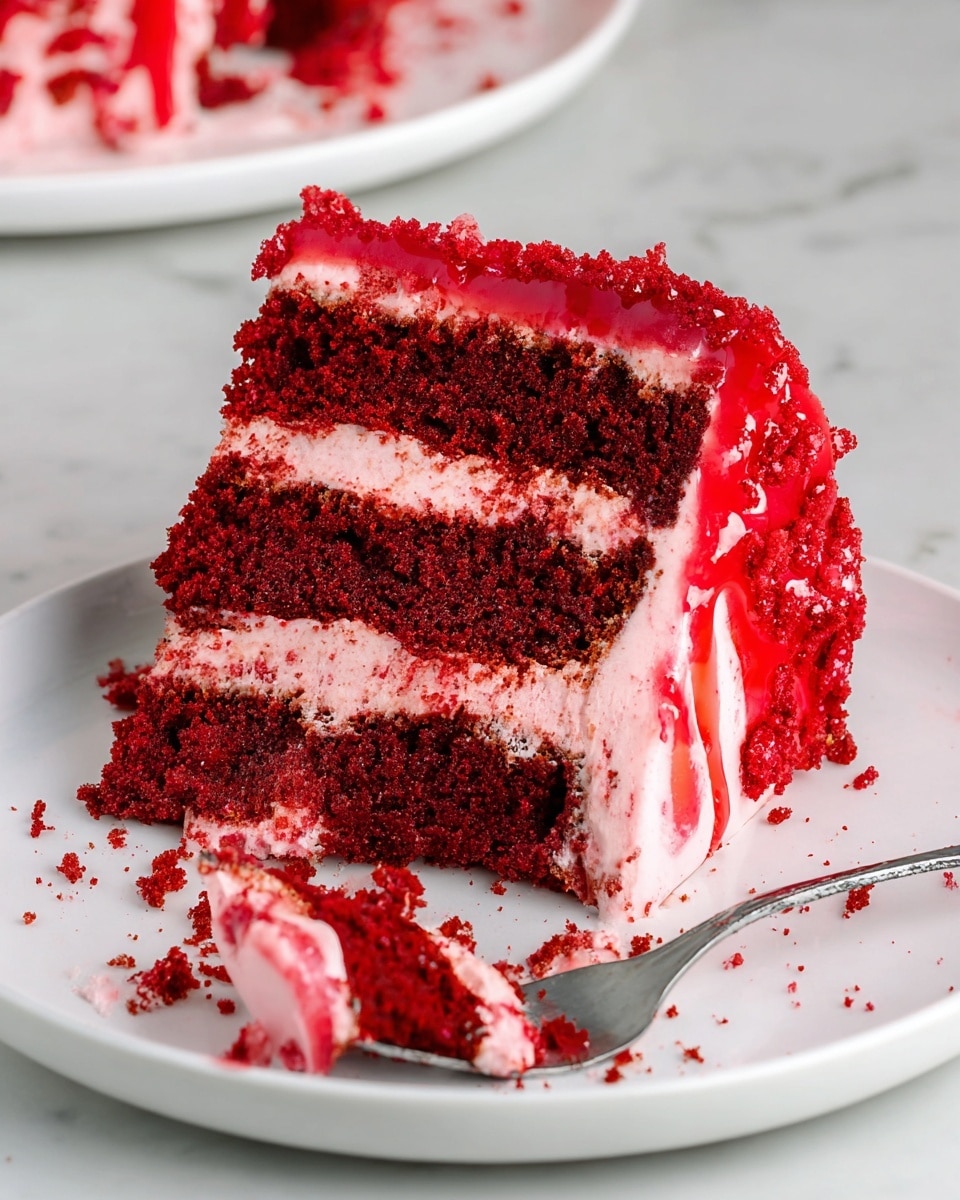
The ingredients for this Brain Cake Recipe come together to create layers of tender red velvet cake, topped with luscious cream cheese buttercream and that signature “blood” raspberry jam. Some pantry staples, a splash of food coloring, and a few special touches make all the difference here.
- Cake Flour: Provides a soft, delicate crumb that’s perfect for a moist cake layer.
- Unsweetened Cocoa Powder: Adds a subtle chocolate undertone classic to red velvet.
- Baking Soda: Leavens the cake for a light texture.
- Fine Salt: Balances sweetness and enhances flavor.
- Unsalted Butter (for cake & frosting): Room temperature butter creams beautifully and adds richness.
- Granulated Sugar: Sweetens your layers just right.
- Large Eggs: Bind the batter and contribute to structure — room temperature eggs mix better.
- Buttermilk: Gives the cake a tender crumb and slight tang.
- Vegetable or Canola Oil: Keeps the cake moist and tender.
- Vanilla Extract or Vanilla Bean Paste: Rounds out flavors with natural warmth.
- White Vinegar: Reacts with baking soda to help leaven and keep the cake light.
- Red Gel or Liquid Food Coloring: That iconic red velvet color (important for the brain theme!).
- Full-Fat Cream Cheese: Essential for creamy, tangy buttercream.
- Powdered Sugar: Smooths and sweetens the frosting.
- Heavy Whipping Cream: Lightens the frosting for silky texture.
- Seedless Raspberry or Strawberry Jam: Creates the perfect oozing “blood” effect inside and outside the cake.
- Water (for thinning jam): Helps spread the jam more easily.
Variations
I love playing around with the flavors and colors in this Brain Cake Recipe, and don’t be afraid to make it your own! Here are some variations I’ve tried or thought would be fun to swap in.
- Chocolate Brain: I once replaced the cocoa powder with additional flour to make it a plain white velvet cake, then added melted dark chocolate between layers for an intense twist.
- Vegan Version: Using vegan butter, flaxseed “eggs,” and plant-based cream cheese works well—just be sure to test baking times as it changes slightly.
- Berry Jam Swap: Raspberry is my favorite, but strawberry or even cherry jam bring different hues and flavors to the “blood.”
- Gluten-Free Option: I tried a cup-for-cup gluten-free flour blend and it held together nicely, but the texture is a bit denser.
How to Make Brain Cake Recipe
Step 1: Make the Red Velvet Cake Batter
Start by sifting together your cake flour, cocoa powder, baking soda, and salt. This step is crucial for a lump-free batter and a tender crumb. In a separate large bowl, cream your room temperature butter with granulated sugar until it’s light and fluffy—this usually takes several minutes and really helps with the cake’s texture. Then, add the eggs one at a time, mixing well between each addition so the batter stays smooth.
Next, alternate adding the dry ingredients with the buttermilk and oil, beginning and ending with the dry. Stir in vanilla, vinegar, and red food coloring until your batter has that gorgeous vibrant red color. Trust me, the gel coloring is more concentrated and gives a deeper shade than liquid.
Step 2: Bake Your Cake Layers
Pour the batter evenly into two or three greased and floured round pans—depending on your preference for layer thickness. Bake in a preheated 350°F (175°C) oven for about 25-30 minutes, or until a toothpick inserted comes out clean. Don’t skip the toothpick test—it’s the best way to avoid a gooey center. Once baked, let the cakes cool completely on wire racks; cold layers are easier to carve and frost without crumbling.
Step 3: Prepare the Cream Cheese Buttercream
To make the signature frosting, beat your room temperature butter and cream cheese together until smooth and creamy. Add vanilla and salt, then slowly incorporate powdered sugar. Pour in heavy cream last to lighten the texture to a spreadable consistency. A little red gel food coloring goes a long way to give your frosting a soft pinkish hue—the perfect “brain” color.
Step 4: Assemble and Carve the Brain
Once the cake layers are completely cool, trim the tops if they’re domed so your layers are flat. Stack them with a generous spread of the cream cheese buttercream and a thin layer of raspberry jam in between. Use a serrated knife to carve the cake into an oval-ish brain shape — I like to look at a brain image as reference here, just to get the curves right. The key is to avoid taking too much off at once. Take your time and clean your knife between cuts.
Step 5: Frost and Detail Your Brain Cake
Apply a thin crumb coat of frosting all over the carved cake and chill it to set. Then, use the remaining buttercream to pipe the intricate folds and grooves of the brain. I find a small round piping tip works best here, but if you’re feeling artistic, you can also use a spatula to create waves and ridges. Lastly, dollop seedless raspberry jam mixed with a little water and optional extra red coloring into the deepest folds to mimic fresh blood oozing through.
Pro Tips for Making Brain Cake Recipe
- Room Temperature Ingredients: I never skip warming my eggs, butter, and dairy — it makes blending smoother and your cake fluffier.
- Carving Slowly: Rather than removing big chunks, I carve in small, careful movements to avoid accidental holes or crumbles.
- Chill Between Steps: Setting the crumb coat before detailed frosting keeps your brain shape crisp and clean.
- Jam Consistency: Water down your jam just enough to drizzle but still keep its vivid color and thickness for “blood.”
How to Serve Brain Cake Recipe
Garnishes
I usually keep the garnishes simple — some fresh raspberries scattered around the cake plate add a touch of freshness and enhance the red tones beautifully. A few edible flowers or mint leaves nearby can soften the visual impact if you want it a bit less spooky for kids or guests.
Side Dishes
Since this Brain Cake Recipe is rich and decadent, I like to serve it with lighter accompaniments like a crisp apple cider or a tart black coffee. A scoop of vanilla bean ice cream also pairs perfectly and cools down the palate.
Creative Ways to Present
For Halloween parties, I once placed the brain cake on a serving tray lined with plastic wrap and “spilled” some extra raspberry jam around it to create a truly gory scene. Also, try dusting a little edible silver dust on top for a glistening wet effect. Kids get a kick out of “poking” the brain with plastic knives to see the “blood” spread!
Make Ahead and Storage
Storing Leftovers
Leftover brain cake stores best covered tightly with plastic wrap in the fridge. I usually slice it and place in an airtight container — it keeps well for up to 4 days, though best eaten within 2 to maintain that fresh, moist texture.
Freezing
I’ve frozen this cake before (unfrosted layers only) by wrapping them tightly in plastic wrap and foil. When you’re ready, thaw in the fridge overnight. I recommend frosting after thawing for the best texture.
Reheating
If you’re reheating a slice, I gently warm it in the microwave for about 15 seconds—just enough to take the chill off without melting the frosting or drying the cake. It’s delicious slightly chilled or at room temperature too.
FAQs
-
Can I make this Brain Cake Recipe without red food coloring?
Yes, absolutely! Without red coloring, you’ll have a more traditional chocolate-velvet flavor and color, but it won’t have that striking brain effect. You could try natural alternatives like beet juice for a red tint, but this might affect the flavor and baking times.
-
What’s the best way to carve the brain shape?
Start with a basic oval shape and use a serrated knife to carve gentle curves and grooves. Reference brain anatomy images if you want to get fancy! Remember to carve gradually and rotate the cake as you go to keep it symmetrical.
-
Can I make the frosting ahead of time?
You can make the cream cheese buttercream a day ahead and keep it refrigerated. Before frosting your cake, let it come to room temperature and give it a quick whip to restore fluffy texture.
-
How do I prevent the raspberry jam from running everywhere?
Mix the jam with a little water to thin it slightly but still keep it thick enough to stay put. Applying it after carving and just before serving reduces the chance it runs too much over the cake.
Final Thoughts
This Brain Cake Recipe is one of those baking projects where the wow factor really pays off. I still get a kick every time I bring it out at parties, and the combination of red velvet, tangy cream cheese frosting, and luscious raspberry “blood” simply can’t be beat. If you’ve ever hesitated to try a layered and carved cake, I encourage you to give this one a go — it’s surprisingly approachable, and I’ll be cheering you on every step of the way. Trust me, once you nail it, you’ll want to make it again and again!
Print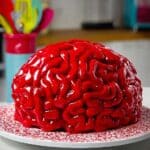
Brain Cake Recipe
- Prep Time: 20 min
- Cook Time: 27 min
- Total Time: 77 min
- Yield: 20 servings
- Category: Dessert
- Method: Baking
- Cuisine: American
Description
A spooky and decadent Brain Cake perfect for Halloween, featuring moist red velvet cake layers, rich pink cream cheese buttercream, and a raspberry jam ‘blood’ filling for an eerie finish.
Ingredients
Cake Ingredients
- 2 1/2 cups cake flour (300g)
- 2 Tbsp unsweetened cocoa powder, sifted (10g)
- 1 tsp baking soda (6g)
- 1/2 tsp fine salt (3g)
- 1/2 cup (1 stick) unsalted butter, room temperature (113g)
- 1 3/4 cups granulated sugar (350g)
- 2 large eggs, room temperature (112g)
- 1 1/4 cups buttermilk, room temperature (300g)
- 1/2 cup vegetable or canola oil (120g)
- 2 tsp vanilla extract or vanilla bean paste (8g)
- 1 tsp white vinegar (4g)
- 1 tsp red gel food coloring (or 1 Tbsp liquid food coloring)
Frosting Ingredients
- 1 1/2 cups (3 sticks) unsalted butter, room temperature (339g)
- 1 cup (8 oz) full-fat cream cheese, room temperature (226g)
- 1 Tbsp vanilla extract or vanilla bean paste (12g)
- 1 tsp fine salt (6g)
- 7 cups powdered sugar (904g or a 2lb. bag)
- 3 Tbsp heavy whipping cream, room temperature (45g)
- Small squirt of red gel food coloring (or 1 tsp liquid food coloring)
Filling Ingredients
- 1/2 cup seedless raspberry or strawberry jam
- 3 Tbsp water (45g)
- [1/4 tsp red gel food coloring or 1 tsp liquid food coloring – optional]
Instructions
- Preheat and Prepare Pans: Preheat your oven to 350°F (175°C). Grease and flour your cake pans or line them with parchment paper to prevent sticking.
- Mix Dry Ingredients: In a medium bowl, sift together cake flour, unsweetened cocoa powder, baking soda, and fine salt. Set aside.
- Cream Butter and Sugar: In a large bowl, beat the room temperature unsalted butter and granulated sugar together until light and fluffy, about 3-5 minutes.
- Add Eggs and Flavorings: Add the eggs one at a time, beating well after each addition. Then mix in vanilla extract, white vinegar, and red food coloring until evenly combined.
- Combine Wet and Dry Ingredients: Alternately add the dry ingredients and buttermilk to the butter mixture, beginning and ending with the dry ingredients. Mix gently to combine without overmixing.
- Add Oil and Mix: Stir in the vegetable or canola oil until the batter is smooth and well incorporated.
- Pour and Bake: Divide the batter evenly between prepared cake pans. Bake in the preheated oven for 25-27 minutes or until a toothpick inserted in the center comes out clean.
- Cool Cakes: Remove cakes from oven and let them cool in the pans for 10 minutes. Then turn them out onto wire racks to cool completely.
- Prepare Frosting: In a large mixing bowl, beat unsalted butter and cream cheese together until smooth and creamy. Add vanilla extract, fine salt, and gradually add powdered sugar, mixing on low speed to avoid a sugar cloud. Once incorporated, beat in heavy whipping cream and red food coloring until a smooth, pink buttercream is achieved.
- Prepare Jam Filling: Mix seedless raspberry or strawberry jam with water and optional red food coloring to create a blood-like consistency.
- Assemble the Cake: Level the cooled cake layers if needed. Place the first layer on your cake board or plate, spread a layer of jam filling over the top, then frost with buttercream. Repeat layering with subsequent cake layers.
- Carve Brain Shape: Using a serrated knife, carefully carve the stacked cake into a brain-like shape with lobes.
- Frost and Detail Cake: Cover the entire cake with a crumb coat of buttercream and chill briefly. Then pipe or spread remaining buttercream in brain-like ridges over the cake, adding detail and texture.
- Final Touches: Use extra red gel food coloring or jam around the base or in crevices to simulate blood for added spooky effect.
- Chill and Serve: Refrigerate the assembled brain cake for at least an hour to set before serving. Bring to room temperature before slicing for best flavor and texture.
Notes
- This brain cake is perfect for Halloween or spooky-themed parties.
- Using cream cheese in the buttercream adds richness and tang that complements the red velvet cake.
- Be careful when carving the cake to achieve a realistic brain shape.
- The raspberry or strawberry jam adds a delicious ‘blood’ effect inside the cake.
- Red gel food coloring is preferred for vibrant color without thinning the batter or frosting.
Nutrition
- Serving Size: 1 slice (about 85g)
- Calories: 596 kcal
- Sugar: 60 g
- Sodium: 333 mg
- Fat: 31 g
- Saturated Fat: 16 g
- Unsaturated Fat: 14 g
- Trans Fat: 0 g
- Carbohydrates: 77 g
- Fiber: 1 g
- Protein: 4 g
- Cholesterol: 89 mg

