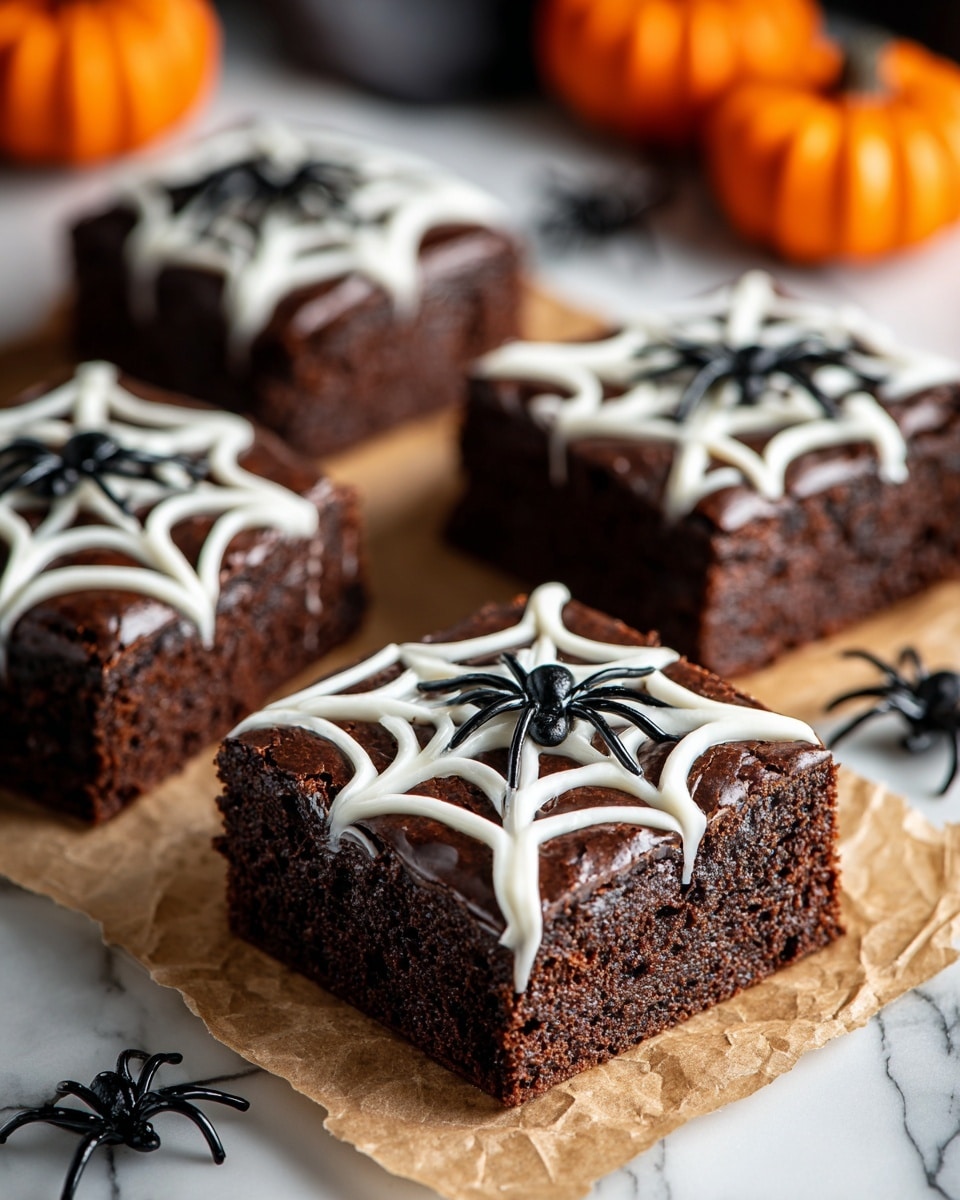
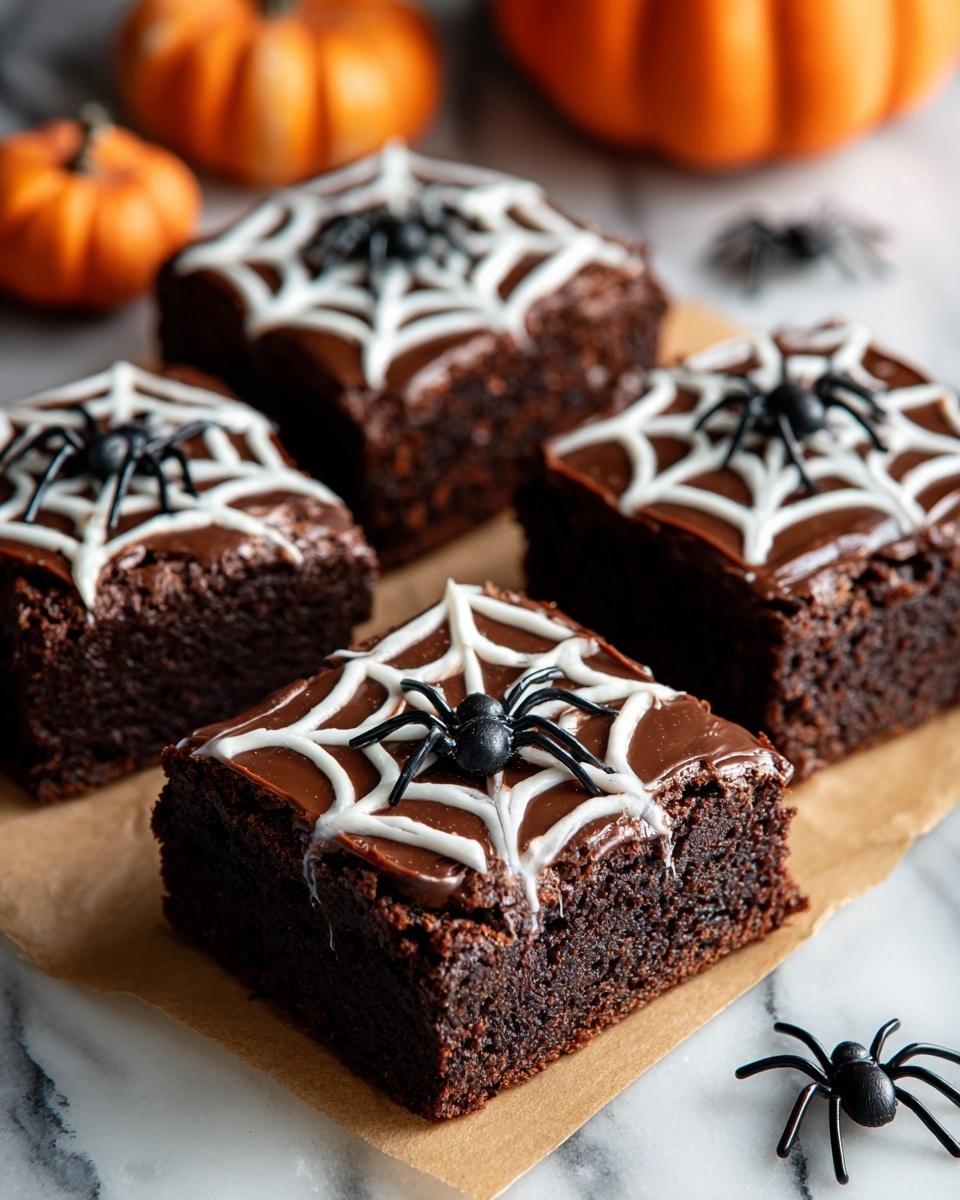
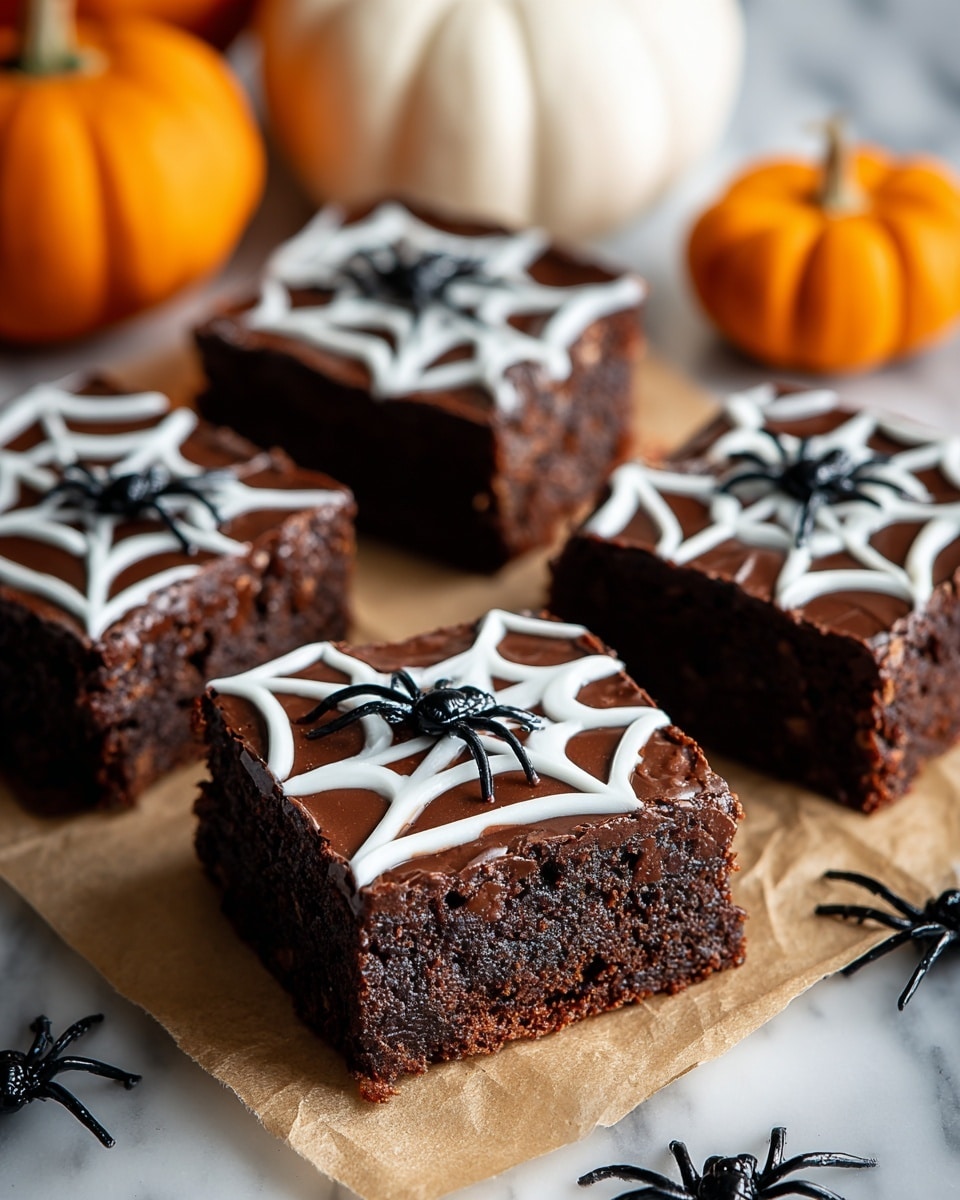
If you’re looking to impress your friends and family with a Halloween treat that’s as fun to make as it is to eat, I absolutely love sharing my Spooky Spiderweb Brownies Recipe. These brownies are rich, fudgy, and have this wickedly cool white chocolate spiderweb design on top that’ll make your dessert table the main event. Stick around because I’m going to walk you through each step with tips that’ll help you nail that perfect spooky look—even if you’re not usually the artsy type in the kitchen.
Why You’ll Love This Recipe
- Easy yet impressive: You don’t have to be a pro baker or artist to create that fun spiderweb effect.
- Perfectly moist brownies: Using a boxed brownie mix gives you consistent fudgy results with minimal effort.
- Festive and creative: It’s a fantastic way to get the kids involved or surprise party guests with something eye-catching.
- Customizable: You can easily swap the spider detail for other Halloween designs or colors to match your party vibe.
Ingredients You’ll Need
For this Spooky Spiderweb Brownies Recipe, all you really need is a solid brownie base and a few simple toppings that transform the look without overwhelming the taste. I like to keep the ingredient list straightforward so it doesn’t feel like a hassle, especially when you want to focus on decorating.
- Brownie mix: I usually pick my favorite boxed mix for convenience and consistent fudginess—just make sure to follow the package instructions.
- White chocolate chips: These melt beautifully and are perfect for piping the spiderweb design; I recommend good quality chips so the texture stays smooth.
- Black gel icing or melted dark chocolate: This is your secret weapon for creating the spider details—the gel icing is super easy to control, but melted chocolate adds a nice rustic touch.
Variations
One of the reasons I keep coming back to this Spooky Spiderweb Brownies Recipe is how fun it is to mix things up. Whether you want to dial up the spooky factor or cater to dietary needs, there’s plenty of room to get creative here.
- Gluten-free version: I swapped the boxed brownie mix for a gluten-free brand, and the spiderweb decoration still turned out gorgeous and just as delicious.
- White chocolate spiderweb glow: Adding a drop of orange or green food coloring to your white chocolate creates a glowing effect that my kids went crazy for last Halloween.
- Double chocolate spider: Instead of black icing, try using a dark chocolate ganache piped for the spider for a richer taste and extra decadence.
- Nutty twist: Adding chopped nuts inside the brownie batter before baking gives an extra crunch that contrasts nicely with the creamy spiderweb.
How to Make Spooky Spiderweb Brownies Recipe
Step 1: Prepare and bake your brownies
Start by following the instructions on your boxed brownie mix. I recommend greasing the pan well or lining it with parchment paper so your brownies come out cleanly. Once your batter is ready, pour it evenly into the pan and bake as the box recommends. Be sure not to overbake—when I first tried this, I left them in too long and they got too cakey instead of fudgy. Keep an eye near the end so they stay moist.
Step 2: Cool completely before decorating
This part is super important—the brownies need to be completely cool before you start decorating, or the white chocolate will melt and get messy. I usually pop mine in the fridge for about 30 minutes after they reach room temperature; it not only cools them faster but also firms them up nicely for cutting later.
Step 3: Make your spiderweb design
Melt the white chocolate chips gently—either in short bursts in the microwave or using a double boiler. Transfer the melted chocolate into a piping bag or a small plastic bag with a tiny corner snipped off for control. I found that piping a spiral from the center of the brownies outwards is much easier than trying to draw individual web lines. Then, use a toothpick to drag lines from the center to the edges, turning your spiral into a beautiful spiderweb. This trick really looked magical when I first tried it.
Step 4: Add the spider detail
For the pièce de résistance, draw a little spider somewhere along the web using black gel icing or melted dark chocolate. You can keep it simple—a few dots and tiny legs work wonders and add a fun, spooky touch. Don’t worry if your spider looks a little wonky; I promise it just adds to the charm!
Step 5: Slice and serve
After the decoration has set, carefully cut your brownies into squares. I like to use a sharp knife dipped in hot water and wiped dry to make clean cuts without cracking the chocolate design. Serve these spooky treats at your next Halloween party or anytime you want to surprise someone with a fun and festive dessert.
Pro Tips for Making Spooky Spiderweb Brownies Recipe
- Melt chocolate slowly: Heating the white chocolate gently prevents it from seizing and helps keep it smooth for piping.
- Use toothpick lines: Dragging with a toothpick turns a simple spiral into a perfect web without stress.
- Cool brownies completely: This keeps your design crisp and prevents the chocolate from melting or running.
- Clean knife for cutting: Dip your knife in hot water and wipe it clean between slices for neat brownie squares.
How to Serve Spooky Spiderweb Brownies Recipe
Garnishes
I love adding a sprinkle of edible glitter or a few orange and black sprinkles around the edges to jazz up the look even more. If you want to be extra festive, tiny candy eyes placed near the spider add an adorably creepy vibe that always gets a smile.
Side Dishes
My family goes crazy for pairing these brownies with vanilla ice cream or whipped cream topped with cinnamon for a simple but delicious combo. A warm cup of spiced apple cider or a rich hot chocolate also makes the whole Halloween experience feel cozy and complete.
Creative Ways to Present
For parties, I like to stack the brownies on a tiered platter with fake cobweb decorations and miniature plastic spiders scattered around. Wrapping each brownie in clear cellophane with a festive ribbon makes for perfect take-home treats. Last year, I even tried serving them on dry ice for that smoky Halloween effect—it was a total showstopper!
Make Ahead and Storage
Storing Leftovers
I keep leftover brownies in an airtight container at room temperature, and they stay delightfully moist for up to 3 days. To prevent the white chocolate spiderweb from cracking, I never stack them on top of one another unless they’re separated by parchment paper.
Freezing
I’ve frozen these brownies a few times—just wrap them tightly in plastic wrap and foil before popping them in the freezer. When you thaw them, the spiderweb design holds up better than I expected, as long as you thaw slowly in the fridge overnight.
Reheating
When I reheat leftovers, I use a microwave for about 10 seconds to bring back some softness, but not too long or the decorations might melt. If you want them warm but still intact, a short oven warm-up at low heat is your best bet.
FAQs
-
Can I use homemade brownies instead of boxed mix for the Spooky Spiderweb Brownies Recipe?
Absolutely! I’ve made this with my favorite homemade fudgy brownie recipe, and it works just as well. The key is allowing the brownies to cool completely before decorating so the spiderweb design stays neat.
-
What’s the best way to melt white chocolate for decorating?
Melting white chocolate slowly over a double boiler or in 15-second microwave bursts stirred in between works best to prevent it from seizing. Adding a tiny bit of vegetable oil can also help smooth it out if needed.
-
How do I make the spiderweb design look professional?
The trick I learned is to pipe one continuous spiral from the center outward, then drag a toothpick straight lines from the center to the edges. This turns the spiral into a perfect web without requiring artistic skill.
-
Can I make the Spooky Spiderweb Brownies Recipe vegan or dairy-free?
It’s possible by selecting a vegan brownie mix and using dairy-free white chocolate chips for the spiderweb. Just be sure the icing or melted chocolate for the spider detail is vegan-friendly as well.
-
How long do these brownies keep after decorating?
Once decorated, I find they keep best for up to 3 days at room temperature in a sealed container. Beyond that, the white chocolate can start to lose its shine and texture.
Final Thoughts
This Spooky Spiderweb Brownies Recipe has become one of my go-to treats every fall because it balances ease, taste, and festive fun so well. When I first tried making the webs, I was nervous I’d mess it up, but it’s honestly easier than it looks—plus, the smile on my family’s faces is totally worth a little extra effort. I can’t wait for you to try it and make your own spooky masterpieces. Trust me, once you nail this, Halloween baking just got a whole lot more exciting!
Print
Spooky Spiderweb Brownies Recipe
- Prep Time: 15 minutes
- Cook Time: 30 minutes
- Total Time: 45 minutes
- Yield: 12 servings
- Category: Dessert
- Method: Baking
- Cuisine: American
Description
Celebrate Halloween with these Spooky Spiderweb Brownies, featuring rich chocolate brownies adorned with delicate white chocolate spiderweb designs and creepy spider details. Perfect for a festive treat that combines classic fudgy brownies with fun decorative flair.
Ingredients
Brownies
- 1 box brownie mix (plus ingredients listed on the box)
Decoration
- 1/2 cup white chocolate chips
- Black gel icing or melted dark chocolate for spider details
Instructions
- Prepare Brownie Batter: Follow the instructions on the brownie mix box to prepare the batter, combining required ingredients as directed, and pour the batter into a greased baking pan ensuring an even layer.
- Bake Brownies: Bake the brownies according to the box directions until a toothpick inserted in the center comes out with moist crumbs. Allow the brownies to cool completely in the pan to set.
- Melt White Chocolate: Gently melt the white chocolate chips using a microwave or double boiler until smooth. Transfer the melted chocolate into a piping bag or a plastic bag with a small tip cut off for piping.
- Create Spiderweb Design: Pipe spiral shapes over the cooled brownies. Using a clean toothpick, drag lines from the center of each spiral outwards to the edges to form spiderweb patterns evenly across the surface.
- Add Spider Details: Use black gel icing or carefully melted dark chocolate to draw small spiders on various sections of the spiderweb decorated brownies, enhancing the spooky theme.
- Serve: Cut the decorated brownies into 12 equal squares and serve these creepy, delicious treats at your next Halloween gathering.
Notes
- Allow brownies to cool fully before decorating to avoid melting the white chocolate.
- Use a toothpick to create clean, defined spiderweb lines for best visual effect.
- For a richer spider detail, use high-quality dark chocolate or decorate with edible black candy eyes.
- These brownies can be stored in an airtight container at room temperature for up to 3 days.
Nutrition
- Serving Size: 1 brownie (1/12th of recipe)
- Calories: 220
- Sugar: 18g
- Sodium: 150mg
- Fat: 10g
- Saturated Fat: 6g
- Unsaturated Fat: 3g
- Trans Fat: 0g
- Carbohydrates: 30g
- Fiber: 1g
- Protein: 2g
- Cholesterol: 20mg

