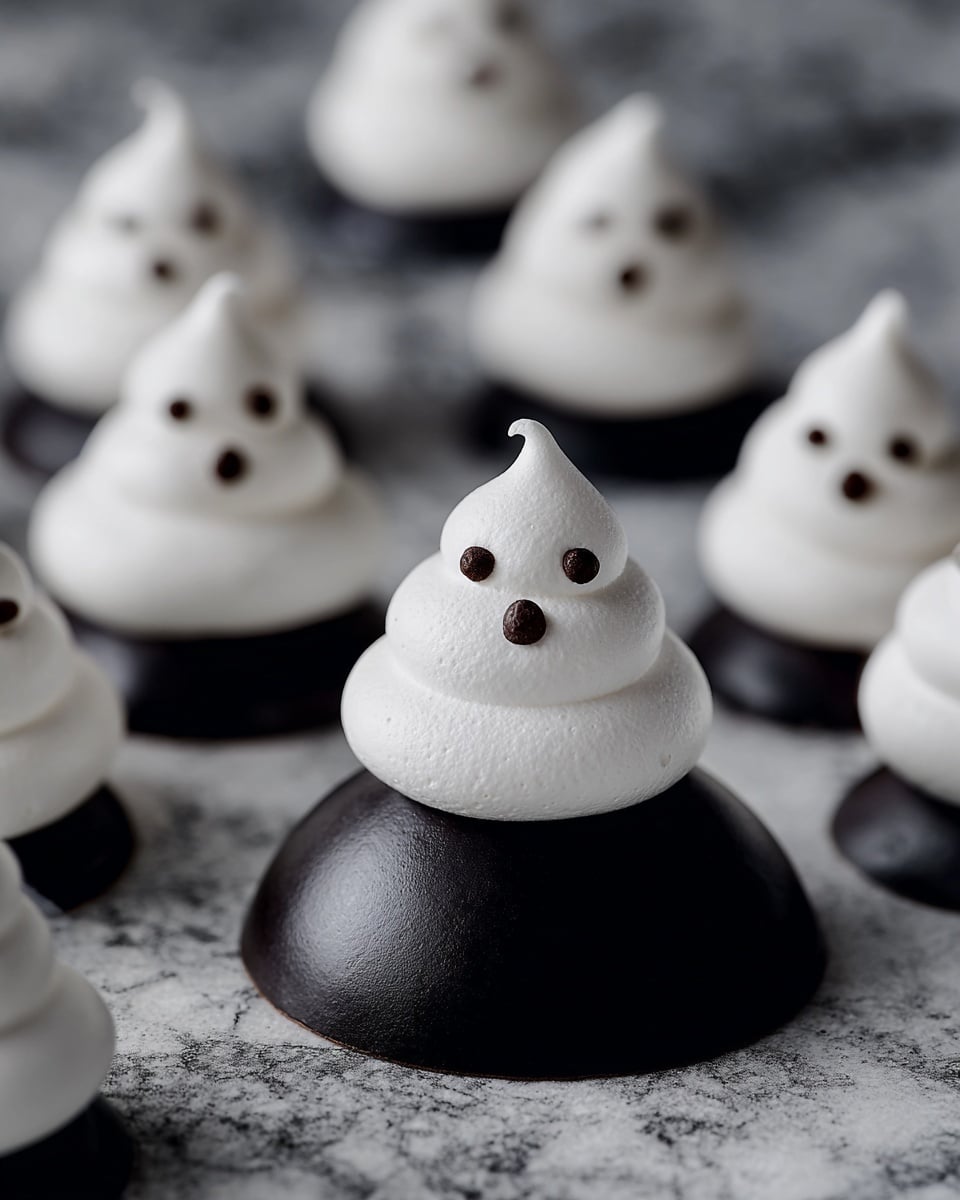
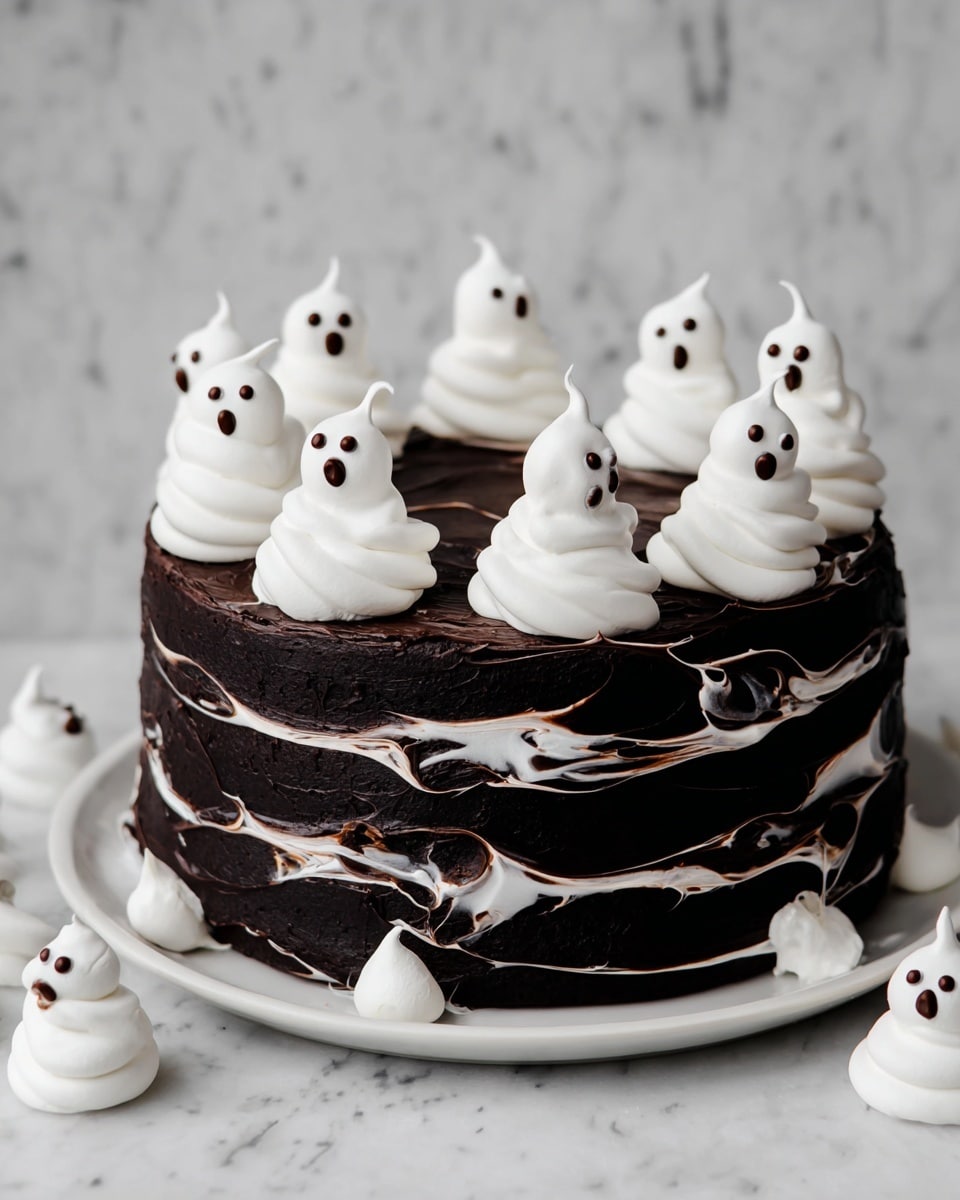
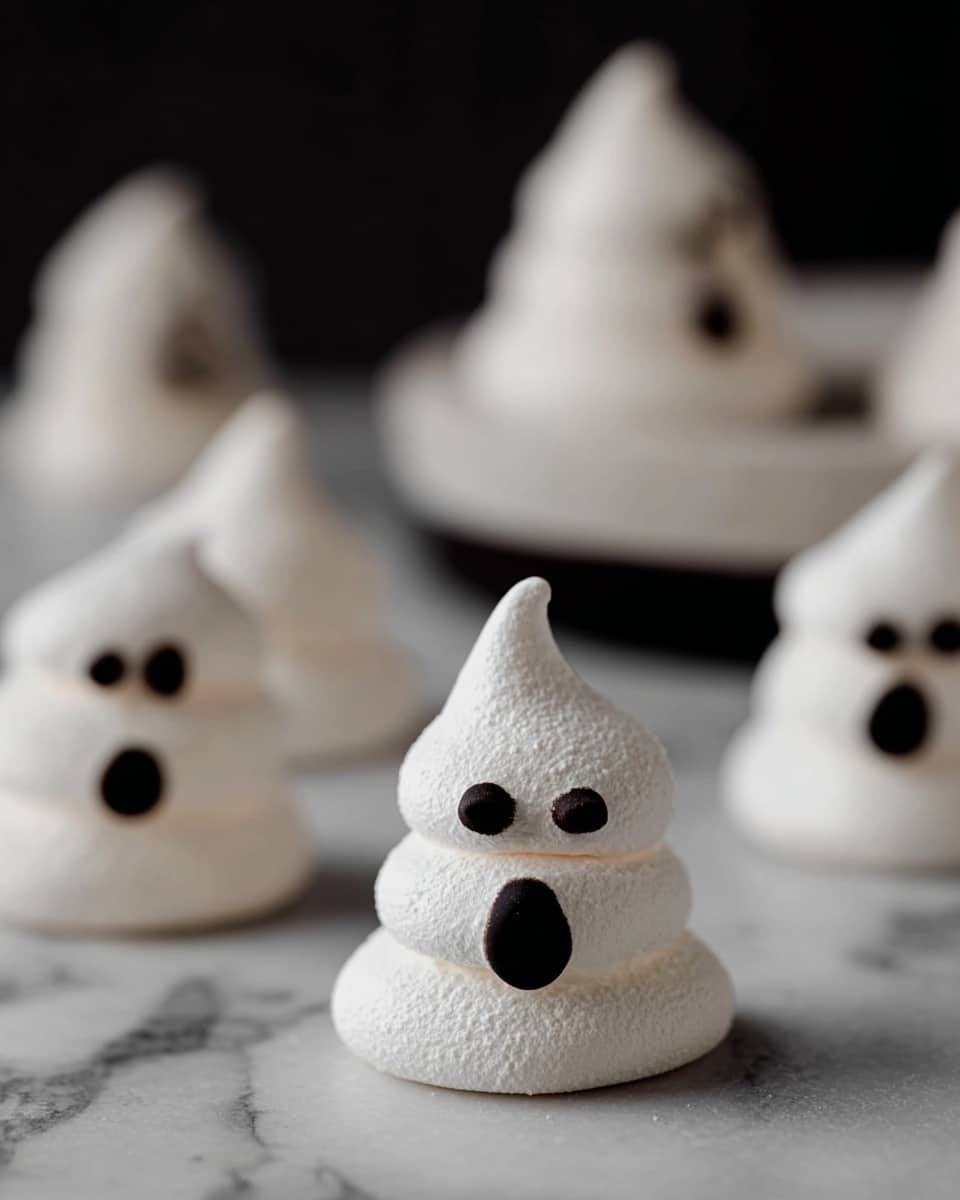
If you’re looking for a fun, spooky treat that’s as charming as it is delicious, then you’re going to love this Ghost Meringues Recipe. I absolutely love how these little ghosts turn out — crisp outside, cloud-like soft inside, and adorned with cute chocolate faces. Perfect for Halloween parties or just a sweet project to get creative with in the kitchen. Stick with me because I’m about to share all my tips and tricks so your ghosts come out perfect every time!
Why You’ll Love This Recipe
- Simple ingredients: You just need a handful of pantry staples and a little chocolate to make these delightful treats.
- Perfectly textured: Crunchy on the outside and soft, pillowy inside—this contrast is what keeps everyone coming back for more.
- Fun and festive: The adorable ghost shapes with chocolate faces add a whimsical touch that kids and adults adore.
- Make ahead friendly: These keep beautifully, so you can bake them well before your event and still impress.
Ingredients You’ll Need
These ingredients work in harmony to create that perfect balance of meringue texture and flavor. When buying your eggs, I always recommend using fresh, room temperature whites—that’s the secret to getting a beautiful volume.
- Egg whites: Make sure they’re at room temperature; it helps them whip up quicker and fuller.
- Cream of tartar: This stabilizes the egg whites and gives your meringue a bit of extra lift and shine.
- Granulated sugar: Adds sweetness and helps form that crisp outer shell while keeping the inside soft.
- Vanilla bean paste: I love this over extract because it adds a gorgeous depth and tiny flecks that make your meringues look fancy.
- Dark chocolate: Melted for painting on faces; it adds just the right touch of bittersweet flavor and cuteness.
Variations
One of my favorite things about this Ghost Meringues Recipe is how easy it is to tweak it to fit your style or mood. Feel free to get creative with your flavors and decorations; I’ve tried a few fun twists that elevate the basic recipe.
- Pumpkin spice meringues: Adding a pinch of cinnamon, nutmeg, and cloves brings a cozy fall vibe that my family can’t get enough of.
- Mini ghost shapes: Use a smaller piping tip to make bite-sized ghosts—perfect for little hands and party platters.
- White chocolate faces: Swap dark chocolate for white chocolate to switch up the look while keeping that rich taste.
- Chocolate swirl: Gently fold in some cocoa powder to the meringue for a marbled ghost effect that’s super impressive.
How to Make Ghost Meringues Recipe
Step 1: Whip up the perfect meringue base
Start by preheating your oven to 200°F and lining a baking sheet with parchment paper or a silicone liner. Next, in the bowl of your stand mixer with the whisk attachment, add the room temperature egg whites and cream of tartar. Whisk on medium speed until you see a frothy foam. Then, slowly add the granulated sugar, one tablespoon at a time, while increasing the speed to medium-high. You’ll want to whip it for about 5-6 minutes until soft peaks form—when you lift your whisk, the peaks should softly hold their shape but curl at the tip. Don’t forget to add the vanilla bean paste right after that for a lovely aroma and flavor.
Step 2: Build stiff, glossy peaks
Keep beating your meringue until it holds stiff peaks. This means when you lift the whisk, the peaks stand straight up without drooping. One trick I discovered is to stop and test by tilting the bowl slightly—if the meringue slips or slides, it needs a bit more time. This stage is crucial because it ensures your meringues will set perfectly crisp on the outside with that soft center everyone loves.
Step 3: Pipe your ghostly mounds
Spoon the meringue into a piping bag fitted with a large round tip. Hold the bag straight up, perpendicular to the baking sheet, and apply slow, even pressure to create about 2-inch high mounds. Remember to space them about an inch apart—they won’t spread as they bake, but you want enough room so they don’t stick together. I love this part because you can really let your creativity shine with the shapes!
Step 4: Low and slow baking magic
Bake your ghosts at 200°F for 1 hour. Here’s the little secret: after the hour, don’t open the oven! Instead, turn it off and let your meringues dry out in that quiet, warm oven for another 1-2 hours. This slow drying process gives them their characteristic crunchy shell and soft inside. Once cooled to room temperature, use a small food-safe paintbrush and your melted dark chocolate to paint on those adorable ghost faces. My kids love helping with this part—it’s such a fun finishing touch!
Pro Tips for Making Ghost Meringues Recipe
- Use fresh, room temperature egg whites: This simple step helps the meringue whip up bigger and more stable.
- Add sugar gradually: I learned this trick so my meringue wouldn’t become grainy and held perfect peaks every time.
- Don’t rush the drying time: Leaving them in the turned-off oven ensures the perfect texture without cracks.
- Pipe steadily and confidently: A smooth, even pressure gives your ghosts the nicest shape – no half-collapsed bodies here!
How to Serve Ghost Meringues Recipe
Garnishes
I keep the garnishes simple because the ghosts are the stars—but a few options I love are sprinkling edible glitter for some magic sparkle or a tiny dusting of cocoa powder for extra warmth. If you’re serving these for kids, tossing on orange or black sprinkles before baking adds a festive pop without overwhelming the delicate flavor.
Side Dishes
These ghost meringues go beautifully alongside a cup of hot cocoa or a chilled glass of spiced milk. I also like pairing them with fresh berries or a light whipped cream because the fruity freshness balances the sweetness perfectly. They’re a lovely light dessert after a hearty meal.
Creative Ways to Present
For Halloween parties, I’ve arranged them standing up on skewers in foam blocks covered with black tissue paper to make a ghostly forest centerpiece. Another time, I layered them with crushed chocolate cookies and whipped cream in glass jars for a spooky parfait effect that got rave reviews. Presentation is half the fun, so have fun with it!
Make Ahead and Storage
Storing Leftovers
I store leftover ghost meringues in an airtight container at room temperature. Keeping moisture out is key because meringues absorb it easily and turn soft. If your house is humid, add a few silica gel packets (the little moisture absorbers) in the container to keep them crisp. They’ll stay fresh like this for up to a week.
Freezing
If you want to freeze ghost meringues, wrap them very gently in plastic wrap, then place in an airtight container or freezer bag. From experience, they freeze well and retain their texture when thawed—not soggy or crumbly. Just thaw them slowly in the fridge overnight before serving.
Reheating
Reheating meringues is usually not necessary, but if you want to refresh their crispness, pop them in a low oven (about 200°F) for 5-10 minutes. Just keep an eye on them—overheating can cause cracks. I use this trick when my meringues have softened a bit from time in the container.
FAQs
-
Can I use powdered sugar instead of granulated sugar for Ghost Meringues Recipe?
While powdered sugar dissolves faster and gives a smoother texture, this recipe works best with granulated sugar to form that classic crisp shell. If you want to experiment, use superfine sugar, which dissolves more quickly but still provides structure.
-
Why did my meringues turn out sticky or chewy?
Meringues becoming sticky usually means they didn’t dry long enough or the humidity in your kitchen was too high. To avoid this, make sure to leave them to dry in the turned-off oven as instructed, and store them properly away from moisture.
-
Can I make ghost meringues without a stand mixer?
Yes! You can use a hand mixer or even whisk by hand if you’re prepared for a good arm workout. Just ensure your bowl and whisk are super clean and dry and be patient when whipping to keep getting those stiff peaks.
-
How long can I store ghost meringues after baking?
Properly stored in an airtight container at room temperature, ghost meringues keep well for up to a week. Beyond that, they may start to lose their crispness and become chewy.
-
Can I color the meringue for different looks?
Absolutely! Gel food coloring works best to keep the texture stable. Just add a few drops while whipping the egg whites before adding sugar, and you’ve got colorful ghosts or any shape you want!
Final Thoughts
This Ghost Meringues Recipe has become a seasonal favorite in my kitchen because it’s easy to make yet feels special enough to impress guests. I love how versatile it is — you can keep it classic or dress it up with all sorts of fun variations. If you want to make a treat that’s as delightful to make as it is to eat, you’ve got to try these ghosts. Once you nail the technique, I promise you’ll find yourself reaching for this recipe year after year.
Print
Ghost Meringues Recipe
- Prep Time: 15 minutes
- Cook Time: 60 minutes
- Total Time: 195 minutes
- Yield: 24 meringues
- Category: Dessert
- Method: Baking
- Cuisine: American
- Diet: Vegetarian
Description
Delightfully spooky and sweet, these Ghost Meringues are a perfect Halloween treat. Crisp on the outside with a soft, pillowy center, they are easy to make and decorated with melted dark chocolate faces for a festive touch.
Ingredients
Meringue
- 3 large egg whites (room temperature)
- 1/4 teaspoon cream of tartar
- 3/4 cup granulated sugar
- 1/4 teaspoon vanilla bean paste
Decoration
- 1/2 ounce dark chocolate (melted)
Instructions
- Preheat Oven: Preheat the oven to 200°F. Line a baking sheet with parchment paper or a silicone liner to prepare for baking the meringues.
- Whisk Egg Whites: In the bowl of a stand mixer fitted with the whisk attachment, add the room temperature egg whites and cream of tartar. Whisk on medium speed until the mixture becomes frothy.
- Add Sugar Gradually: Slowly add granulated sugar one tablespoon at a time while increasing the mixer speed to medium-high. Continue beating until soft peaks form, which should take about 5 to 6 minutes. Then add the vanilla bean paste.
- Beat to Stiff Peaks: Continue to whip the meringue mixture until it holds stiff peaks, meaning the peaks stand straight up without collapsing.
- Pipe Meringues: Transfer the meringue to a piping bag fitted with a large round tip. Hold the bag perpendicular to the baking sheet and pipe mounds approximately 2 inches high, spacing them 1 inch apart as they won’t spread during baking.
- Bake and Dry: Bake the meringues at 200°F for 1 hour. After baking, turn off the oven and allow the meringues to dry inside for an additional 1 to 2 hours, which helps achieve the perfect texture.
- Cool Completely: Remove the meringues from the oven and let them cool all the way to room temperature before decorating.
- Decorate Faces: Using a small food-safe paintbrush and the melted dark chocolate, paint cute ghost faces onto each meringue to complete the festive look.
Notes
- These ghost meringues offer a wonderful balance of a crunchy exterior with a soft, pillowy center, making them a hit at Halloween parties.
- Ensure egg whites are at room temperature for best volume when whipping.
- Be gentle when folding and piping to maintain the airy texture.
- Drying the meringues in the oven after baking is key to achieving the ideal chewy inside and crisp outside.
- You can substitute vanilla bean paste with vanilla extract if needed.
Nutrition
- Serving Size: 1 meringue
- Calories: 27 kcal
- Sugar: 6 g
- Sodium: 7 mg
- Fat: 1 g
- Saturated Fat: 0.4 g
- Unsaturated Fat: 0.6 g
- Trans Fat: 0 g
- Carbohydrates: 6 g
- Fiber: 0 g
- Protein: 1 g
- Cholesterol: 0 mg

