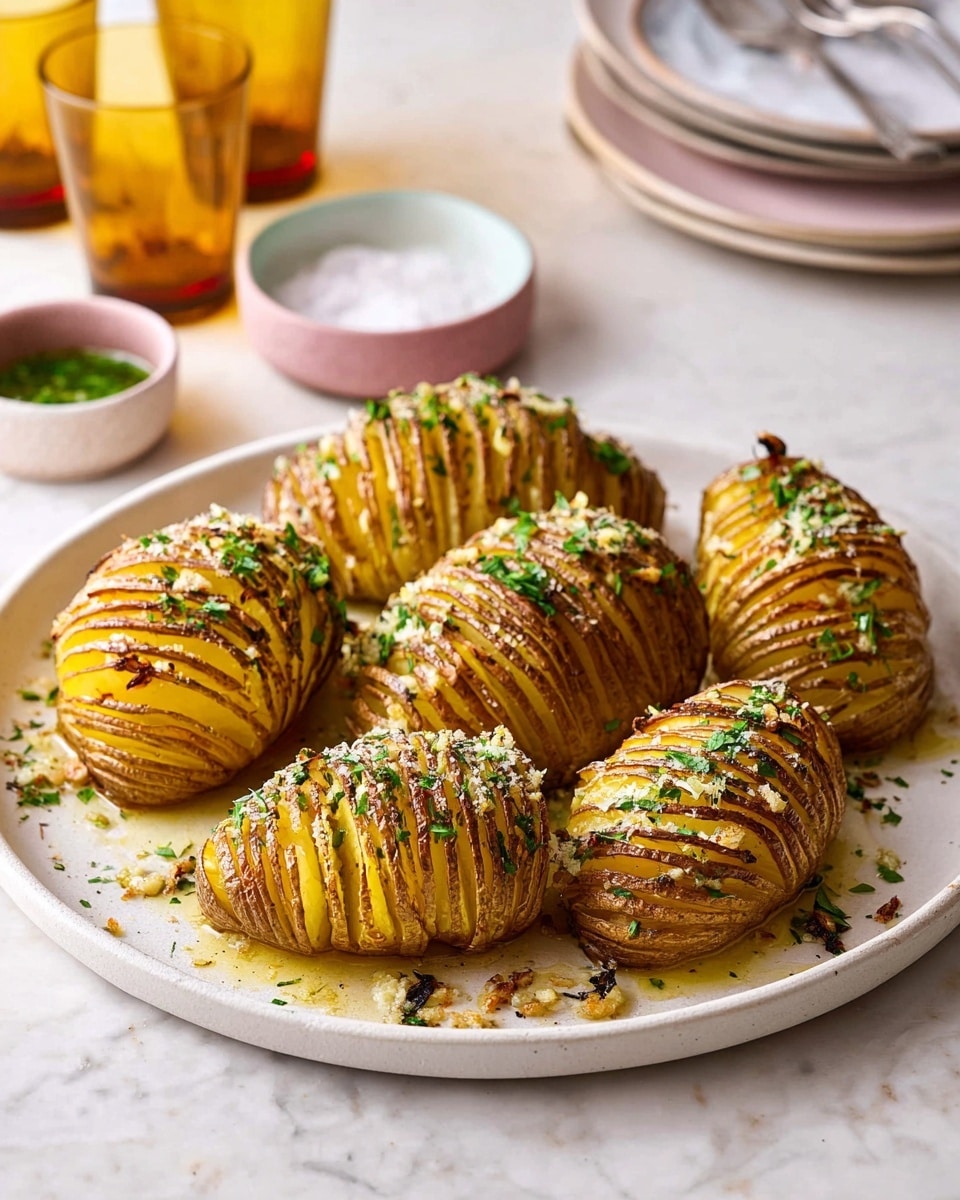
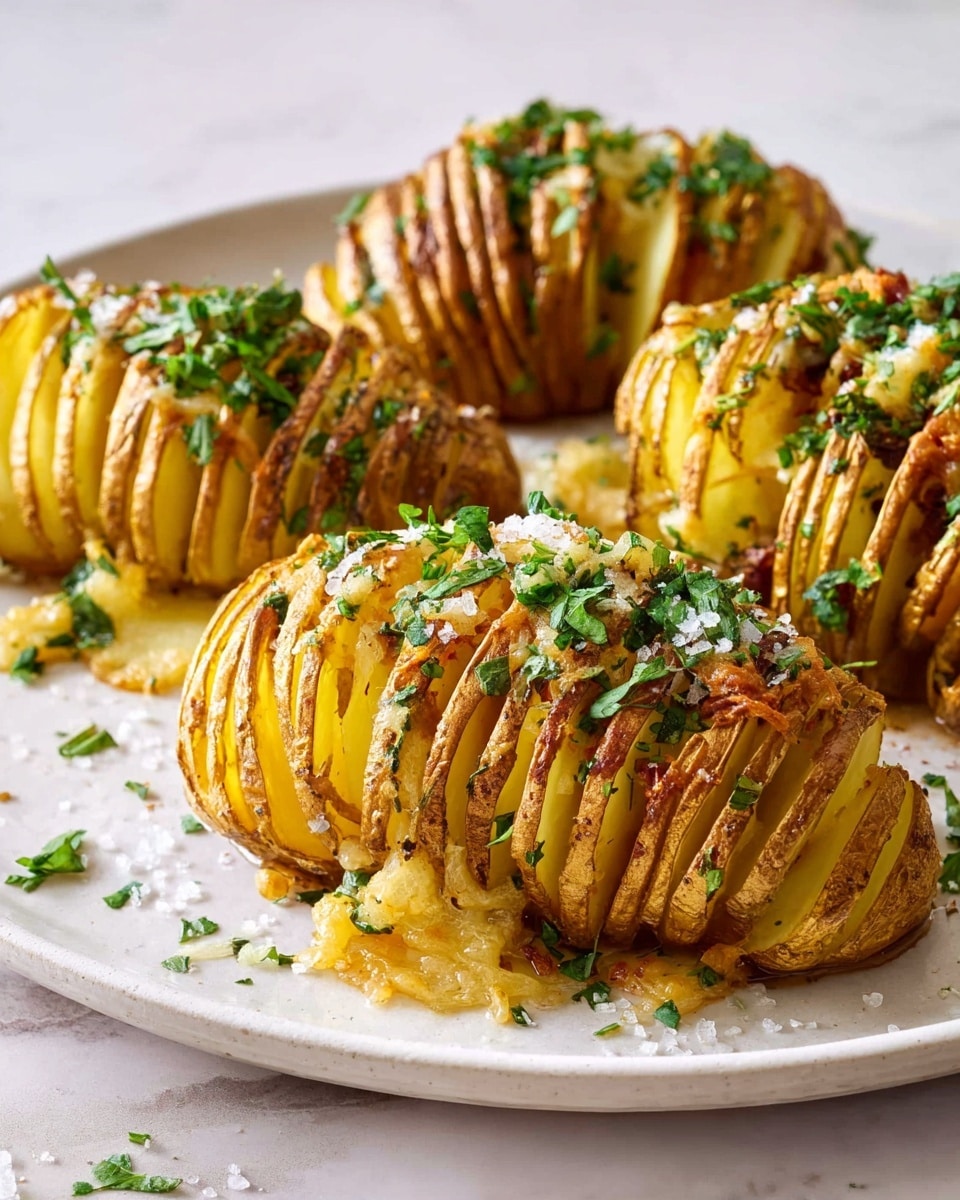
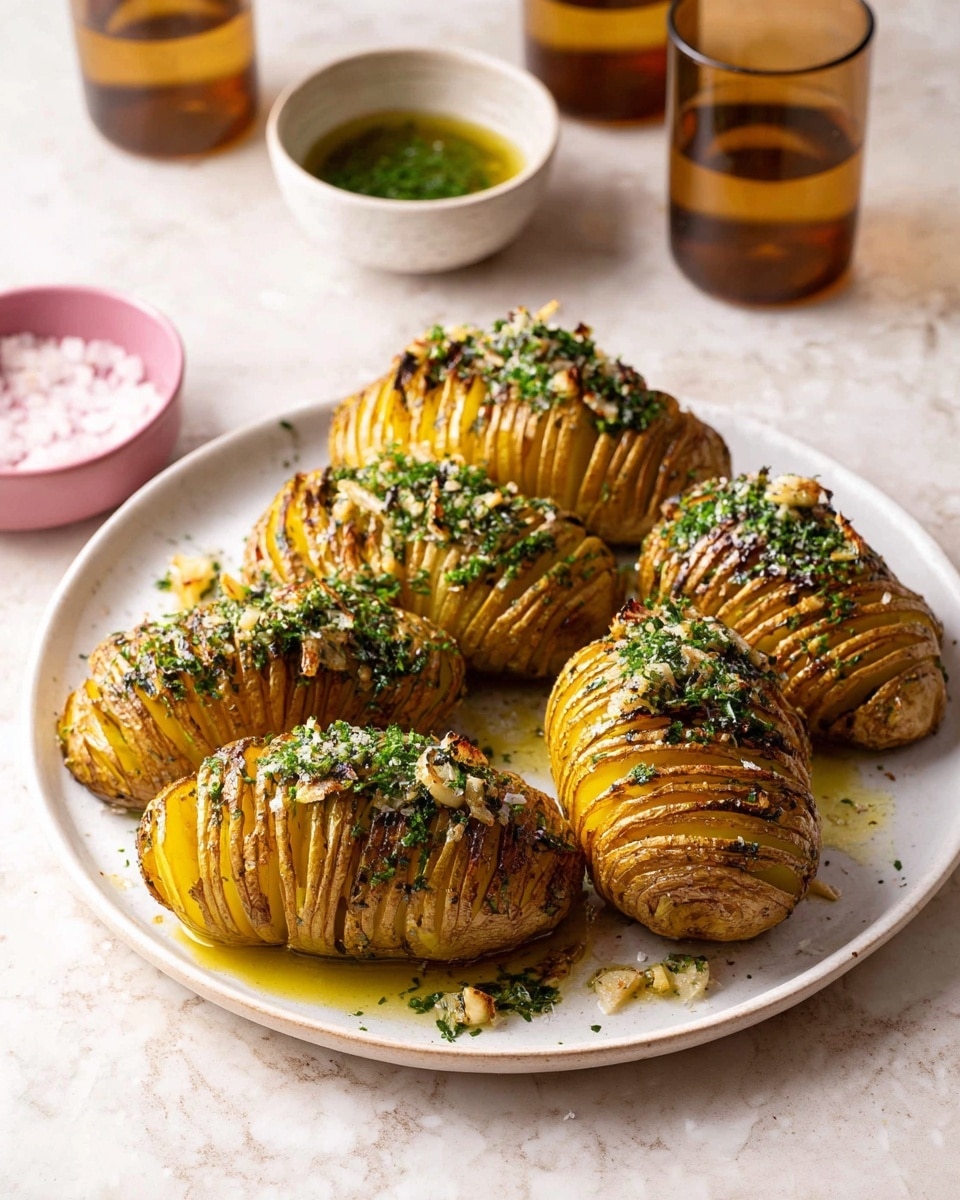
If you’re looking to wow your friends and family with a side dish that looks fancy but is actually pretty simple, you’ve got to try this Hasselback Potatoes Recipe. I absolutely love how these potatoes turn out – thin, crispy edges combined with soft, buttery insides, all infused with garlic and fresh sage. When I first tried making them, I was hooked immediately, and now it’s a go-to for special dinners or comforting weeknight meals. Stick with me, and I’ll walk you through every step to make sure your Hasselback potatoes are perfection!
Why You’ll Love This Recipe
- Simple but Stunning: The thin slices give it an elegant look that’s sure to impress.
- Perfect Texture: Crispy edges meet soft, buttery centers every single time.
- Flavor Boost: Garlic butter and fresh sage take these potatoes from basic to gourmet.
- Great for Any Occasion: Whether a weeknight or holiday meal, these potatoes fit right in.
Ingredients You’ll Need
Each ingredient here works in harmony to create that iconic Hasselback potato flavor and texture. Yukon Gold potatoes are my favorite because their creamy texture holds up well to slicing and roasting, giving you the perfect balance of crispy and tender. Olive oil and garlic butter provide moisture and richness, while fresh herbs add a bright, aromatic touch.
- Yukon Gold potatoes: These have a lovely creamy texture and hold their shape beautifully after baking.
- Extra-virgin olive oil: Adds a fruity, rich layer and helps create those crispy edges.
- Sea salt and freshly ground black pepper: Essential for seasoning, enhancing the natural potato flavor.
- Fresh sage leaves: A subtle earthy herb that complements the garlic butter perfectly.
- Garlic butter: Melted and brushed onto the potatoes to infuse them with deep, savory flavor.
- Fresh parsley: For a pop of color and freshness at the end.
- Red pepper flakes: Adds a gentle kick, optional but recommended for a little heat.
Variations
I love how adaptable this Hasselback Potatoes Recipe is—you can easily make it your own! I often tweak the herbs or toppings depending on the season or what I have on hand, and it’s always a hit. Feel free to get creative and experiment.
- Cheesy Variation: Sprinkle grated Parmesan or cheddar into the slices during the final baking stage for some melty indulgence—my family goes crazy for this version!
- Vegan Version: Swap the garlic butter for olive oil mixed with minced garlic and fresh herbs to keep it plant-based without losing flavor.
- Spicy Twist: Add cayenne pepper or smoked paprika to the oil drizzle for a smoky, spicy kick that really wakes up the potatoes.
- Herb Mix-up: Try rosemary or thyme instead of sage—each brings a different, delicious flavor profile to the dish.
How to Make Hasselback Potatoes Recipe
Step 1: Get Your Potatoes Ready with Precision
Start by preheating your oven to 425°F and lining a baking sheet with parchment paper for easy cleanup. Then, here’s a trick I picked up: place a pair of butter knives or chopsticks on either side of your potato before slicing. This way, when you cut the thin slices about ⅛-inch apart, you won’t slice all the way through—your potatoes will stay intact at the bottom, creating that beautiful fan effect. Take your time and use a sharp knife to get clean, even cuts. Rinse and dry the potatoes well if you like to remove some starch for extra crispiness.
Step 2: Season and Layer with Flavor
Once sliced, place your potatoes on the prepared baking sheet. Drizzle generously with olive oil, then sprinkle with sea salt and pepper. Now here’s where a bit of TLC pays off: use your fingers to gently work the oil and seasonings in between each slice, ensuring each layer tastes as good as the outside. Then, slip a fresh sage leaf into every gap—this little addition smells incredible as it roasts and gives the potatoes a subtle earthy note you’ll love.
Step 3: First Roasting and Garlic Butter Boost
Pop the potatoes into the oven and roast for about 50 minutes. At this point, you’ll notice the edges are crisping up nicely, and the potatoes are tender but not quite fully cooked inside. Remove them gently from the oven and brush each with melted garlic butter. This is seriously the game changer—I always make a little extra garlic butter because you’ll want to drizzle more when serving. Return the potatoes to the oven for another 25 minutes or until they’re crispy at the edges and tender through the center, smelling amazing the whole way.
Step 4: Final Touches and Serving
Once out of the oven, give your Hasselback potatoes a final seasoning touch of salt and pepper. Sprinkle with fresh parsley and red pepper flakes if you like a touch of heat and color. Serve them hot, with plenty of that garlic butter on the side for dipping. Trust me, this part’s the best—everyone loves dunking crisp potatoes into the garlicky richness.
Pro Tips for Making Hasselback Potatoes Recipe
- Knife Safety and Consistency: Using chopsticks or knives along the sides of the potato is how I ensure perfect, even slices that stay connected—it’s a total game changer for the classic look.
- Don’t Rush Roasting: Patience pays off! The slow roast both softens the potato and crisps the edges. If you try to speed it up, you risk undercooked centers or burnt outsides.
- Generous Garlic Butter: I learned that brushing garlic butter twice—midway and after cooking—gives the best flavor and texture, making every slice super tasty.
- Use Parchment Paper: Clean-up is easier, and the potatoes won’t stick or scorch on the baking sheet.
How to Serve Hasselback Potatoes Recipe
Garnishes
I always reach for fresh parsley and a sprinkle of red pepper flakes to finish these potatoes—the green parsley adds a bright freshness, while the pepper flakes bring a subtle heat that cuts through the richness. Sometimes, I even add a little grated Parmesan or crumbled feta for an extra layer of flavor that everyone raves about.
Side Dishes
This Hasselback Potatoes Recipe pairs beautifully with so many mains. My go-to is a juicy roast chicken or lamb, but I also love them alongside pan-seared salmon or a hearty vegetable stew. For a vegetarian meal, they’re perfect with a big green salad and roasted mushrooms—comfort food with a fresh touch.
Creative Ways to Present
For a dinner party, I like plating individual Hasselback potatoes on small plates with a drizzle of herb-infused olive oil and a dollop of sour cream or crème fraîche on the side. You can also top them with crispy bacon bits, caramelized onions, or even a soft poached egg for extra flair. It’s such a cool dish that guests always want the recipe!
Make Ahead and Storage
Storing Leftovers
Leftover Hasselback potatoes are just as good the next day. I store them in an airtight container in the fridge, making sure to cool completely first. The key is to reheat them so the edges get crispy again—more on that next!
Freezing
I don’t usually freeze Hasselback potatoes because they do best fresh, but if you want to, freeze them only after the first roasting stage (before adding the garlic butter). Thaw overnight in the fridge, brush with garlic butter, then roast the rest of the way for best results.
Reheating
To bring leftover Hasselback potatoes back to life, I pop them in a 375°F oven for 10-15 minutes, uncovered. This warms them through and crisps the edges again, unlike microwaving which can make them soggy. Sometimes I add a little extra garlic butter before reheating—because why not?
FAQs
-
Can I use other types of potatoes for this Hasselback Potatoes Recipe?
Absolutely! While Yukon Golds are my favorite because of their creamy texture and ability to hold shape, Russet or red potatoes can also work. Just keep in mind Russets tend to be starchy and might fall apart if sliced too thinly. Adjust roasting time accordingly.
-
How do I prevent the slices from breaking apart?
Using chopsticks or butter knives along the sides of the potato acts as a guard when slicing, stopping you from cutting through completely. This technique keeps the potato intact while allowing you to make those thin slices that fan out beautifully.
-
Can I prepare Hasselback potatoes ahead of time?
You can slice and season the potatoes a few hours ahead, then cover and refrigerate them until you’re ready to roast. However, I recommend adding the garlic butter and final roasting steps right before serving to keep them crispy and flavorful.
-
Is there a shortcut to making this Hasselback Potatoes Recipe?
I get it; slicing takes time! If you’re short on time, you can slice slightly thicker or not quite as many cuts—it’ll still taste great, just with less crispiness. Alternatively, using a mandoline with a safety guard can speed up the slicing process.
Final Thoughts
This Hasselback Potatoes Recipe holds a special place in my kitchen because it’s impressive enough for company but easy enough for a casual night in. Every time I make it, I get compliments about how they look and taste like they took hours to prepare. I hope you try this yourself—you’ll enjoy the process and the delicious payoff. Plus, once you master this recipe, it’s sure to become a family favorite, just like it did in mine.
Print
Hasselback Potatoes Recipe
- Prep Time: 20 minutes
- Cook Time: 75 minutes
- Total Time: 95 minutes
- Yield: 6 servings
- Category: Side Dish
- Method: Baking
- Cuisine: American
Description
Hasselback potatoes are a visually stunning and delicious side dish featuring thinly sliced Yukon Gold potatoes roasted to crispy perfection. They are seasoned with sea salt, black pepper, fresh sage, and rich garlic butter, resulting in tender interiors and crisp, flavorful edges. Garnished with fresh parsley and red pepper flakes, these potatoes elevate any meal with their balance of textures and aromatic herbs.
Ingredients
Potatoes
- 6 medium Yukon Gold potatoes
Seasonings and Garnishes
- Extra-virgin olive oil, for drizzling
- Sea salt, to taste
- Freshly ground black pepper, to taste
- Fresh sage leaves, enough to insert between slices
- Fresh parsley, chopped, for serving
- Red pepper flakes, for serving
Garlic Butter
- 1 recipe Garlic Butter (melted)
Instructions
- Preheat the oven: Set your oven to 425°F (220°C) and line a baking sheet with parchment paper to prevent sticking and for easy cleanup.
- Slice the potatoes: Place a potato on a cutting board and lay butter knives or chopsticks on both sides lengthwise to act as guides. Using a sharp knife, make crosswise cuts about ⅛-inch thick into the potato, stopping when you reach the butter knives or chopsticks to keep the base intact. Repeat this slicing method with all potatoes to create thin, fan-like slices.
- Prepare potatoes for roasting: Arrange the sliced potatoes on the prepared baking sheet. Drizzle generously with extra-virgin olive oil, then sprinkle sea salt and freshly ground black pepper over them. Use your hands to carefully spread the oil and seasonings between the slices to ensure full flavor coverage.
- Add sage leaves: Insert one fresh sage leaf into each gap between the potato slices to impart a fragrant herbal aroma while roasting. Drizzle a bit more olive oil on top for added moisture and crispiness.
- Roast the potatoes: Place the baking sheet in the preheated oven and roast for 50 minutes. This initial roasting softens the potatoes and crisps the edges.
- Brush with garlic butter: Remove the potatoes from the oven and evenly brush them with the melted garlic butter. Return the potatoes to the oven and roast for an additional 25 minutes, or until the potatoes are tender all the way through and have a crisp, golden exterior.
- Season and garnish: After roasting, adjust seasoning with salt and pepper to taste. Sprinkle with chopped fresh parsley and a pinch of red pepper flakes for a touch of heat. Serve immediately with extra garlic butter on the side for dipping.
Notes
- This dish makes an impressive and flavorful side that pairs well with roasted meats, poultry, or vegetarian mains.
- The thin slicing technique ensures the potatoes become crispy on the edges while remaining soft inside, offering great texture contrast.
- Fresh sage and garlic butter elevate the classic baked potato experience with aromatic richness.
- If you prefer, rosemary or thyme can be substituted for sage for different herbal notes.
- Use a sharp knife and the butter knife or chopstick guides carefully to prevent cutting all the way through the potatoes.
Nutrition
- Serving Size: 1 medium potato with toppings
- Calories: 230
- Sugar: 2 g
- Sodium: 180 mg
- Fat: 10 g
- Saturated Fat: 3 g
- Unsaturated Fat: 7 g
- Trans Fat: 0 g
- Carbohydrates: 32 g
- Fiber: 3 g
- Protein: 4 g
- Cholesterol: 7 mg

