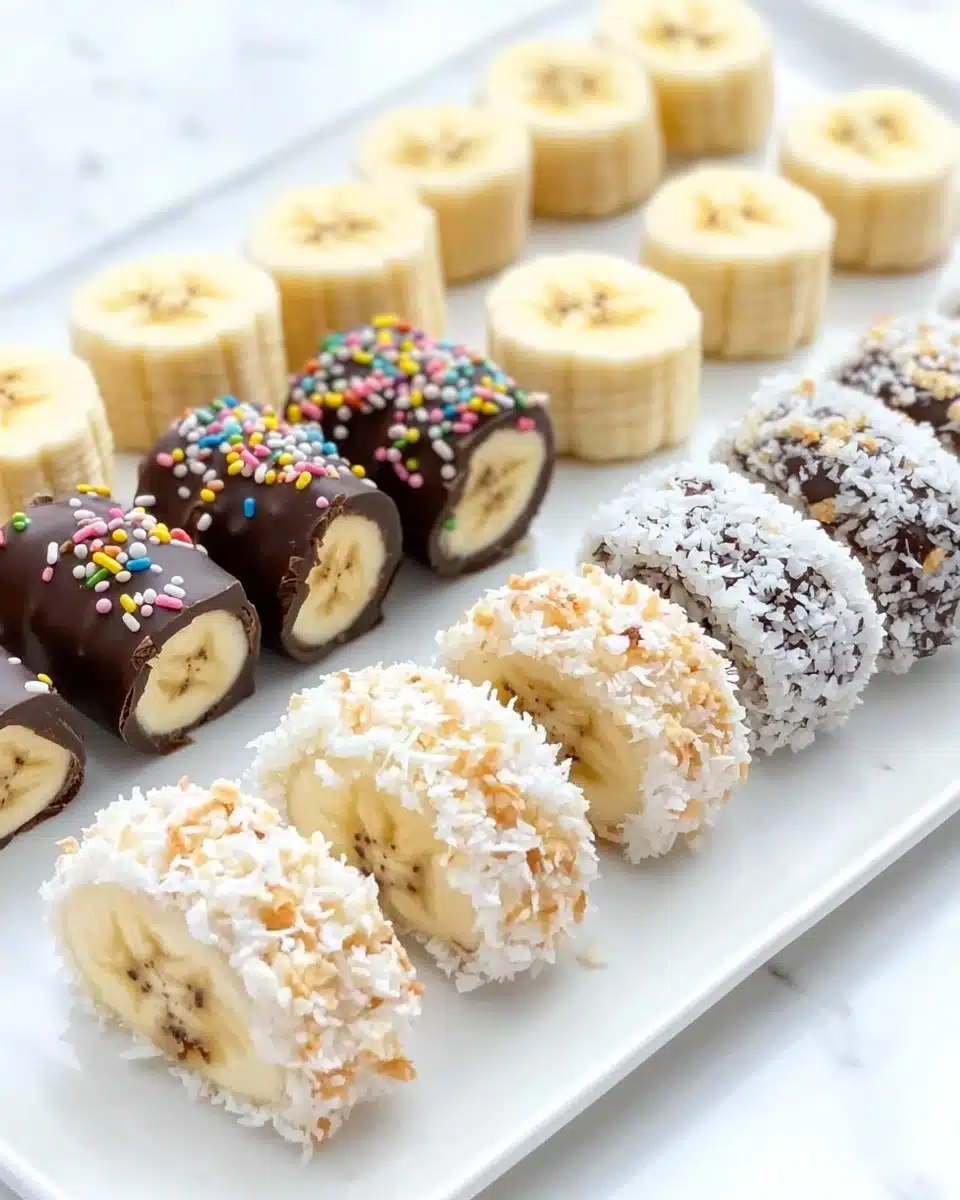
This Banana Sushi recipe is pure joy on a plate—it’s colorful, playful, and absolutely delicious, transforming simple bananas into bite-sized treats you’ll want to make on repeat. Whether you’re craving a quick breakfast, a kid-friendly snack, or a fun dessert to share, Banana Sushi is as versatile as it is delightful!
Why You’ll Love This Recipe
- Endlessly Customizable: You can mix and match toppings like sprinkles, chia seeds, coconut, or cereal to suit any craving or dietary need.
- Quick and No-Fuss: Banana Sushi comes together in just 5 minutes—ideal for busy mornings or impromptu snack attacks.
- Kid-Approved and Grown-Up Adored: These sweet, sushi-inspired bites are just as popular with little ones as they are with adults.
- Naturally Sweet & Wholesome: Each piece is packed with real fruit, whole grains, and a touch of chocolate or nut butter for happy, satisfying snacking.

Ingredients You’ll Need
The beauty of Banana Sushi is in its simplicity—each ingredient shines in its own way, bringing flavor, texture, or a pop of color to your sushi “rolls.” You don’t need anything fancy, just a handful of basics and your favorite toppings!
- Bananas: The star of the show! Choose ripe but firm bananas for the best texture and sweetness—they’re the perfect canvas for all the toppings.
- Dark Chocolate: Melts beautifully for a glossy, decadent coating on your Banana Sushi, and adds just the right touch of richness.
- Sprinkles: Instantly turn Banana Sushi into a party! Opt for colorful sprinkles for extra fun (and kid appeal).
- Chia Seeds: Add an omega-3 boost and pleasant crunch. Great for a nutritious twist on classic Banana Sushi.
- Nut Butter: Creamy and satisfying, it helps toppings stick and brings delicious flavor. Use peanut, almond, or your favorite alternative.
- Shredded Coconut: Sweet, nutty, and just a bit chewy—coconut makes Banana Sushi feel like a tropical treat.
- Rice Krispies: These lend a playful crunch and make each bite of Banana Sushi extra satisfying.
Variations
One of the best things about Banana Sushi is how adaptable it is. You can easily tweak it to fit your favorite flavors, dietary needs, or whatever ingredients you have on hand—so go ahead and get creative!
- Gluten-Free Banana Sushi: Swap Rice Krispies for a certified gluten-free cereal, or skip the cereal altogether and stick with coconut or nuts.
- Chocolate Hazelnut Delight: Use hazelnut spread instead of nut butter for a Nutella-inspired twist on Banana Sushi.
- Berry Burst: After spreading the nut butter, roll your banana in freeze-dried raspberries or strawberries for a tangy, fruity layer.
- Savory Peanut Crunch: For an exotic spin, sprinkle crushed salted peanuts and a hint of sea salt on top for a sweet-and-savory mashup.
How to Make Banana Sushi
Step 1: Prep Your Bananas
Start by peeling your ripe bananas and placing them on a clean plate or cutting board. If your bananas are a little curved, gently roll them with your palms to straighten them out—this helps create even “sushi” pieces later!
Step 2: Choose Your Coating and Toppings
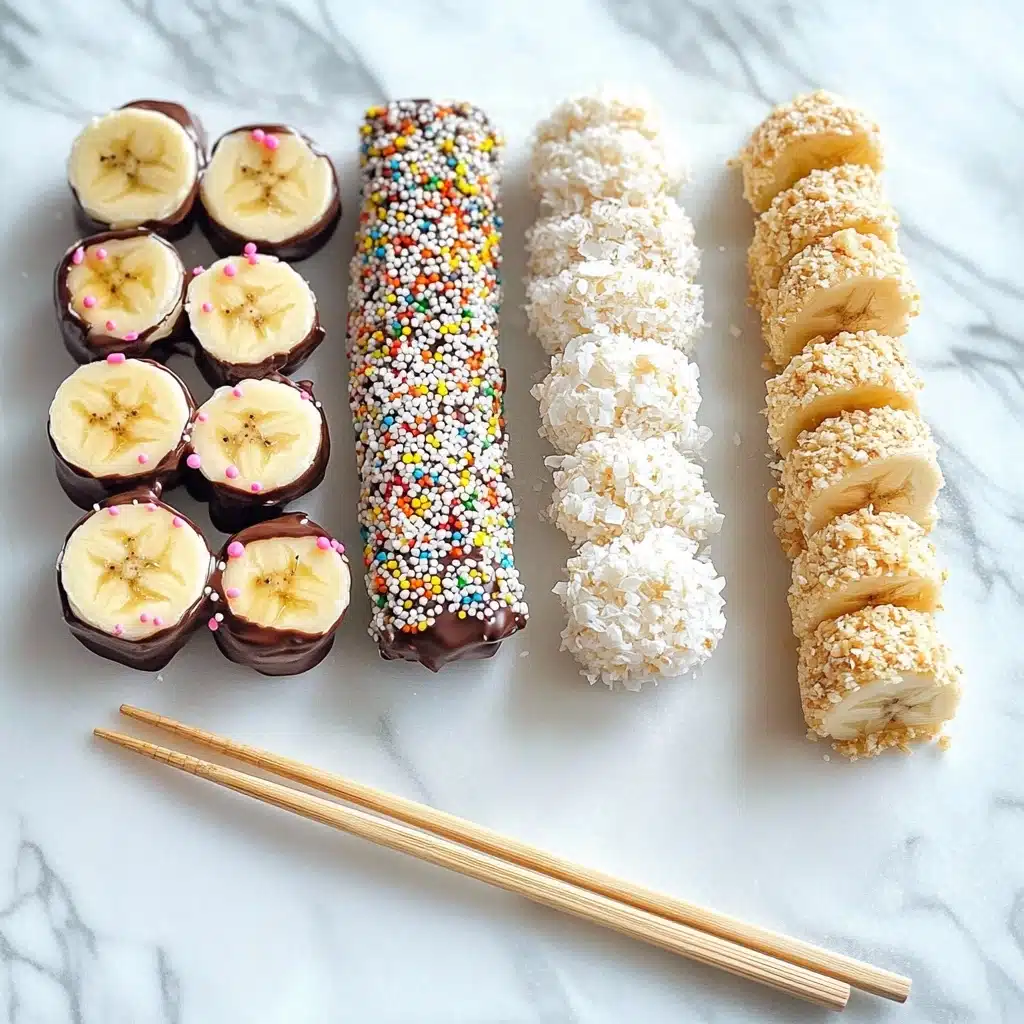
Decide which Banana Sushi version you’d like: for chocolate-coated sushi (Sprinkles or Chia Seed), gently melt the chocolate squares in a microwave or double boiler. For the coconut or Rice Krispie versions, grab your favorite nut butter and desired toppings.
Step 3: Decorate Your Bananas
If you’re making Sprinkles or Chia Seed Sushi, pour the melted chocolate over the bananas and immediately scatter sprinkles or chia seeds on top. For the Coconut or Rice Krispie Sushi, spread nut butter generously on top of the bananas, then roll them in shredded coconut or cereal so they’re fully coated.
Step 4: Chill (Optional), Slice, and Serve
For chocolate-topped Banana Sushi, pop the bananas in the fridge for a few minutes so the chocolate sets—this makes slicing much easier. Then use a sharp knife to cut the “sushi” into thick, sushi-like rounds and serve on a platter for instant smiles.
Pro Tips for Making Banana Sushi
- Banana Firmness Matters: Use bananas that are ripe but still slightly firm—overripe bananas can get mushy when sliced and won’t hold their shape for your sushi rounds.
- Smooth Chocolate Coating: Add a tiny bit of coconut oil or butter to your melted chocolate for a smoother, glossier finish that sets beautifully in the fridge.
- Cut with Confidence: Chill chocolate-coated bananas before slicing, and use a sharp, non-serrated knife; wipe the blade clean between cuts for picture-perfect pieces every time.
- Topping Evenness: Roll the bananas gently but evenly in your toppings to ensure each piece of Banana Sushi gets the perfect ratio of crunch, color, and flavor.
How to Serve Banana Sushi
Garnishes
Presentation is half the fun with Banana Sushi! Try an extra shower of colorful sprinkles, a dusting of cocoa powder, a drizzle of more melted chocolate, or a scattering of freeze-dried berries. Even a pinch of flaky sea salt over chocolate-topped sushi adds amazing contrast.
Side Dishes
Pair your Banana Sushi with yogurt parfaits, a fruit salad, or a handful of mixed nuts to make it a full breakfast or snack board. For celebrations, serve alongside other finger foods—like mini sandwiches—or a smoothie for a balanced treat.
Creative Ways to Present
Create a playful sushi platter: arrange your Banana Sushi pieces in neat rows, use chopsticks for serving, and add little bowls of extra nut butter or melted chocolate “dipping sauce” on the side. If you’re feeling fancy, tuck in edible flowers or sliced fruit “ginger.”
Make Ahead and Storage
Storing Leftovers
If you find yourself with extra Banana Sushi (which is rare!), simply place the sushi rounds in a single layer in an airtight container. Store in the fridge—they’ll stay fresh and tasty for up to 24 hours, though they’re always best on the day you make them.
Freezing
You can freeze Banana Sushi for a frosty treat! Arrange them on a parchment-lined tray and freeze until solid, then transfer to a freezer bag. Frozen Banana Sushi is delicious eaten straight from the freezer or added to smoothies for a snack with extra pizzazz.
Reheating
Since Banana Sushi is best enjoyed cold or at room temperature, there’s no need to reheat. If frozen, let pieces thaw briefly on the counter before eating if you prefer a softer bite—otherwise, enjoy them chilled for maximum refreshment!
FAQs
-
Can I make Banana Sushi with other nut butters or spreads?
Absolutely! Banana Sushi is delicious with peanut, almond, cashew, or even sunflower seed butter. You can also use chocolate-hazelnut spread, cookie butter, or yogurt spread to suit your taste and dietary preferences.
-
What if I have a nut allergy?
No problem—swap out the nut butter for a seed butter (like sunflower or pumpkin seed), or try a thick Greek yogurt as your “adhesive” for toppings. Banana Sushi is super flexible and allergy-friendly!
-
Can Banana Sushi be made ahead for parties?
Definitely! You can prepare Banana Sushi up to a day in advance. For the best presentation, wait to slice and garnish just before serving so each bite is fresh and pretty.
-
How do I keep Banana Sushi from turning brown?
Coating the banana in chocolate or nut butter acts as a natural barrier, slowing browning. If you need to store Banana Sushi for a while, keep it in an airtight container in the fridge and add a splash of lemon juice to the banana rounds before topping for extra insurance.
Final Thoughts
If you’ve never tried Banana Sushi before, today’s the perfect day to change that! I promise you’ll fall in love with just how easy, playful, and totally customizable it is. Give it a whirl, and don’t be surprised if this sweet snack becomes a cheerful staple in your kitchen. Enjoy every bite!
Print
Banana Sushi Recipe
- Prep Time: 5 mins
- Total Time: 5 minutes
- Yield: 1
- Category: Dessert
- Method: Mixing, Rolling
- Cuisine: Fusion
- Diet: Vegetarian
Description
Enjoy these fun and easy-to-make banana sushi rolls that are perfect for a quick snack or a fun dessert. Customize each ‘sushi’ with different toppings for a delicious treat.
Ingredients
Sprinkles Sushi:
- 1 banana
- 2 squares dark chocolate
- 1 tbsp sprinkles
Chia Seed Sushi:
- 1 banana
- 2 squares dark chocolate
- 0.5 tbsp chia seeds
Coconut Sushi:
- 1 banana
- 1.5 tbsp nut butter
- 1.5 tbsp shredded coconut
Rice Krispie Sushi:
- 1 banana
- 1.5 tbsp nut butter
- 3 tbsp rice krispies
Instructions
- Peel the bananas and place them on a plate or board.
- For the Sprinkles and Chia Seed Sushi, melt the chocolate and pour it on top of the bananas. Add the sprinkles or chia seeds on top and place in the fridge until set.
- For the Coconut and Rice Krispie Sushi, spread the nut butter onto the top of the bananas and then roll them in the shredded coconut or rice krispies.
- Serve straight away.
Nutrition
- Serving Size: 1 roll


