If you’re on the hunt for a dessert that brings together creamy, spicy, and sweet all in one bite, then this Classic Apple Crisp Recipe is exactly what you need to try next. I absolutely love how the tender, cinnamon-drizzled apples pair perfectly with a buttery, crunchy topping. When I first tried this recipe, I was surprised how simple it was to pull together, yet the results wowed everyone at the table. Keep reading because I’m about to share every tip and trick so your apple crisp turns out fan-freaking-tastic every single time!
Why You’ll Love This Recipe
- Simple Ingredients: You probably have most of these in your pantry, so it’s easy to whip up at a moment’s notice.
- Perfect Balance: The sweet-tart apples with the warm spices and the crunchy, buttery topping are a match made in heaven.
- Family Favorite: My family goes crazy for this dessert and always requests it whenever apples are in season.
- Versatile Dessert: It’s just as lovely warm out of the oven as it is chilled with ice cream on the side.

Ingredients You’ll Need
For this Classic Apple Crisp Recipe, the magic really happens by layering fresh apples with a perfectly spiced topping that crisps up beautifully. Use apples that are firm and slightly tart to keep that fresh, bright flavor.
- Apples: I usually grab Granny Smith or Honeycrisp for their tartness and firm texture—they hold up great and balance the sweetness perfectly.
- Brown Sugar: Adds rich caramel notes that blend wonderfully with the spices.
- Old-Fashioned Rolled Oats: Gives the topping that signature hearty, chewy texture.
- Butter: Unsalted is my go-to, melted into the topping to make it delectably crisp.
- Ground Cinnamon: Essential for that warm, comforting spice flavor.
- All-Purpose Flour: Helps bind the topping ingredients together so nothing crumbles away.
- Lemon Juice: This little trick helps keep your apples from browning and brightens up the apple flavor.
- Granulated Sugar: Used for tossing the apples—you can adjust depending on your apple’s sweetness.
Variations
One of my favorite things about this Classic Apple Crisp Recipe is how easy it is to make it your own. I’ve experimented with a few variations over the years, and each one brings a unique twist without losing that comforting essence.
- Add Nuts: I love sprinkling chopped pecans or walnuts on top for extra crunch—my family always notices and asks for “the nutty one.”
- Mix in Other Fruits: Try adding fresh cranberries or blueberries for a burst of tart flavor that pairs wonderfully with apples.
- Gluten-Free Version: Swap the all-purpose flour for almond flour and use gluten-free oats to make it safe for gluten-sensitive friends.
- Extra Spice Boost: Don’t be shy to add a pinch of nutmeg or cloves for a deeper, more nuanced warmth.
How to Make Classic Apple Crisp Recipe
Step 1: Prep Your Apples
Start by peeling (if you prefer), coring, and slicing your apples evenly—about 1/4-inch thick works great. Toss them in a bowl with lemon juice to keep them from browning and then sprinkle with sugar, cinnamon, and a pinch of nutmeg or pumpkin pie spice if you fancy. Give everything a good stir so each slice gets coated. The lemon juice balances the sweetness and adds a subtle zing you’ll notice in the final bite.
Step 2: Make the Crisp Topping
In a separate bowl, mix together brown sugar, oats, flour, cinnamon, and a pinch of salt. Then add melted butter and stir until the mixture is crumbly but holds together when pressed. This topping is the star of the show—don’t skimp on the butter or oats. The contrast of the crunchy topping against tender apples is what makes this dish memorable.
Step 3: Assemble and Bake
Spread your apple mixture evenly in a greased baking dish, then sprinkle the topping over the apples, distributing it generously. Bake at 350°F (175°C) for about 45-50 minutes. You’ll know it’s done when the topping is golden brown and the apple juices are bubbly along the edges. I like to keep a close eye during the last 10 minutes to ensure the topping doesn’t get too dark; if it’s browning too fast, you can loosely cover it with foil.
Step 4: Cool and Serve
Let your apple crisp cool for at least 15 minutes before diving in—this helps the juices set so it doesn’t run everywhere when you scoop it. That said, warm is where it’s at; I often sneak a few spoonfuls before it’s completely cool. Trust me, you’ll enjoy every bite whether it’s fresh out of the oven or chilled.
Pro Tips for Making Classic Apple Crisp Recipe
- Choosing Apples: I always use a mix of tart and sweet apples for depth—Granny Smith with Fuji or Gala works beautifully.
- Even Slices: Cutting your apples into uniform pieces ensures they bake evenly without some being mushy while others stay firm.
- Keep Butter Cold: For an extra crumbly topping, try chilling your melted butter slightly before mixing with dry ingredients.
- Watch Your Bake Time: Overbaking can dry out the apples, so start checking for doneness around 40 minutes and look for bubbly edges.
How to Serve Classic Apple Crisp Recipe
Garnishes
I’m a die-hard fan of serving this apple crisp with a generous scoop of vanilla ice cream—the cold creaminess balances the warm spice perfectly. Sometimes I top it with a drizzle of caramel sauce for that extra indulgence. Freshly whipped cream or even a dollop of Greek yogurt works great if you want a lighter option.
Side Dishes
This dessert loves being center stage, but if you’re thinking about a meal companion, a simple roast chicken or pork tenderloin pairs beautifully, rounding out a cozy fall dinner. It also shines alongside a cheese and charcuterie board for a fun twist at parties.
Creative Ways to Present
For holidays or special gatherings, I like to serve the apple crisp in individual ramekins, topped with a sprig of fresh mint or a sprinkle of toasted nuts. Sometimes I’ll layer it in clear glasses alternating with whipped cream for a rustic trifle feel—everyone always asks for the recipe at those parties!
Make Ahead and Storage
Storing Leftovers
Leftover apple crisp can be stored in an airtight container in the fridge for up to 4 days. I find the topping softens slightly, but a quick reheat crisps it right back up. Just cover loosely so the steam doesn’t make it soggy.
Freezing
If you want to make this recipe ahead for a crowd, freezing works great. Bake it fully, let it cool, then wrap tightly in foil and plastic wrap. It keeps well in the freezer for up to 3 months. When you’re ready, thaw overnight in the fridge and warm in the oven before serving.
Reheating
I like to reheat apple crisp in a 325°F oven for about 15 minutes—this brings back the warm softness of the apples and crisps the topping again. If you’re in a hurry, a quick zap in the microwave works too, but you’ll lose a bit of that crunchiness.
FAQs
-
Can I use frozen apples for this recipe?
While fresh apples provide the best texture, frozen apples can work in a pinch. Just make sure to thaw and drain any excess liquid before mixing with the sugar and spices to avoid a soggy crisp.
-
How do I prevent my apple crisp topping from getting soggy?
Using enough butter and oats in your topping helps create that crispy texture. Also, baking uncovered allows moisture to evaporate, so avoid covering the dish until after baking.
-
Can I make this recipe vegan?
You can make a vegan version by substituting vegan butter and using a plant-based sugar. The rest of the ingredients are naturally plant-based, so it’s an easy swap.
-
What’s the best way to reheat apple crisp leftovers?
Reheating in the oven at a low temperature (around 325°F) for 10-15 minutes brings back both the warm filling and crisp topping, much better than the microwave.
-
Can I prepare the apple mixture the night before?
Yes! Preparing the apples ahead allows the flavors to deepen, but wait to add the topping until just before baking to keep that golden crunch.
Final Thoughts
Honestly, this Classic Apple Crisp Recipe has become one of my go-to desserts for pretty much every season—whether it’s a quick weeknight treat or a showstopper for holiday dinners. I love how it feels homemade and comforting without requiring a ton of fuss. If you haven’t made it before, trust me, you’re in for a cozy, delicious experience. I can’t wait for you to try this and have your own “just-one-more-scoop” moment!
Print
Classic Apple Crisp Recipe
- Prep Time: 25 minutes
- Cook Time: 50 minutes
- Total Time: 4 hours 55 minutes
- Yield: 18 bars
- Category: Dessert
- Method: Baking
- Cuisine: American
Description
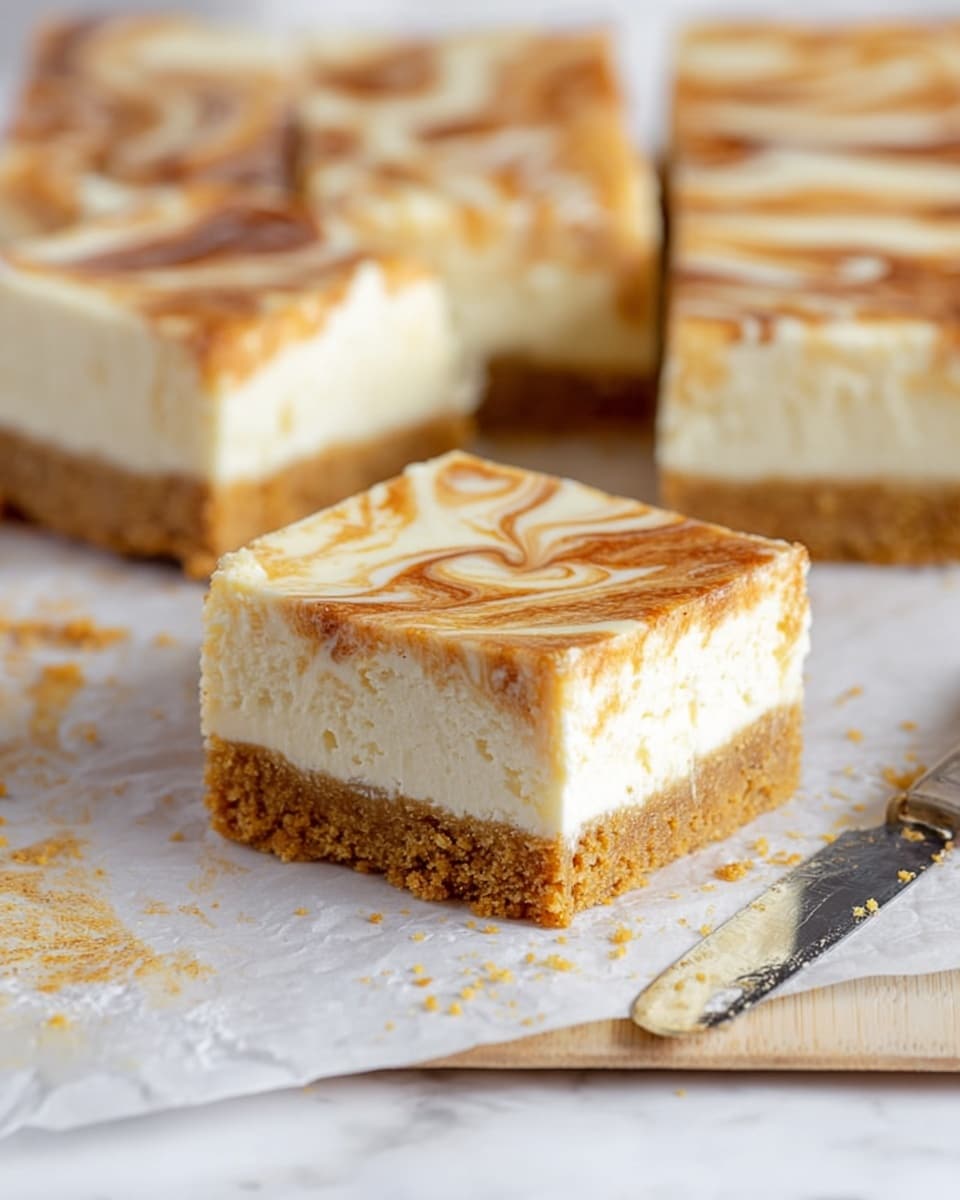
These Pumpkin Cheesecake Bars combine the warm spices and rich flavors of classic pumpkin pie with creamy, luscious cheesecake on a crunchy graham cracker crust. Perfect for fall desserts and holiday gatherings, these bars offer a delightful balance of texture and spice in every bite.
Ingredients
Crust:
- 15 whole rectangular graham crackers
- 1/4 cup granulated sugar
- 8 tablespoons unsalted butter, melted
Filling:
- 1-1/4 cups pumpkin puree
- 1-1/2 teaspoons pumpkin pie spice
- 1-1/2 teaspoons ground cinnamon
- 1 tablespoon all purpose flour
- Three 8-oz packages full fat cream cheese, at room temperature
- 1-2/3 cup granulated sugar
- 1-1/2 teaspoons pure vanilla extract
- 1/2 cup full fat sour cream
- 1/8 teaspoon salt
- 3 large eggs, at room temperature
Instructions
- Preheat and Prepare Pan: Preheat your oven to 350°F (175°C). Line a 9×13-inch baking pan with foil and lightly grease the foil to prevent sticking. A metal pan is preferred for even baking, but a glass pan can be used with a slightly longer bake time.
- Make the Crust: Crush the whole rectangular graham crackers into fine crumbs. In a bowl, combine the graham cracker crumbs, 1/4 cup granulated sugar, and melted butter. Mix thoroughly until the mixture resembles wet sand. Press this mixture evenly into the bottom of the prepared pan to form the crust.
- Bake the Crust: Bake the crust in the preheated oven for about 10 minutes. This helps to set the crust and create a firmer base for the cheesecake filling. Remove from oven and allow to cool slightly while preparing the filling.
- Prepare the Filling: In a large mixing bowl, beat the cream cheese on medium speed until smooth and creamy. Gradually add 1-2/3 cups granulated sugar and continue beating until well incorporated. Add the eggs one at a time, mixing on low speed after each addition. Then, mix in the vanilla extract and sour cream until fully combined.
- Add Pumpkin and Spices: In a separate bowl, whisk together the pumpkin puree, pumpkin pie spice, ground cinnamon, all purpose flour, and salt. Gradually fold this pumpkin mixture into the cream cheese batter, blending until the batter is smooth and uniform in color.
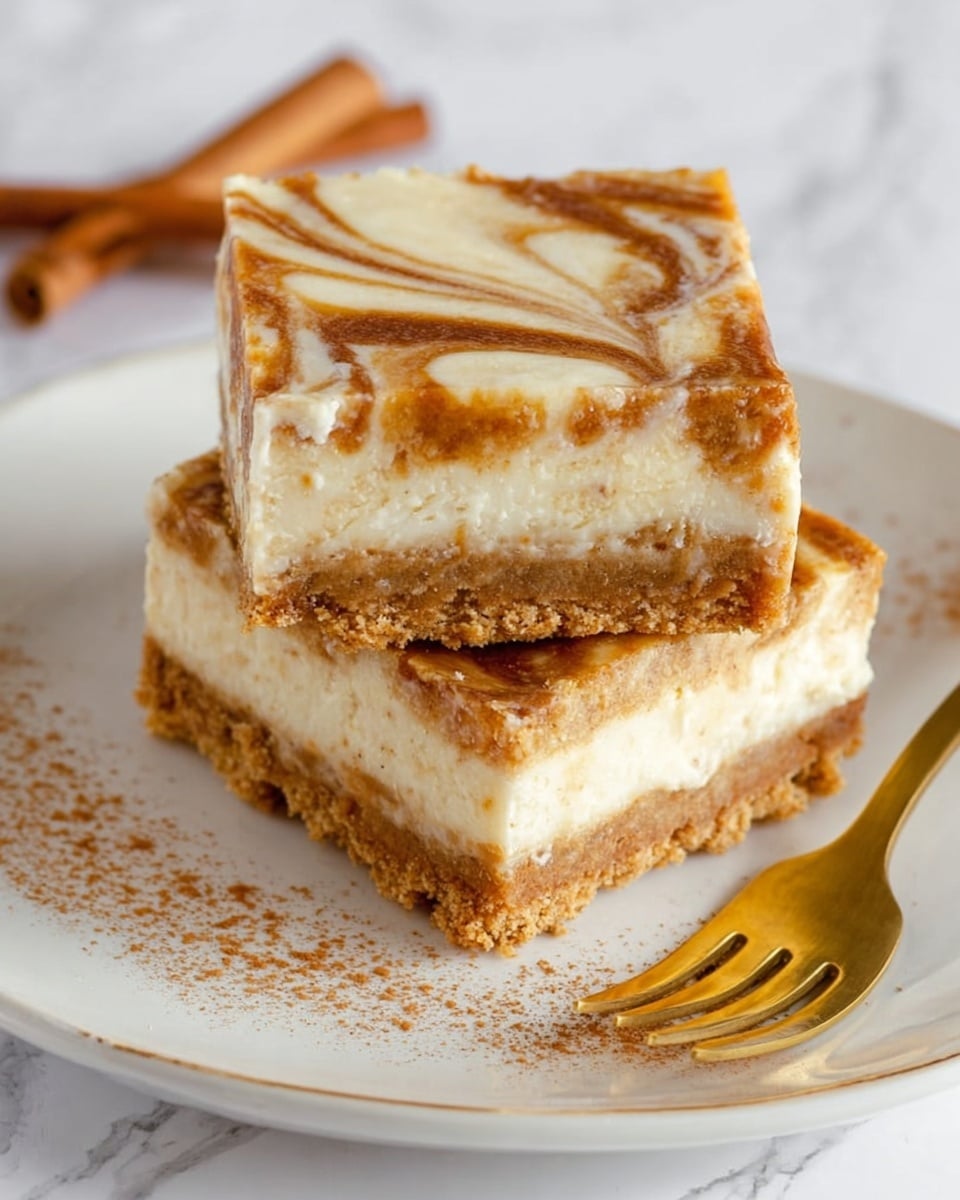
- Combine and Swirl: Pour the pumpkin cheesecake batter over the prepared and cooled crust in the pan. Use a spatula or knife to lightly swirl the pumpkin filling for a marbled effect, if desired.
- Bake the Bars: Place the pan in the oven and bake at 350°F for approximately 50 minutes, or until the edges are set and the center is slightly jiggly but mostly firm. Avoid overbaking to keep the texture creamy.
- Cool and Chill: Remove the cheesecake bars from the oven and let them cool completely to room temperature. Once cooled, refrigerate for at least 4 hours or overnight to set and develop flavors.
- Serve: Use the foil edges to lift the cheesecake bars from the pan, then cut into 18 bars. Serve chilled and enjoy this perfect blend of pumpkin spice and cheesecake richness.
Notes
- These swirled Pumpkin Cheesecake Bars combine the best flavors of pumpkin pie and creamy cheesecake on a classic graham cracker crust.
- Using full-fat cream cheese and sour cream ensures a rich and smooth texture.
- Room temperature ingredients help to create a smooth batter without lumps.
- Adjust baking time slightly if using a glass pan to prevent over- or undercooking.
- For a stronger pumpkin spice flavor, you can increase the pumpkin pie spice to 2 teaspoons.
- These bars are best stored refrigerated and can be kept for up to 4 days.
Nutrition
- Serving Size: 1 bar
- Calories: 294
- Sugar: 21 g
- Sodium: 200 mg
- Fat: 20 g
- Saturated Fat: 11 g
- Unsaturated Fat: 6 g
- Trans Fat: 1 g
- Carbohydrates: 26 g
- Fiber: 1 g
- Protein: 4 g
- Cholesterol: 84 mg


