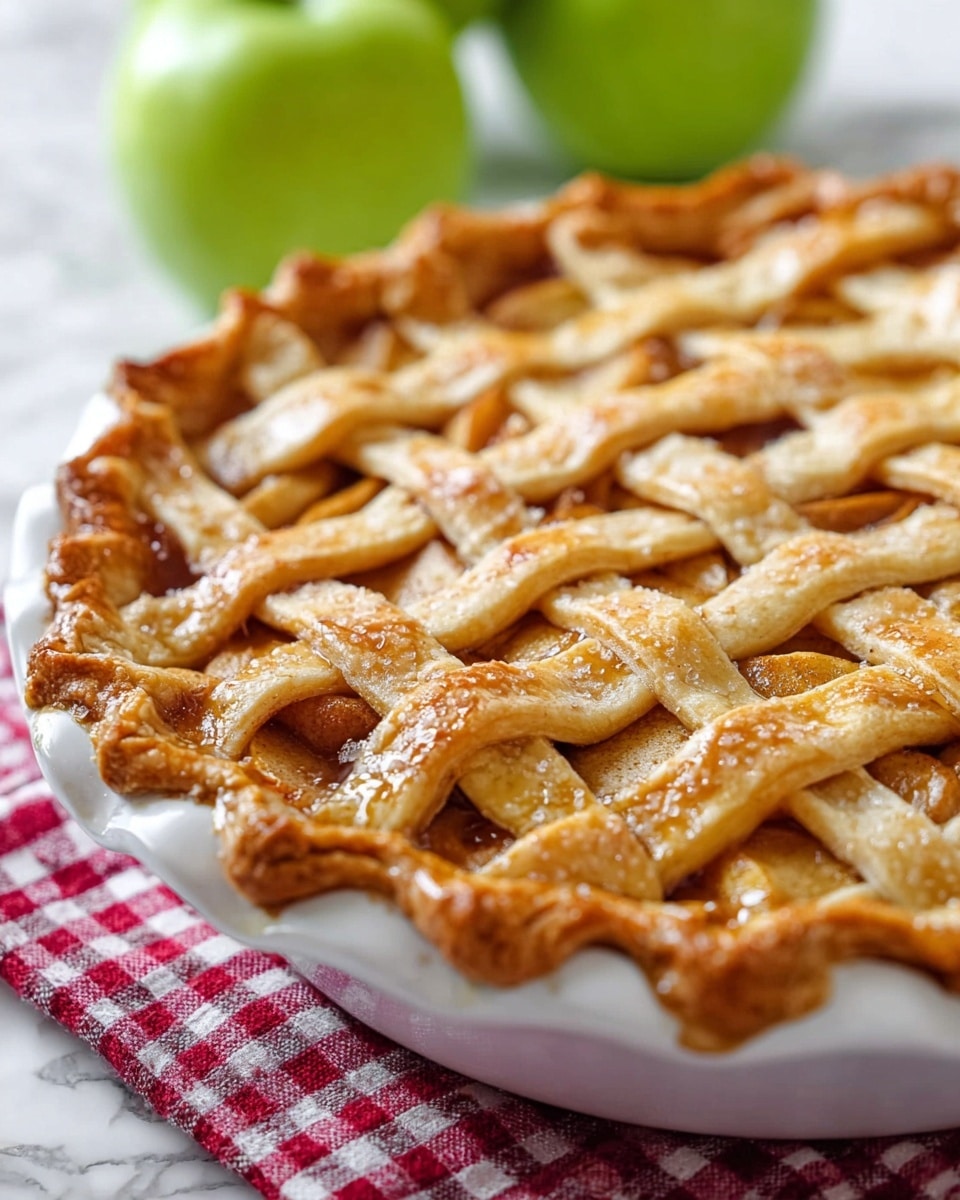
If you’re craving the cozy, comforting flavors of homemade apple pie, this Classic Apple Pie Recipe is an absolute must-try. I absolutely love how this turns out every time — flaky, buttery crust combined with tender, cinnamon-spiced apples swimming in a perfectly sweet sauce. Whether you’re an experienced baker or just starting out, this recipe is straightforward, and I’ll walk you through every step so you’ll feel confident and proud serving it to friends and family. Trust me, once you bake this, it will become your go-to dessert for fall gatherings, holidays, or anytime you want a slice of pure happiness.
Why You’ll Love This Recipe
- Flaky Double Crust: The crust is buttery and tender, giving you that classic pie experience every time.
- Perfectly Spiced Filling: Cinnamon and sugar balance the tartness of Granny Smith apples beautifully.
- Simple to Follow: I’ve broken down each step so you won’t feel overwhelmed, even if it’s your first pie.
- Crowd-Pleaser: My family goes crazy for this, and I bet yours will too!

Ingredients You’ll Need
The heart of this Classic Apple Pie Recipe lies in using quality ingredients that complement each other perfectly. I always recommend fresh Granny Smith apples for their tartness and firm texture—they hold up well during baking and won’t turn mushy.
- Double pie crust: Whether homemade or store-bought, a flaky crust is key—homemade adds that special touch.
- Granny Smith Apples: Choose firm, crisp apples for a balanced sweet-tart flavor and ideal texture.
- Cinnamon: Fresh ground is best, but pre-ground works too for that warm, comforting spice.
- Unsalted butter: Melts into the filling adding a rich, silky texture without extra saltiness.
- All-purpose flour: Helps thicken the filling so you don’t end up with a runny pie.
- Water: Used in the sauce to dissolve the sugar and create a lovely glaze over the apples.
- Granulated sugar: Sweetens the pie perfectly—feel free to adjust based on your apple sweetness.
- Egg: Used to brush the crust for that gorgeous golden, shiny finish.
Variations
I love how versatile this Classic Apple Pie Recipe is. Over time, I’ve tried a few tweaks that let you customize it to your taste or dietary needs without losing that signature apple pie magic.
- Gluten-Free Crust: I swapped in a gluten-free pie crust once for a friend and honestly, you wouldn’t believe it wasn’t traditional—it held together wonderfully.
- Add Nuts: Toss in a handful of chopped walnuts or pecans for extra crunch and flavor; my dad loves this version!
- Spice it Up: Experiment with adding a pinch of nutmeg or ginger for a warmer spice profile.
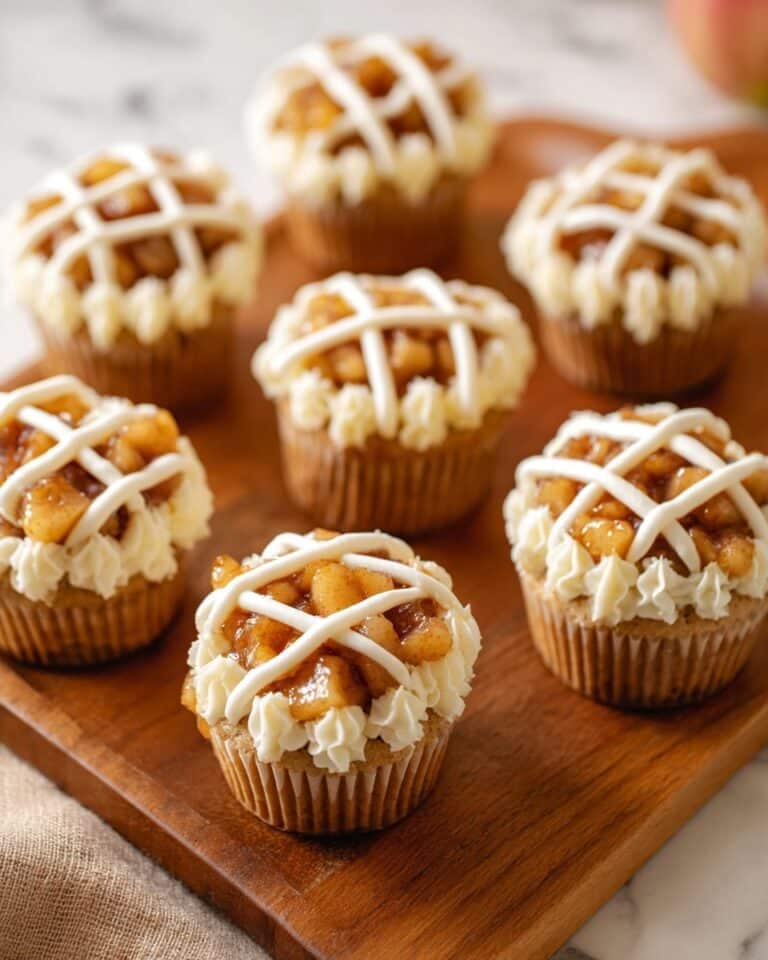
- Lattice vs. Full Crust: Sometimes I go for a full top crust with vents, other times a lattice—woven crusts always impress guests and let more steam escape.
How to Make Classic Apple Pie Recipe
Step 1: Prep Your Pie Crust and Oven
Start by making your double pie crust according to your favorite recipe (or use store-bought if you’re in a pinch). Once made, chill the dough as directed—it makes rolling out much easier and prevents shrinkage during baking. While the crust chills, preheat your oven to 425ºF so it’s nice and hot when the pie goes in.
Step 2: Create the Silky Apple Filling Sauce
In a medium saucepan, melt 8 tablespoons of unsalted butter over medium heat. Then whisk in 3 tablespoons of flour and simmer it for about a minute, whisking constantly—this cooks out the raw flour taste. Next, stir in 1/4 cup of water and 1 cup of granulated sugar and bring the mixture to a boil. Once boiling, reduce heat and simmer for 3 minutes while whisking frequently. This step creates the luscious glaze that coats your apples.
Step 3: Prepare Your Apples
While the sauce simmers, peel, core, and slice your apples thinly—you want about 7 cups total. Toss the sliced apples with 1 1/2 teaspoons of cinnamon to get that warm spice melding into every bite. Then, pour the warm butter-sugar sauce over the apples and gently stir to coat them evenly. I discovered this trick adds an irresistible silky texture and binds everything together.
Step 4: Assemble the Pie
Flour your work surface lightly and roll out your chilled bottom pie crust into a 12-inch circle. Transfer it carefully to a 9-inch pie plate by wrapping it around your rolling pin—that always works better than trying to pick it up. Add the apple filling, mounding it slightly in the center but keep the edges clean—any stray filling can stop the top crust from sealing properly.
Step 5: Create the Lattice Top and Egg Wash
Roll out the second crust into an 11-inch circle and cut it into 10 even strips with a pizza cutter. Arrange them over the apples in a woven lattice pattern—this takes a little patience, but it’s so worth the beautiful result. Then, beat together one egg with a tablespoon of water and brush this egg wash over your crust. It gives you a gorgeous golden shine that will make your pie look bakery-worthy.
Step 6: Bake to Perfection
Bake your pie at 425ºF for 15 minutes to get that crust starting to brown nicely. Then, lower the heat to 350ºF and bake for another 45 minutes. You’ll know it’s ready when the apples are tender and the filling bubbles through the lattice or vents for at least 5 minutes. Let it rest at room temperature for about an hour before slicing to let everything set up beautifully.
Pro Tips for Making Classic Apple Pie Recipe
- Keep Your Ingredients Cold: Chilled butter and dough help create the flaky crust I love most.
- Don’t Overfill: Leaving room around the edges makes sealing your crust neater and prevents leaks.
- Use a Pizza Cutter: It’s the easiest way to get clean, even lattice strips without tearing the dough.
- Let It Rest Before Serving: I learned this patience pays off—the filling sets nicely and the pie slices cleanly.
How to Serve Classic Apple Pie Recipe
Garnishes
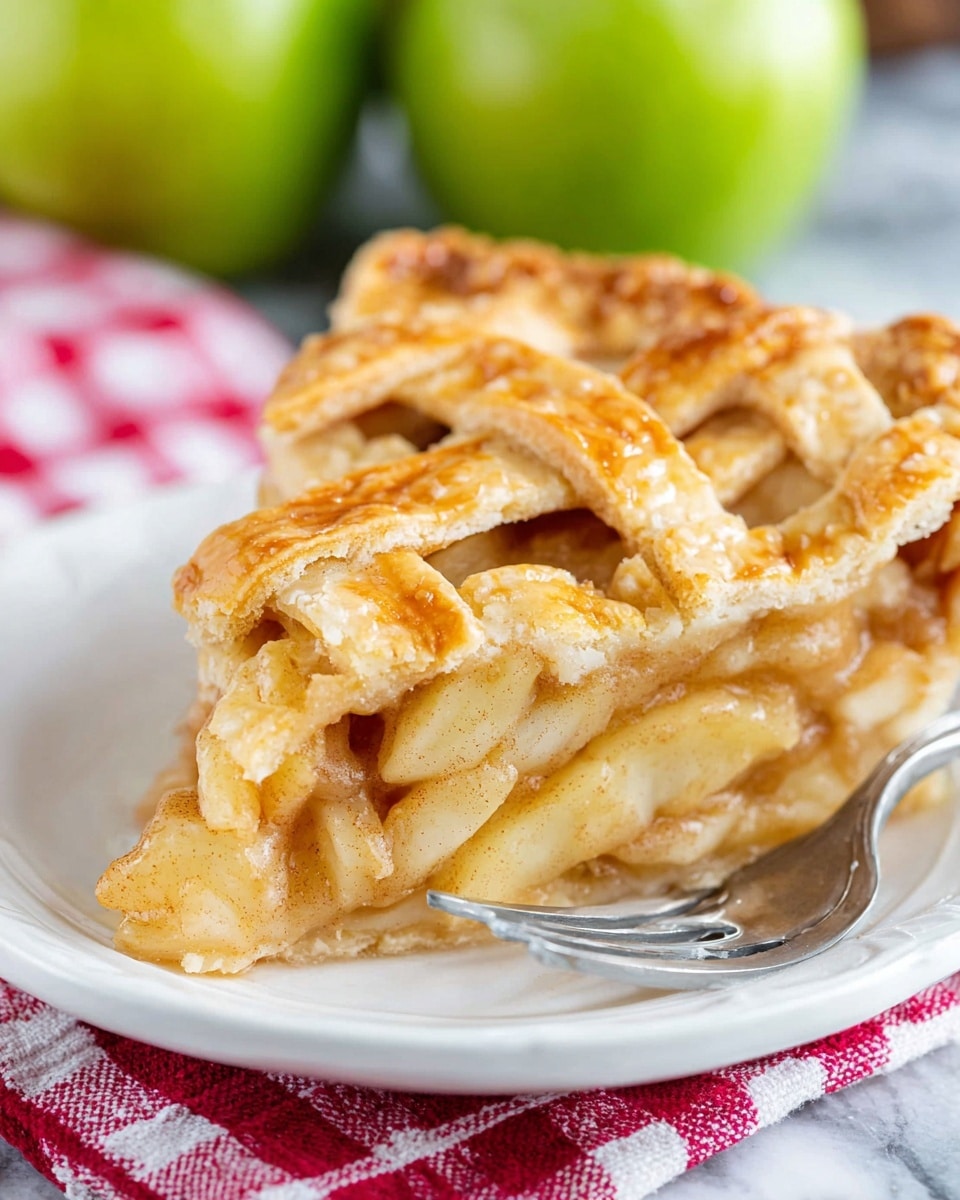
I always serve my apple pie with a scoop of vanilla ice cream—it melts over the warm filling, creating the most heavenly contrast. For a little extra flair, a sprinkle of cinnamon or a light dusting of powdered sugar works wonders to elevate the presentation and flavor.
Side Dishes
This pie is a star on its own, but if you’re serving it after dinner, it pairs beautifully with strong coffee or a hot cup of chai tea. For a festive occasion, I like to accompany it with a simple cheese board—it balances the sweet richness of the pie perfectly.
Creative Ways to Present
For holidays, I’ve decorated the lattice with small dough leaf shapes, giving the pie a festive touch that wows guests. Another time, I cut the pie into smaller, individual mini pies in ramekins—perfect for intimate gatherings or when you want to skip slicing drama!
Make Ahead and Storage
Storing Leftovers
I store leftover pie covered loosely with foil at room temperature for up to two days, as it keeps the crust crisp. After that, I pop leftovers into the fridge wrapped tightly, but honestly, it rarely lasts that long!
Freezing
Once baked and cooled, I’ve successfully frozen whole pies wrapped tightly in plastic wrap and foil. Just thaw overnight in the fridge before reheating. Freezing before baking also works well—I recommend freezing the assembled pie for a few hours and then baking from frozen, adding some extra baking time.
Reheating
To bring leftover pie back to life, I reheat slices in a 350ºF oven for 10-15 minutes. It crisps the crust back up and warms the filling without drying it out, which always makes it taste like freshly baked again.
FAQs
-
Can I use other types of apples for this Classic Apple Pie Recipe?
Absolutely! While Granny Smith apples are my favorite for their tartness and texture, you can mix in other firm apples like Honeycrisp or Fuji for a sweeter profile. Just avoid super soft apples like McIntosh, as they tend to turn mushy during baking.
-
How do I prevent the crust edges from burning?
I usually cover the edges with aluminum foil or a pie shield after the first 20 minutes of baking. This keeps the edges from browning too quickly while the filling finishes cooking through.
-
Can I make this pie ahead of time?
Yes! You can prepare the filling and dough a day ahead—the dough should be chilled, and the filling kept refrigerated. Assemble and bake the pie on the day you plan to serve it for best freshness and texture.
-
Why does my apple pie filling sometimes turn out runny?
This happens if the thickening agents aren’t enough or the apples release too much juice. Using the flour in the butter mixture, as in this recipe, helps thicken the sauce perfectly. Also, avoid over-peeling apples and consider tossing slices in a bit of cornstarch if extra thickening is needed.
Final Thoughts
This Classic Apple Pie Recipe is more than just a dessert to me—it’s a slice of nostalgia, a warm hug on a plate. I remember the first time I baked it for my family; the house filled with that cinnamon-sweet aroma and everyone went back for seconds, no questions asked. I hope you’ll enjoy making and sharing it as much as I do. So, grab your rolling pin and that perfect bag of tart apples—your next favorite pie is just a bake away!
Print
Classic Apple Pie Recipe
- Prep Time: 30 minutes
- Cook Time: 60 minutes
- Total Time: 150 minutes
- Yield: 8 servings
- Category: Dessert
- Method: Baking
- Cuisine: American
Description
This classic apple pie recipe features a flaky double pie crust filled with tender, cinnamon-spiced Granny Smith apples cooked in a sweet buttery sauce. Perfectly baked with a beautiful lattice top, it’s an irresistible dessert ideal for Thanksgiving or any special occasion. Serve warm with vanilla ice cream for an unforgettable treat.
Ingredients
Pie Crust
- 1 recipe for double pie crust
Filling
- 2 1/4 lbs Granny Smith Apples (peeled, cored, and thinly sliced, about 6-7 apples or 7 cups)
- 1 1/2 tsp cinnamon
- 8 Tbsp unsalted butter
- 3 Tbsp all-purpose flour
- 1/4 cup water
- 1 cup granulated sugar
Egg Wash
- 1 egg
- 1 Tbsp water
Instructions
- Prepare the Pie Crust: Make the double pie crust recipe according to instructions and chill it while preparing the apple filling. Preheat your oven to 425˚F (220˚C).
- Make the Sauce: In a medium saucepan over medium heat, melt 8 tablespoons of unsalted butter. Whisk in 3 tablespoons of all-purpose flour and simmer for 1 minute while whisking constantly to form a roux. Slowly whisk in 1/4 cup water and 1 cup granulated sugar. Bring the mixture to a boil, then reduce heat and simmer for 3 minutes, whisking frequently. Remove from heat once thickened.
- Prepare the Apples: Peel, core, and thinly slice enough Granny Smith apples to yield 7 cups. Place the apples in a large mixing bowl. Sprinkle 1 1/2 teaspoons ground cinnamon over the apples and toss to coat evenly. Pour the hot sugar-butter sauce over the apples and gently stir to combine the filling thoroughly.
- Assemble the Bottom Crust: Lightly flour your work surface and roll out one pie crust to a 12-inch diameter circle. Carefully wrap the dough around your rolling pin and transfer it to a 9-inch pie plate. Gently press the crust into the plate without stretching. Mound the apple filling into the crust, making sure not to spill filling on the edges to ensure a proper seal.
- Create the Lattice Top: Roll the second crust out to an 11-inch round. Using a pizza cutter, cut the dough into 10 even strips. Arrange these strips in a woven lattice pattern over the filled pie. Press the edges of the lattice and bottom crust together to seal.
- Apply Egg Wash: Beat 1 egg with 1 tablespoon water to create an egg wash. Brush the top crust thoroughly with this mixture for a shiny, golden finish when baked.
- Bake the Pie: Place the pie in the center of the preheated oven and bake at 425˚F for 15 minutes. Then reduce the oven temperature to 350˚F and continue baking for an additional 45 minutes or until the apples are tender and the filling bubbles through the lattice vents for at least 5 minutes.
- Cool and Serve: Remove the pie from the oven and allow it to rest at room temperature for 1 hour before serving to let the filling set.
Notes
- This classic apple pie is a must-make for Thanksgiving celebrations, revered for its flaky crust and delightfully easy yet delicious filling.
- For extra indulgence, serve warm slices topped with vanilla ice cream for a memorable dessert experience.
- Use Granny Smith apples for their tartness and ability to hold shape well during baking.
- Ensure the edges are free of filling to get a perfect seal between the crusts and prevent leakage during baking.
Nutrition
- Serving Size: 1 slice
- Calories: 380 kcal
- Sugar: 38 g
- Sodium: 98 mg
- Fat: 17.7 g
- Saturated Fat: 9.1 g
- Unsaturated Fat: 7.5 g
- Trans Fat: 0 g
- Carbohydrates: 55 g
- Fiber: 3.9 g
- Protein: 2.8 g
- Cholesterol: 51 mg


