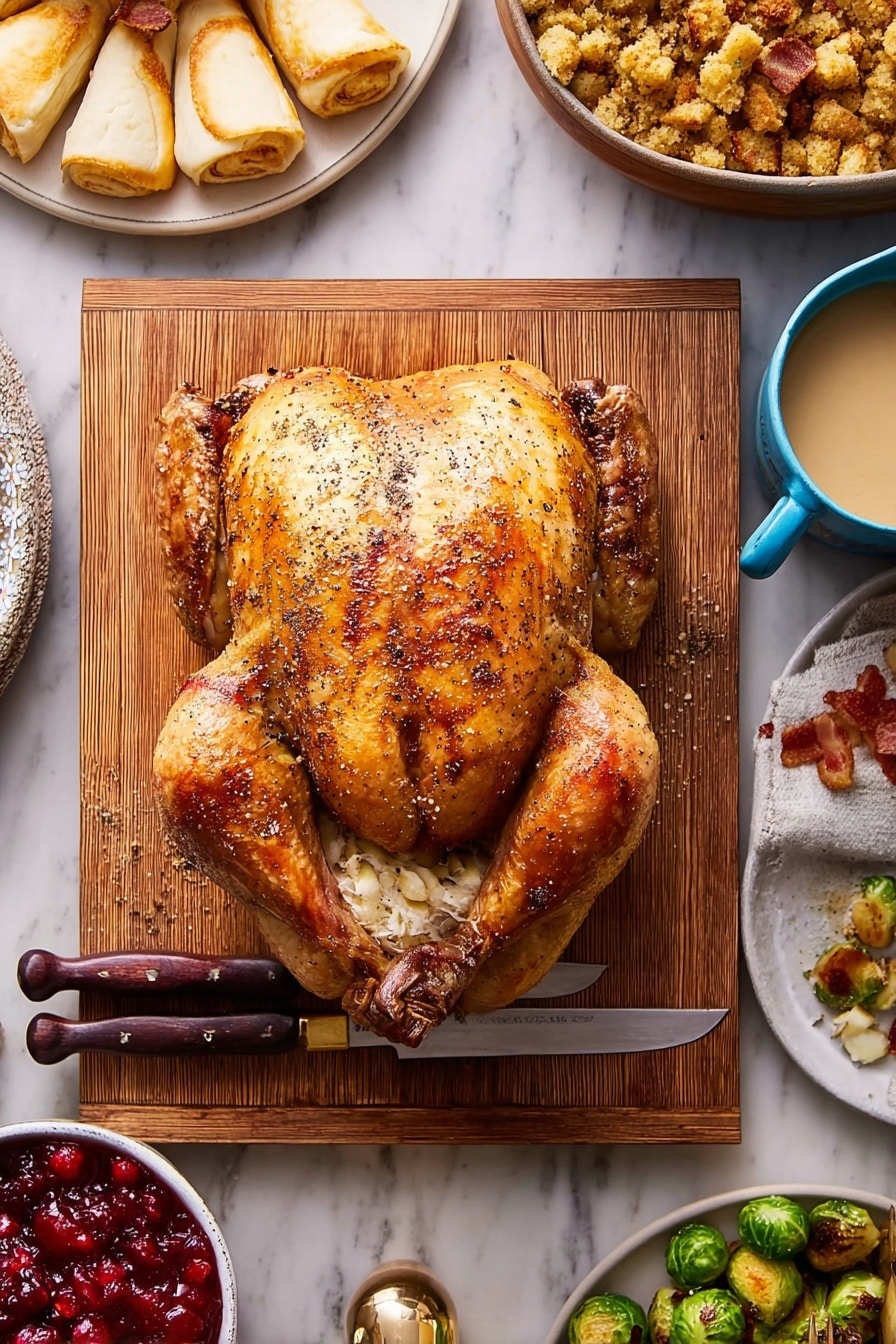
If you’re craving a turkey recipe that delivers irresistibly crispy skin and juicy, tender meat, you’re in the right place. I absolutely love this Crispy Spatchcock Turkey with Homemade Gravy Recipe because it slashes cooking time and guarantees even roasting, plus the homemade gravy made from pan drippings ties it all together perfectly. Trust me, once you try spatchcocking your turkey this way, you’ll never go back to traditional roasting again!
Why You’ll Love This Recipe
- Crispy Skin Every Time: Spatchcocking the turkey flattens it for more even heat exposure—resulting in beautifully golden, crackling skin you’ll want to nibble on before the meat even hits the table.
- Faster Roasting Time: Flattening the bird cuts down traditional roasting time by nearly half, freeing you up for other holiday prep or just some well-deserved downtime.
- Homemade Gravy Magic: Using the turkey’s backbone, neck, giblets, and roasting veggies makes a gravy so rich and flavorful, it quickly became the star of my holiday table.
- Juicy, Evenly Cooked Meat: No more dry breast meat or undercooked thighs—this method ensures both white and dark meat reach perfect doneness simultaneously.

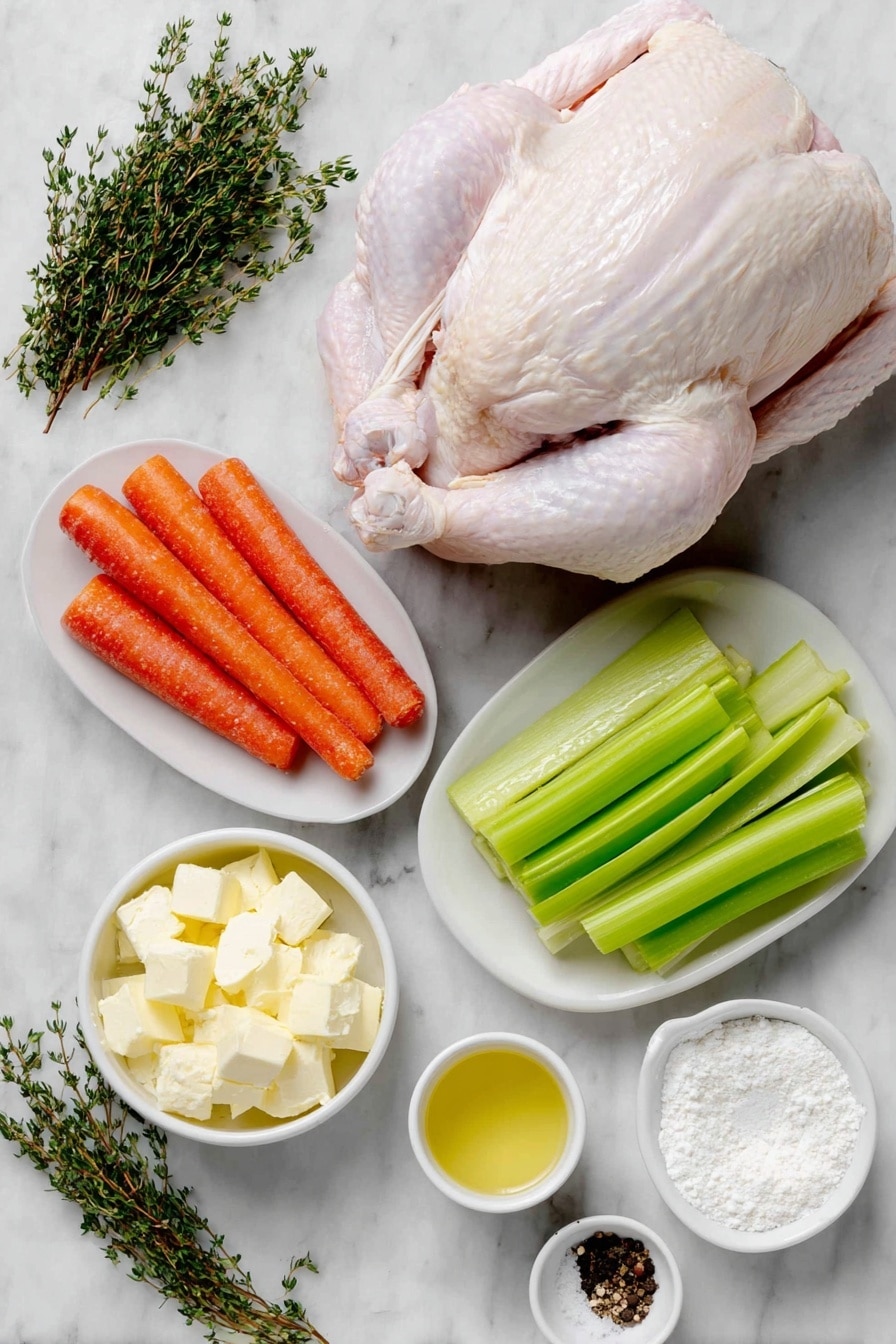
Ingredients You’ll Need
All the ingredients in this Crispy Spatchcock Turkey with Homemade Gravy Recipe are simple, yet they harmonize beautifully to bring out the rich flavor of the turkey and the depth of the gravy. When shopping, try to pick fresh, firm veggies and preferably organic herbs for that extra punch.
- Onions: Three large ones—these add a foundational sweetness and aromatic depth to both the roasting bed and the gravy.
- Carrots: Peeled and chopped, carrots bring subtle earthiness and color to your roasting pan and stock.
- Celery: Roughly chopped to balance the sweetness with its natural slight bitterness and crunch.
- Thyme sprigs: Fresh thyme is essential for that herbal brightness that elevates the whole dish.
- Whole turkey (12-14 pounds): You’ll be butterflying (spatchcocking) it—this is the game-changer technique for crisp skin and speedier roasting.
- Vegetable oil: For that initial rub to help the skin crisp up beautifully without burning.
- Kosher salt and freshly ground black pepper: Simple seasoning that brings out the turkey’s natural flavors; be generous.
- Low-sodium chicken or turkey broth: I always prefer homemade if I have it, but good store-bought also works wonders for gravy base depth.
- Bay leaves: A few whole bay leaves deepen the aroma without overpowering the flavor.
- Butter: Adds richness and smoothness to the gravy’s roux.
- Flour: For thickening the gravy to just the right silky consistency.
Variations
I love how adaptable this recipe is, so feel free to make it your own. Over the years, I’ve tweaked seasoning and add-ins based on what’s in my pantry or the season’s best produce—and my family still goes crazy for every version!
- Herb Variations: I sometimes swap thyme with rosemary or sage for a more woodsy aroma, which lends a cozy, autumn vibe perfect for holiday meals.
- Spicy Kick: Adding a pinch of cayenne or smoked paprika to the rub gives the turkey a subtle heat that pairs wonderfully with the rich gravy.
- Gluten-Free Gravy: You can easily swap the flour for a gluten-free flour blend or cornstarch slurry, and it thickens just as nicely.
- Vegetable Changes: Try roasting parsnips or fennel with the onions and carrots for a sweeter, more complex base for your drippings and gravy.
How to Make Crispy Spatchcock Turkey with Homemade Gravy Recipe
Step 1: Prep Your Turkey and Roasting Bed
Start by preheating your oven to a high 450°F. While it’s heating, scatter two-thirds of your chopped onions, carrots, celery, and most of the thyme sprigs on a foil-lined rimmed baking sheet—this will act as your roasting bed and flavor base. Set a wire rack over the veggies so the turkey doesn’t sit in its own juices. Meanwhile, pat your butterflied turkey dry with paper towels—this is key for that crispy skin. Rub the turkey all over with oil and season generously with salt and freshly ground pepper. Tuck those wing tips back so they don’t burn. Then, arrange the turkey flat on the rack, pressing down slightly on the breastbone to flatten it out evenly.
Step 2: Roast the Turkey to Crispy Perfection
Pop the turkey into the middle of the oven and roast for about 80 minutes, turning it occasionally so it browns evenly. The magic numbers you’ll want on your instant-read thermometer: 150°F in the thickest part of the breast and 165°F in the thighs. This combination ensures juiciness without overcooking. Keeping an eye on the temperature is my top tip—nothing beats perfectly cooked turkey!
Step 3: Make the Rich Homemade Gravy
While the turkey roasts, it’s gravy-making time. Chop the reserved neck, backbone, and giblets, and sauté them in the remaining oil over high heat until they’re golden and fragrant. Then add the remaining veggies and cook till they soften and brown here and there—this browning adds incredible flavor. Pour in your broth, toss in the leftover thyme and bay leaves, and simmer for 45 minutes. Strain the liquid carefully, skim off the fat, then melt butter in a saucepan to create a roux by stirring in flour until golden. Gradually whisk in your broth and simmer until it thickens and reduces to about a quart, seasoning with salt and pepper to taste. Once the turkey is out of the oven, add its pan juices back into the gravy for that extra punch of turkey goodness.
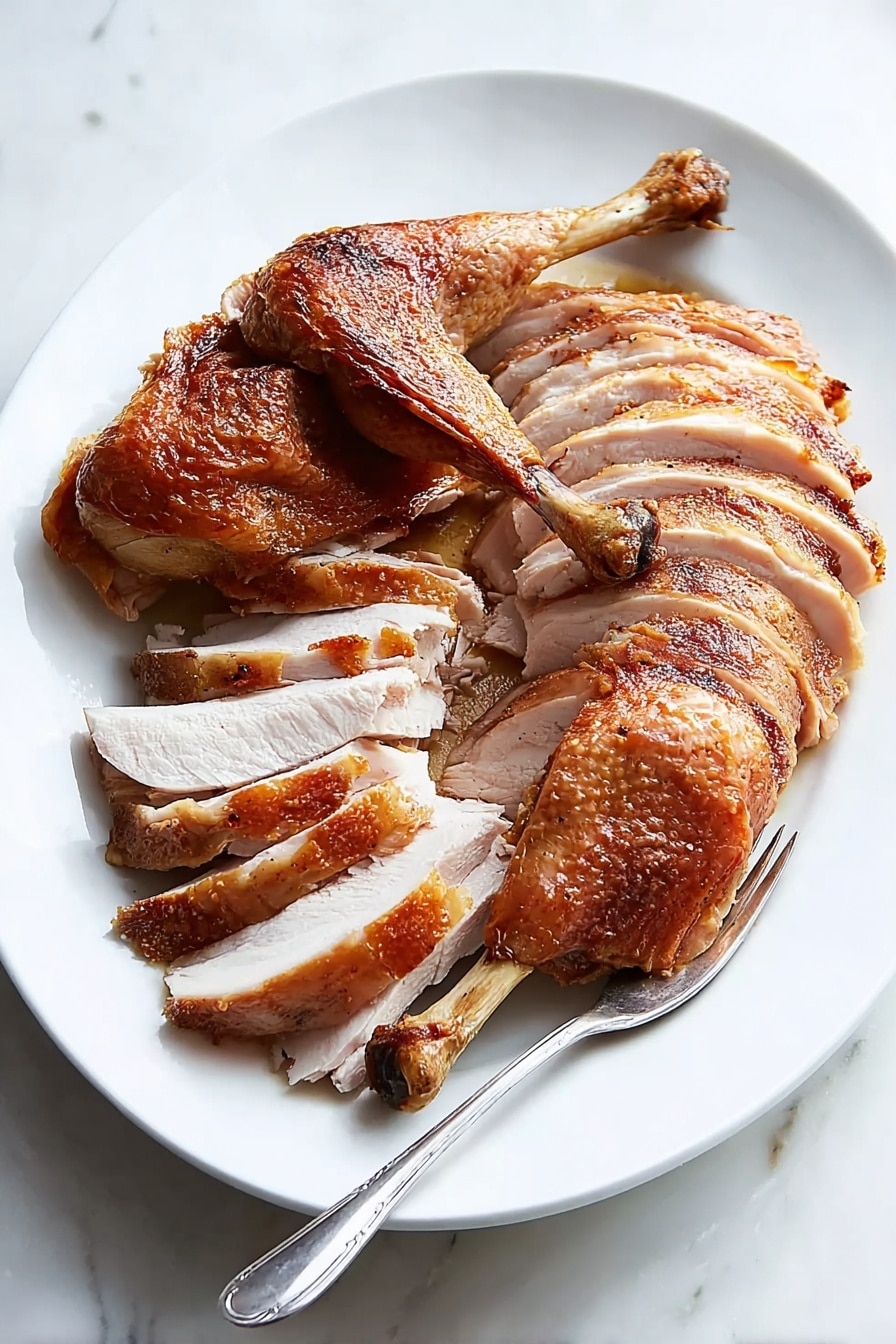
Step 4: Rest, Carve, and Serve
After roasting, let the turkey rest for about 20 minutes on a clean baking sheet. This helps the juices redistribute, keeping the meat tender and juicy. Then carve with confidence and serve alongside your homemade gravy. I discovered this resting step makes all the difference—no more dry edges!
Pro Tips for Making Crispy Spatchcock Turkey with Homemade Gravy Recipe
- Dry That Skin Thoroughly: Before oiling the turkey, pat it completely dry with paper towels. Moisture is the enemy of crispiness.
- Don’t Skip the Rest: Resting the turkey after roasting locks in those flavorful juices—skip it, and you might end up with dry meat.
- Use a Thermometer: I learned this the hard way—checking the internal temperature is the only way to guarantee perfect doneness without guesswork.
- Save Those Neck and Giblets: Roasting these parts with the veggies makes your gravy super flavorful and rich—don’t toss them!
How to Serve Crispy Spatchcock Turkey with Homemade Gravy Recipe
Garnishes
I love to sprinkle fresh thyme leaves and some chopped parsley over the carved turkey for a pop of color and fresh herbal aroma. A few lemon wedges on the side also brighten the plate and let guests add a little citrus zing if they want. Simple but elegant!
Side Dishes
To complete the feast, I usually serve creamy mashed potatoes, roasted Brussels sprouts with balsamic glaze, and some buttery dinner rolls. The rich gravy ties all these sides together beautifully, making each bite a perfect balance of hearty and fresh.
Creative Ways to Present
For special occasions, I like to carve the turkey into thick slices and arrange them on a platter lined with fresh herbs and citrus slices—it makes the whole spread look festive and inviting. Serving gravy in a beautiful gravy boat alongside makes it feel extra special, too.
Make Ahead and Storage
Storing Leftovers
Once your turkey has cooled, I wrap the leftovers tightly in foil or airtight containers and refrigerate. The meat stays juicy for up to 3-4 days—perfect for sandwiches or quick reheat dinners!
Freezing
If I’ve got more leftover turkey than we can eat in a few days, I slice and freeze it in portion-sized bags. Just make sure to press out as much air as possible before sealing. Frozen turkey keeps well for up to 3 months.
Reheating
My go-to method for reheating leftover turkey is to warm it gently in a covered pan with a splash of broth or gravy over low heat, so it doesn’t dry out. You can also reheat in the oven at 300°F wrapped in foil—slow and steady wins the day!
FAQs
-
What does “spatchcocking” mean, and why should I try it?
Spatchcocking is a technique where you remove the backbone of the turkey and flatten it out like a butterfly. This allows for faster and more even cooking, and it gives you that unbeatable crispy skin all over. It’s a game-changer if you want juicy meat without waiting hours!
-
Can I use a brined turkey for this recipe?
Absolutely! If your turkey is already brined or salted, skip the additional salting step in the recipe to avoid over-seasoning. Just proceed with oiling and seasoning lightly if needed.
-
How do I know when the turkey is perfectly cooked?
The best way is to use an instant-read thermometer—150°F in the breast and 165°F in the thickest part of the thighs signals safe, juicy, and perfectly cooked turkey without dryness.
-
Can I make the gravy ahead of time?
Yes! You can prepare the gravy while the turkey roasts and keep it warm on the stove. It also reheats beautifully if you prefer to make it a day ahead—just whisk and heat gently before serving.
Final Thoughts
Honestly, this Crispy Spatchcock Turkey with Homemade Gravy Recipe has become my go-to for holidays and special dinners because it combines show-stopping presentation with foolproof cooking. Once you try spatchcocking your turkey, you’ll appreciate that crispy skin, juicy meat, and silky homemade gravy every time. Give it a shot—you’ll impress yourself and everyone around your table!
Print
Crispy Spatchcock Turkey with Homemade Gravy Recipe
- Prep Time: 10 min
- Cook Time: 105 min
- Total Time: 135 min
- Yield: Serves 10 to 12
- Category: Main Course
- Method: Roasting
- Cuisine: American
Description
This Crisp-Skinned Spatchcocked (Butterflied) Roast Turkey recipe delivers perfectly cooked white and dark meat with stunningly crispy skin. The turkey is butterflied and roasted at high heat to achieve ideal texture, while a rich, flavorful gravy is made from simmered turkey parts, vegetables, and pan drippings for a complete, mouthwatering holiday centerpiece.
Ingredients
Vegetables and Herbs
- 3 large onions, roughly chopped (about 1 1/2 quarts)
- 3 large carrots, peeled and roughly chopped (about 1 quart)
- 4 stalks celery, roughly chopped (about 1 quart)
- 12 thyme sprigs
- 2 bay leaves
Turkey and Seasoning
- 1 whole turkey (12 to 14 pounds total), butterflied according to instructions, backbone, neck, and giblets reserved
- 2 tablespoons vegetable oil
- Kosher salt and freshly ground black pepper
Broth and Gravy
- 1 1/2 quarts low-sodium homemade or store-bought chicken or turkey broth
- 3 tablespoons butter
- 4 tablespoons flour
Instructions
- Preheat Oven and Prepare Rack: Adjust oven rack to middle position and preheat oven to 450°F (230°C). Line a rimmed baking sheet or broiler pan with aluminum foil. Scatter two-thirds of the chopped onions, carrots, celery, and thyme sprigs across the bottom of the pan. Place a slotted broiler rack or wire rack directly on top of the vegetables.
- Prepare Turkey: Pat the spatchcocked turkey dry with paper towels. Rub all surfaces with 1 tablespoon vegetable oil. Season liberally with kosher salt and freshly ground black pepper on all sides, omitting salt if using a brined or kosher turkey. Tuck wing tips behind the back. Place the turkey on the rack so it does not overlap edges, pressing down on the breastbone to flatten slightly.
- Roast Turkey: Transfer the turkey to the oven and roast, rotating occasionally, until an instant-read thermometer registers 150°F (66°C) in the deepest part of the breast and at least 165°F (74°C) in the thighs, about 80 minutes.
- Make Gravy Base: While the turkey roasts, roughly chop the reserved neck, backbone, and giblets. Heat remaining 1 tablespoon vegetable oil in a 3-quart saucepan over high heat until shimmering. Add the chopped turkey parts and cook, stirring occasionally, until lightly browned, about 5 minutes. Add the remaining onions, carrots, and celery and continue cooking, stirring occasionally, until vegetables soften and brown in spots, about 5 more minutes.
- Simmer Broth: Add chicken or turkey stock, remaining thyme, and bay leaves to the saucepan. Bring to a boil, then reduce to a bare simmer. Cook uncovered for 45 minutes to develop flavor. Strain through a fine-mesh strainer into a 2-quart liquid measuring cup, discarding solids. Skim fat from the surface.
- Prepare Roux and Finish Gravy: Melt butter over medium-high heat in a 2-quart saucepan. Add flour and cook, stirring constantly until golden brown, about 3 minutes. Gradually whisk in the strained broth in a thin, steady stream until smooth. Bring gravy to a boil, reduce heat, and simmer until reduced to about 1 quart, around 20 minutes. Season with salt and pepper to taste, cover, and keep warm.
- Rest Turkey: When turkey is done, remove from oven and transfer the rack to a new baking sheet. Let turkey rest at room temperature for 20 minutes before carving.
- Make Final Gravy: Carefully pour any juices collected in the roasting pan through a fine-mesh strainer into a liquid measuring cup. Skim off excess fat and discard. Whisk these juices into the warm gravy for extra flavor.
- Carve and Serve: Carve the rested turkey and serve with the freshly made gravy.
Notes
- Spatchcocking the turkey creates stunningly crisp skin while ensuring even cooking of white and dark meat.
- This recipe also makes a flavorful gravy from the pan drippings and turkey parts for a complete meal.
- If using a brined, salted, or kosher turkey, omit additional salting to avoid oversalting the bird.
- Use an instant-read thermometer for precise cooking temperature and safety.
- Resting the turkey before carving allows juices to redistribute for moist meat.
Nutrition
- Serving Size: 1 slice (approximately 1/12 of turkey with gravy)
- Calories: 552 kcal
- Sugar: 0 g
- Sodium: 696 mg
- Fat: 24 g
- Saturated Fat: 8 g
- Unsaturated Fat: 16 g
- Trans Fat: 0 g
- Carbohydrates: 4 g
- Fiber: 0 g
- Protein: 76 g
- Cholesterol: 288 mg


