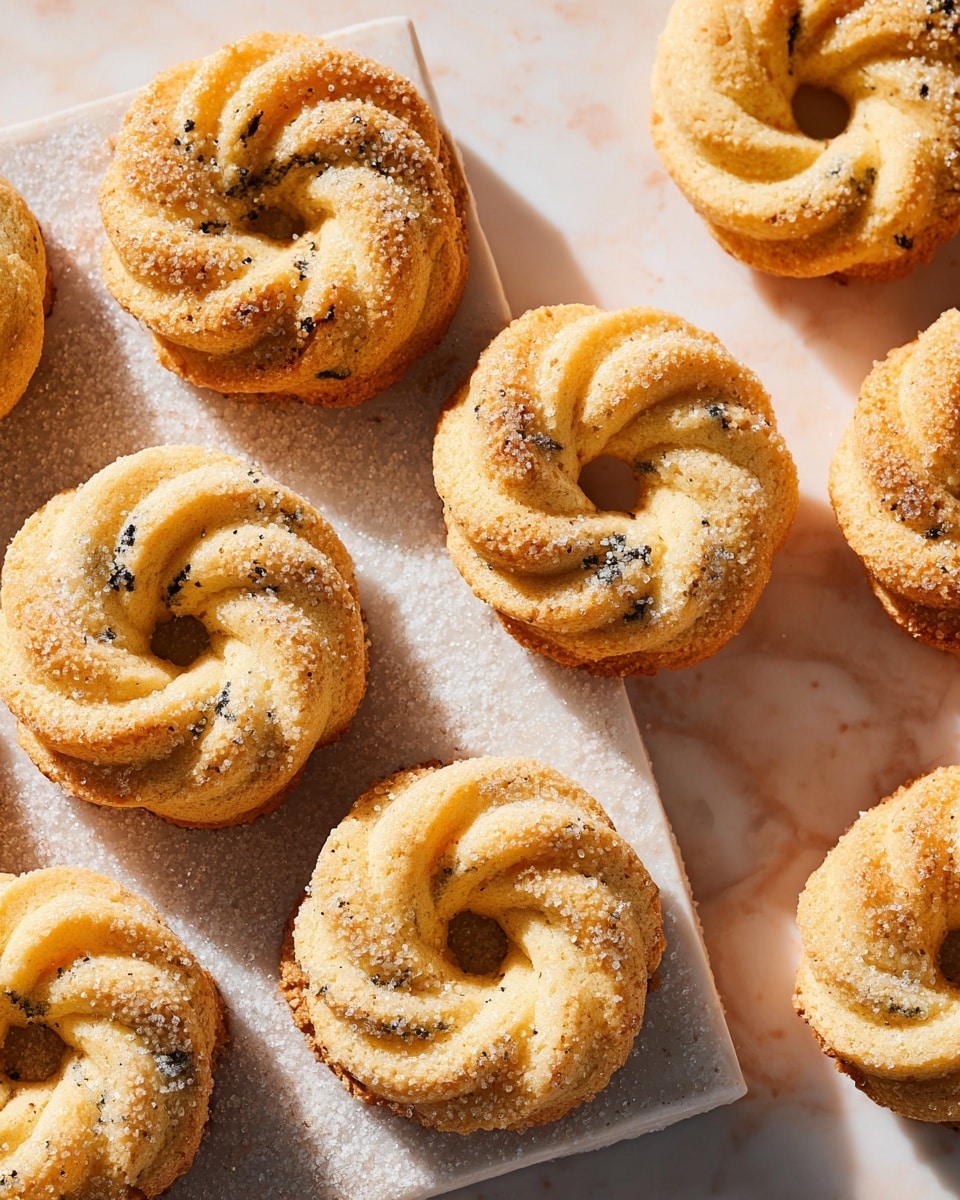
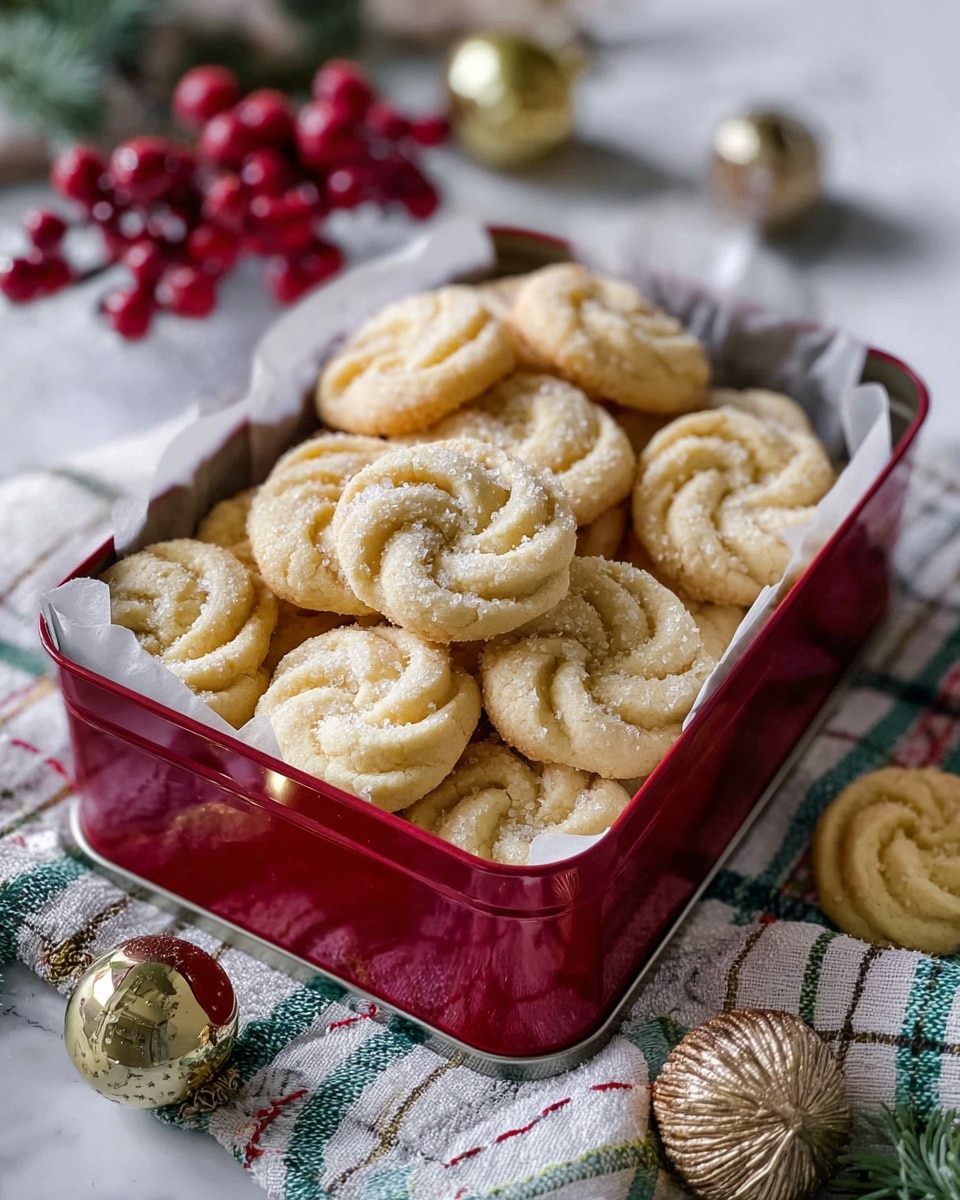
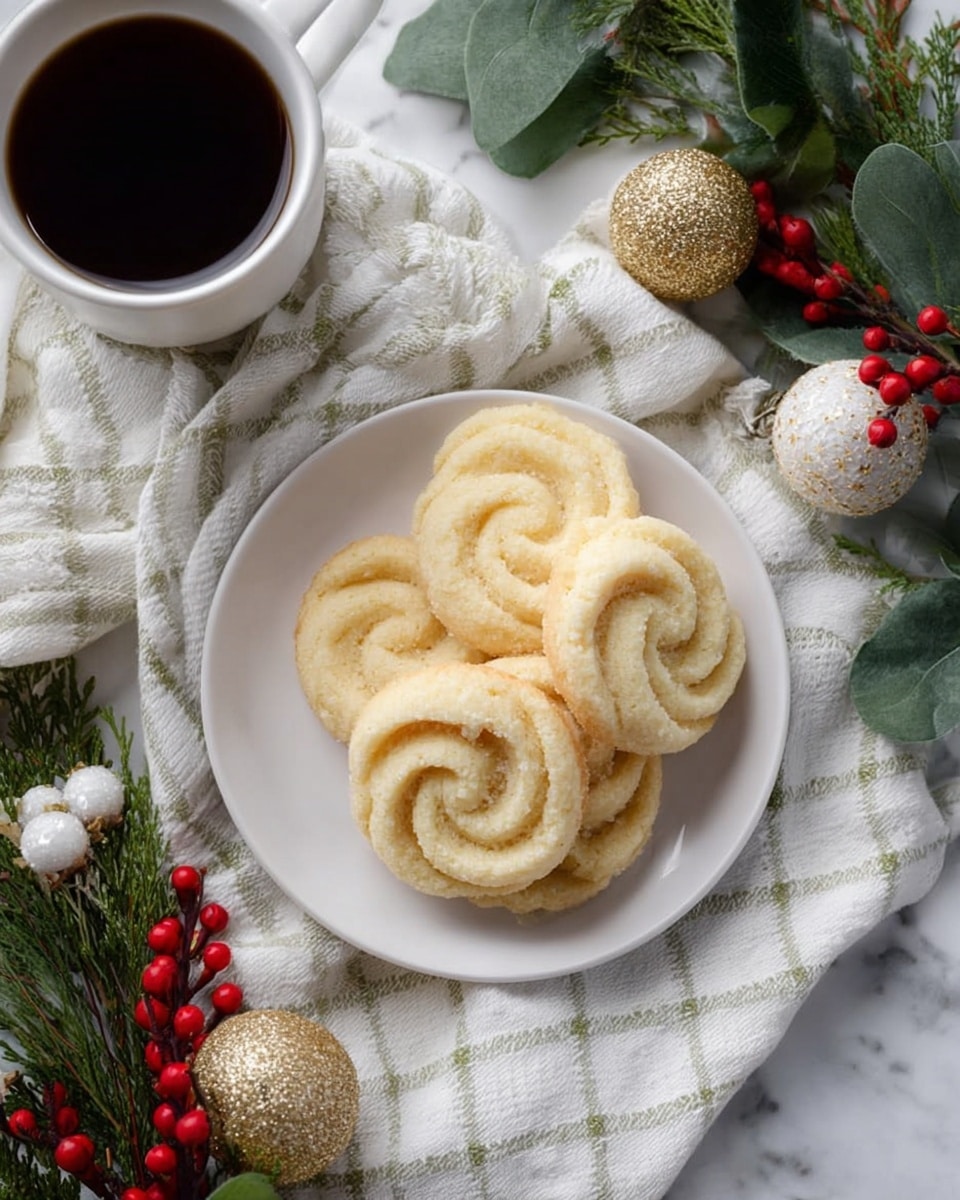
When I first baked these Danish Butter Cookies, I was amazed at how buttery and tender they turned out—just the way I remember from my travels in Denmark. This Danish Butter Cookies Recipe is truly something special because it combines a rich, melt-in-your-mouth texture with the perfect hint of lemon zest and the natural sweetness of dried currants. You’ll find that these cookies work beautifully not only for festive occasions but also as a delightful treat with afternoon tea or coffee.
What I love most about this Danish Butter Cookies Recipe is its simplicity. The ingredients are straightforward, and the method is easy to follow, so it’s ideal whether you’re an experienced baker or just starting out. Plus, the subtle crunch from the sanding sugar on the outside adds a fancy touch without complicating things. Trust me, once you try these, they’ll become your go-to classic cookie recipe.
Why You’ll Love This Recipe
- Buttery Richness: The use of quality unsalted butter gives these cookies that irresistible melt-in-your-mouth texture you’ll crave.
- Refreshing Zest: A touch of fresh lemon zest brightens the flavor, making it feel light and perfect with tea or coffee.
- Currant Surprise: Dried currants add a subtle fruity chewiness that makes these cookies stand out from ordinary butter cookies.
- Simple Yet Elegant: Piping the dough and coating with sanding sugar adds a charming finish without extra fuss.
Ingredients You’ll Need
Each ingredient in this Danish Butter Cookies Recipe plays a crucial role in delivering that perfect cookie bite. I always recommend using room temperature butter and eggs to ensure the dough mixes evenly and the texture comes out spot on.
- Unsalted Butter: Using unsalted lets you control the saltiness, plus it provides the rich creamy flavor essential here.
- Granulated Sugar: Gives sweetness and helps create that slight crisp edge without overpowering the buttery taste.
- Large Egg: Binds everything together while adding moisture for tenderness.
- Finely Grated Lemon Zest: Fresh zest infuses a bright citrus note that cuts through the richness.
- Pure Vanilla Extract: Adds warmth and depth to the overall flavor profile.
- All-Purpose Flour: The classic base, provides structure to the dough.
- Dried Currants: These little gems add a sweet-tart chewiness that’s far better than raisins in my opinion.
- Baking Soda: Helps give a slight lift, keeping the cookies light and tender.
- Kosher Salt: Balances out the sweetness and enhances all the other flavors.
- Sanding Sugar: For coating the cookies, it adds that sparkling crunch and a pretty finish.
Variations
I like to mix things up sometimes with this Danish Butter Cookies Recipe, keeping it fun and tailored to what we’re in the mood for. This recipe is a great base, so feel free to play around with flavors or swap ingredients to suit dietary needs.
- Currant-Free Version: If dried currants aren’t your thing, I’ve swapped them for finely chopped pistachios or orange zest with great results—adds a different but equally delicious twist.
- Gluten-Free Adaptation: Using a gluten-free flour blend works pretty well; just make sure to chill the dough thoroughly to prevent spreading.
- Spiced Cookies: Adding a pinch of ground cardamom or cinnamon gives the cookies a warm holiday vibe that my family absolutely loves.
- Vanilla Bean Upgrade: Splitting a vanilla bean instead of extract amps up the flavor if you want to impress guests.
How to Make Danish Butter Cookies Recipe
Step 1: Cream and Combine the Wet Ingredients
Start by beating the unsalted butter and granulated sugar together in a large bowl using an electric mixer on medium speed. I usually do this for about 3 minutes until the mixture is creamy and light. This step is key because it incorporates air, which helps your cookies stay tender rather than dense. Next, add the large egg, finely grated lemon zest, and vanilla extract, beating until everything is well combined. The lemon zest wakes up the mixture with freshness, so be sure to grate it finely to avoid any bitter chunks.
Step 2: Gently Fold in the Dry Ingredients
Now, switch to low speed or even a sturdy spatula to mix in the all-purpose flour, dried currants, baking soda, and kosher salt. It’s important not to overmix here—once the dry ingredients disappear into the wet, you want to stop. Overworking the dough can lead to tougher cookies, and we want buttery and tender! The dough will be a bit sticky but manageable.
Step 3: Pipe the Cookies and Chill
Line a rimmed baking sheet with parchment paper, then fit a piping bag with a ½-inch star tip. Transfer about one-quarter of the dough into the bag and pipe small rings—around 1¾ inches in diameter—onto the sheet. Piping these star-shaped rings gives the cookie that classic Danish look I adore. Freeze the piped cookies for about 20 minutes; chilling firms up the dough so the cookies hold their shape and don’t spread too much when baking.
Step 4: Coat with Sanding Sugar and Bake
Heat your oven to 350°F (180°C) and prepare two baking sheets with parchment paper. Pour some sanding sugar into a small bowl. Carefully dip each frozen cookie into the sugar to coat all the nooks and crannies—this adds a delightful texture and sparkle after baking. Place the sugar-coated cookies about 1 inch apart on the baking sheets. Bake them for 13 to 18 minutes, rotating the sheets halfway through to ensure even browning. You’ll know they’re done when the edges turn a beautiful golden color while the center remains slightly pale.
Step 5: Cool and Repeat
Transfer the baked cookies to a wire rack so they cool completely. This prevents sogginess and helps them crisp up nicely. While the first batch cools, return any remaining dough portions to the freezer to keep them firm until you’re ready to bake the next batch. This way, you get consistent shapes and textures every time. Once cooled, your Danish Butter Cookies are ready to enjoy!
Pro Tips for Making Danish Butter Cookies Recipe
- Use Room Temperature Ingredients: I learned this trick early on – when the butter and egg are at room temp, your mixing is smoother and dough combines evenly.
- Don’t Skip Chilling: Freezing the piped dough helps the cookies keep their signature shape instead of spreading flat.
- Piping Bag Tip: If you don’t have a star tip, a plain round tip works fine; the cookies will still taste incredible, just a bit different in appearance.
- Watch the Bake Time Closely: Baking times vary by oven, so keep an eye near the end to avoid overbaking and drying out these delicate cookies.
How to Serve Danish Butter Cookies Recipe
Garnishes
When I serve these cookies, I like to sprinkle a few extra dried currants on top right after baking for an appealing pop of color and flavor. Another favorite is adding a light dusting of powdered sugar just before serving to enhance their charming, rustic look.
Side Dishes
These Danish Butter Cookies pair beautifully with simple accompaniments like a hot cup of Earl Grey tea or freshly brewed coffee. For special occasions, I serve them alongside jams or marmalade that complement the lemon and currant flavors.
Creative Ways to Present
I’ve made these cookies into charming gift boxes lined with parchment paper for Christmas, tied with festive ribbons and a sprig of fresh rosemary. They also look adorable arranged on tiered dessert stands at parties, making guests feel like they’re enjoying traditional Danish hospitality.
Make Ahead and Storage
Storing Leftovers
After baking, I store leftover Danish Butter Cookies in an airtight container at room temperature. They keep beautifully for up to 3 days, and the texture stays crisp on the outside with a soft center. Just make sure your container is sealed well to protect from moisture.
Freezing
I’ve frozen both the raw dough and baked cookies. For the dough, I portion and freeze on trays before transferring to bags—this way you can bake fresh batches anytime. Baked cookies freeze well too; just thaw at room temperature before serving. Freezing won’t compromise flavor but is best within 2 months.
Reheating
If the cookies lose a bit of their crunch after storage, warming them in a 300°F oven for 3-5 minutes revives that fresh-baked crisp perfectly. I’ve found microwaving doesn’t work as well since it softens them too much.
FAQs
-
Can I substitute dried currants with raisins in this Danish Butter Cookies Recipe?
Absolutely! Raisins can be used as a substitute if you don’t have dried currants on hand. They’ll add a similar chewy sweetness, though currants tend to be smaller and tarter, so your cookies may be a bit sweeter and less tangy. Chop larger raisins for even distribution.
-
Why is chilling the dough important in this recipe?
Chilling the piped dough solidifies the butter, which helps the cookies hold their shape during baking and prevents them from spreading too much. This step ensures those classic Danish butter cookie edges and keeps the texture tender but firm.
-
Can I make these cookies without a piping bag?
Yes! While piping gives them a lovely traditional look, you can roll out the dough and cut into shapes or simply shape small balls with your hands. They’ll still taste fantastic, even if the appearance is a bit different.
-
How long do these Danish Butter Cookies last?
Stored in an airtight container at room temperature, these cookies last up to 3 days with the best texture. For longer storage, freezing baked or unbaked dough extends their life up to 2 months without loss of flavor or quality.
Final Thoughts
I absolutely love how this Danish Butter Cookies Recipe brings a little Scandinavian charm right into my kitchen. They’re one of those recipes that feel both nostalgic and special, perfect for sharing with friends or yourself on a quiet afternoon. I encourage you to try them just as I have — the combination of buttery tenderness, citrus brightness, and juicy currants truly makes these cookies a little piece of joy. Once you master this recipe, you’ll see why it’s a favorite in my family, and I’m sure it will become one in yours too.
Print
Danish Butter Cookies Recipe
- Prep Time: 30 minutes
- Cook Time: 18 minutes
- Total Time: 48 minutes
- Yield: About 35 cookies
- Category: Dessert
- Method: Baking
- Cuisine: Danish
Description
These Danish Butter Cookies are a classic treat known for their rich, buttery flavor and crisp texture. Enhanced with dried currants and a hint of lemon zest, these cookies are piped into delicate rings, coated in sanding sugar, and baked until golden. Perfect for festive occasions or as an everyday sweet snack, they freeze well and stay fresh for days.
Ingredients
Cookie Dough
- 1 cup (2 sticks, ½ pound, or 227 grams) unsalted butter, room temperature
- ½ cup (100 grams) granulated sugar
- 1 large egg, room temperature
- 1 tablespoon finely grated lemon zest
- 1 teaspoon pure vanilla extract
- 2 cups (250 grams) all-purpose flour
- 5 ounces (142 grams) dried currants
- ½ teaspoon baking soda
- ½ teaspoon kosher salt
Coating
- 1 handful sanding sugar
Instructions
- Prepare the Dough: In a large bowl, use an electric mixer on medium speed to beat the unsalted butter and granulated sugar for about 3 minutes until the mixture is creamy and combined. Add the egg, finely grated lemon zest, and pure vanilla extract, continuing to beat until fully incorporated. Then, beat in the all-purpose flour, dried currants, baking soda, and kosher salt until the dough is just combined, being careful not to overmix.
- Shape the Cookies: Line a rimmed baking sheet with parchment paper. Transfer about one-quarter of the dough into a piping bag fitted with a ½-inch (1.2-centimeter) star tip. Pipe the dough onto the baking sheet in small rings approximately 1¾ inches (3.6 centimeters) in diameter. Repeat with the remaining dough. Place the baking sheet in the freezer for about 20 minutes or until the cookie dough rings are firm enough to handle.
- Preheat and Sugar Coat: While the dough is chilling, preheat your oven to 350°F (180°C) and line two rimmed baking sheets with parchment paper. Pour some sanding sugar into a small bowl. Remove the cookies from the freezer and quickly dip each cookie into the sanding sugar to coat both sides. Arrange the coated cookies about 1 inch apart on the prepared baking sheets. Return any remaining cookies to the freezer until ready to bake.
- Bake the Cookies: Bake the cookies in the preheated oven for 13 to 18 minutes, rotating the baking sheets halfway through to ensure even baking. The cookies are ready when they turn golden around the edges. Once baked, transfer the cookies on the baking sheets to wire racks to cool completely.
- Storage Tips: These cookies can be prepared up to three days in advance. Store them in an airtight container at room temperature to maintain freshness, or freeze for up to two months for longer storage.
Notes
- Using room temperature butter and egg helps achieve a smooth, creamy dough.
- Freezing the piped cookies firms them up, which helps maintain their shape during baking.
- For a more intense citrus flavor, you can add a teaspoon of lemon juice along with the zest.
- Be sure to space the cookies about one inch apart on the baking sheet to prevent sticking as they spread slightly while baking.
- These cookies pair wonderfully with tea or coffee, making them perfect for sharing with guests.
Nutrition
- Serving Size: 1 cookie
- Calories: 110
- Sugar: 6g
- Sodium: 60mg
- Fat: 7g
- Saturated Fat: 4.5g
- Unsaturated Fat: 2.5g
- Trans Fat: 0g
- Carbohydrates: 12g
- Fiber: 0.5g
- Protein: 1g
- Cholesterol: 25mg

