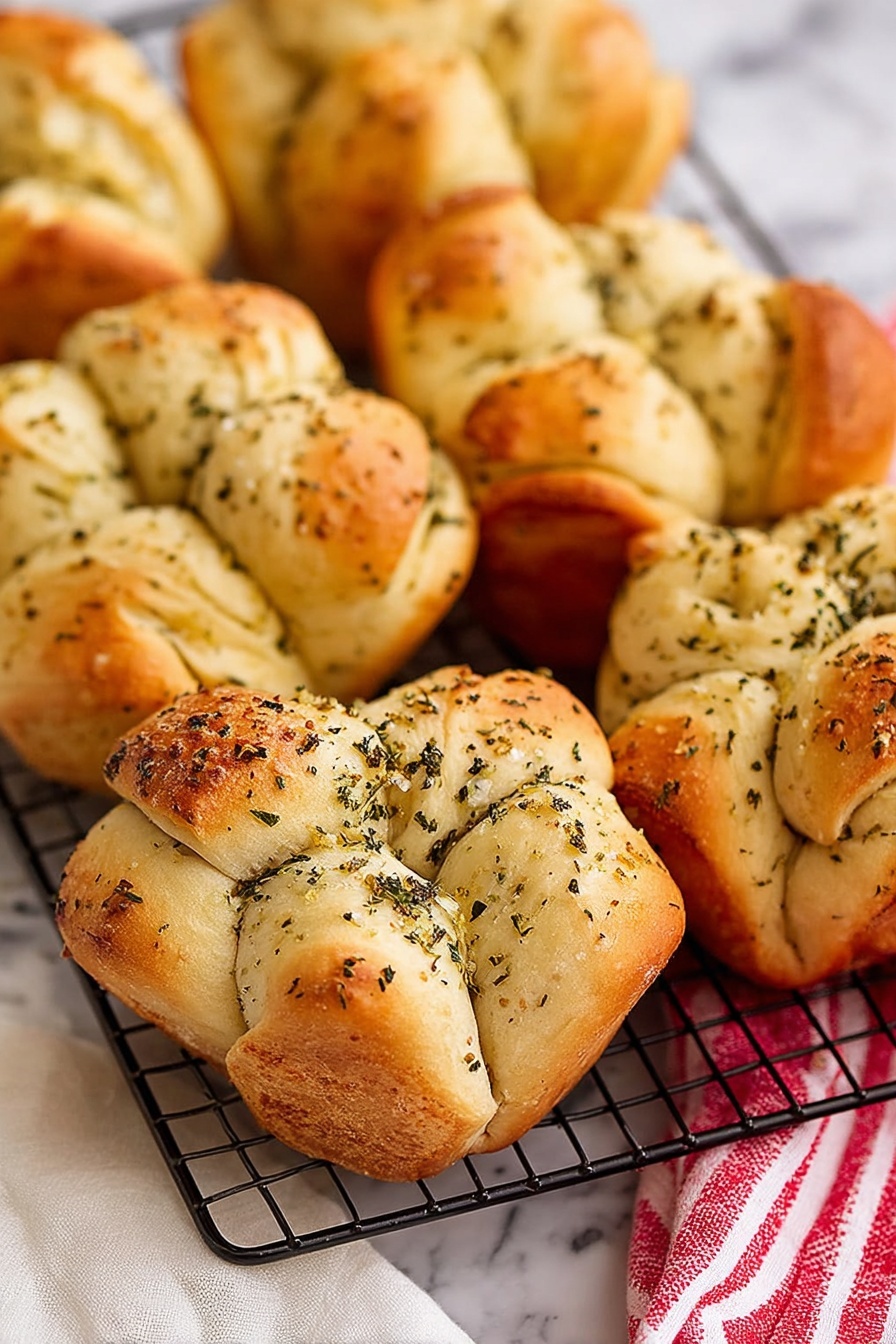
If you’re looking for an easy yet seriously delicious treat, this Garlic Herb Pull-Apart Rolls Recipe is an absolute winner. I love how these rolls come out with golden, flaky layers that are packed with buttery garlic and herbs—it’s like a warm hug in bread form. Plus, they’re quick to make and perfect for sharing, whether it’s a casual weeknight dinner or a cozy gathering. Stick with me here, and I’ll walk you through how to get them just right every time.
Why You’ll Love This Recipe
- Super Quick to Make: Using refrigerated biscuit dough means no waiting for rise time, perfect for last-minute cravings.
- Flavor-Packed: The combo of garlic powder, Italian seasoning, and basil infuses every bite with herbs and savory goodness.
- Fun to Share: Pull-apart rolls are so interactive and perfect for family dinners or parties.
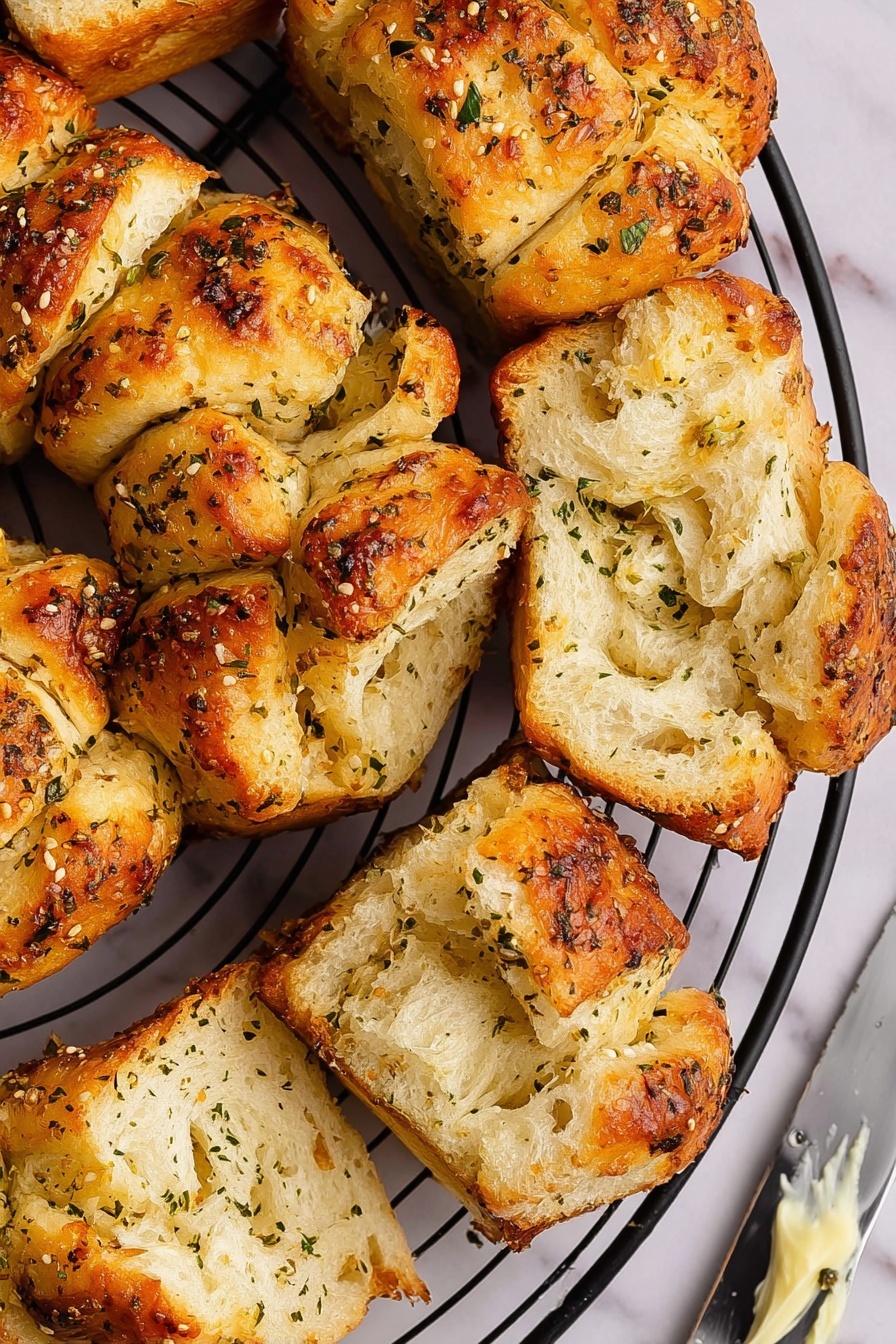
- Consistently Flaky: Thanks to the biscuit dough, you get layers that are soft yet slightly crisp on the edges every time.

Ingredients You’ll Need
These garlic herb pull-apart rolls keep it simple with easy-to-find pantry staples that come together beautifully. Each ingredient plays a key role in building flavor and that irresistible texture.

- Refrigerated Biscuit Dough: This is the shortcut hero, saving you from making dough from scratch but still yielding flaky layers.
- Unsalted Butter: Melting it locks in that rich, buttery flavor that coats each piece just right.
- Salt: Enhances all the seasonings and balances the flavors perfectly.
- Dried Italian Seasoning: A blend of herbs that brings a classic, aromatic touch.
- Dried Basil: Adds a fresh, slightly sweet herbal note to complement the garlic.
- Garlic Powder: The star savory flavor that makes these rolls so addictive.
Variations
I’m all about making recipes my own, so I encourage you to customize these rolls based on what herbs you love or what you have on hand. The pull-apart style makes it easy to experiment.
- Cheesy Twist: Sprinkle shredded mozzarella or parmesan between the biscuit pieces before baking—I’ve done this a million times and it always takes these rolls to the next level.
- Spicy Kick: Add a pinch of crushed red pepper flakes in the butter mixture if you love a little heat—you’ll get subtle warmth without overpowering the garlic flavor.
- Fresh Herbs: Swap dried herbs for fresh chopped rosemary or thyme for extra freshness—just slightly reduce the amount since fresh is more potent.
- Vegan Option: Replace butter with olive oil or vegan margarine and double-check your biscuit dough is dairy-free. It still tastes amazing!
How to Make Garlic Herb Pull-Apart Rolls Recipe
Step 1: Prep and Cut the Biscuit Dough
Start by preheating your oven to 350°F. Then, open that can of flaky layers refrigerated biscuit dough and separate each biscuit. I like to cut each biscuit into quarters—this creates those perfect bite-sized pieces that are super fun to pull apart later. Toss them all into a large mixing bowl.
Step 2: Mix the Garlic Herb Butter
In a small bowl, combine the melted unsalted butter with salt, dried Italian seasoning, dried basil, and garlic powder. This mixture is what turns those simple biscuit pieces into irresistible garlic herb bites. Make sure it’s well stirred so that every spice is evenly distributed.
Step 3: Coat the Biscuit Pieces
Pour your garlic herb butter over the biscuit quarters. Using a spatula or your hands (clean, please!), gently toss until every piece is coated in that savory, buttery mixture. You’ll notice the dough soaking up the flavors right away—this is where the magic starts.
Step 4: Bake to Golden Perfection
Divide the coated biscuit pieces evenly into six wells of a muffin tin, packing them a little snug because they’ll puff up nicely while baking. Pop it in the preheated oven for about 16 to 18 minutes. You’ll want to watch for a golden-brown top—that’s your signal they’re done. Let them cool for around 5 minutes before removing the rolls from the pan so they hold their shape without falling apart.
Pro Tips for Making Garlic Herb Pull-Apart Rolls Recipe
- Use Flaky Layers Dough: Choosing the biscuit dough labeled “flaky layers” makes a world of difference for texture—trust me, it’s worth the extra step.
- Don’t Skip Cooling: Let the rolls cool a bit in the pan before trying to remove them or they might fall apart. Patience pays off here.
- Even Coating: Stir the coated biscuit pieces gently but thoroughly so every piece tastes herby and buttery.
- Check Oven Temperature: Bake at 350°F as directed; a hotter oven can brown too fast and leave the centers doughy.
How to Serve Garlic Herb Pull-Apart Rolls Recipe
Garnishes
I like to top these rolls with a little flaky sea salt right after baking for a slight crunch, and sometimes a sprinkle of freshly chopped parsley for a pop of color and fresh flavor. It just brings that extra “wow” to the table.
Side Dishes
These pull-apart rolls pair beautifully with soups like tomato bisque or creamy mushroom, and they’re fantastic alongside pasta dishes or roasted chicken. My family especially loves them with a big salad or some garlicky greens on the side.
Creative Ways to Present
For holidays or dinner parties, I’ve arranged these rolls on a big wooden board surrounded by bowls of flavored butters or dipping sauces—guests love pulling apart bites and trying different combos. You can even bake them in mini bundt pans for a cute twist!
Make Ahead and Storage
Storing Leftovers
Once cooled completely, I store leftover rolls in an airtight container at room temperature for up to two days. They stay soft and flaky, although I usually reheat them to bring back that fresh-baked warmth.
Freezing
You can freeze the baked pull-apart rolls by wrapping them tightly in foil and placing them in a freezer bag. When I do this, they freeze well for up to a month. Just thaw overnight in the fridge before reheating.
Reheating
To reheat, I pop the rolls in a 325°F oven for about 8-10 minutes wrapped loosely in foil to keep them from drying out. This brings back the soft, buttery texture like they just came out of the oven.
FAQs
-
Can I use homemade biscuit dough instead of canned dough?
Absolutely! Homemade biscuit dough with flaky layers works just as well. Just make sure your dough is rolled out and cut into quarters similarly, so it bakes evenly in the muffin tin.
-
How do I make these rolls extra garlicky?
If you want more garlic punch, increase the garlic powder slightly or add finely minced fresh garlic to the melted butter mixture—but be careful not to overpower the herbs. Roasted garlic butter also makes a wonderful twist.
-
Can I make these rolls gluten-free?
As long as you use a gluten-free biscuit dough, this recipe works well. Since the seasoning is all naturally gluten-free, it’s an easy swap if you have the right dough.
-
Why did my rolls come out doughy inside?
This usually happens if the oven temperature is too low or the rolls weren’t baked long enough. Make sure your oven is fully preheated to 350°F and bake until the tops are golden and the edges feel firm.
Final Thoughts
I absolutely love how this Garlic Herb Pull-Apart Rolls Recipe makes a simple pantry staple feel special and homemade in no time. When I first tried this, I was pleasantly surprised at how addictive and easy it was, and now it’s become a go-to whenever I want something cozy and flavorful without fuss. You’ll enjoy how it brings family and friends together over warm, buttery bites that everyone can’t stop pulling apart. Seriously, give this recipe a try—you might soon find it’s your new favorite quick bread!
Print
Garlic Herb Pull-Apart Rolls Recipe
- Prep Time: 10 minutes
- Cook Time: 18 minutes
- Total Time: 28 minutes
- Yield: 6 rolls
- Category: Bread
- Method: Baking
- Cuisine: American
Description
These Shortcut Garlic Herb Pull-Apart Rolls are an easy and delicious way to enjoy buttery, garlicky bread with a hint of Italian herbs. Made from flaky refrigerated biscuit dough coated in a flavorful butter and herb mixture, they bake up golden brown and perfect for sharing as a snack or alongside any meal.
Ingredients
Rolls
- 1 (16.3-ounce) can flaky layers refrigerated biscuit dough
Garlic Herb Butter
- 1/4 cup unsalted butter (melted)
- 1/2 teaspoon salt
- 1 teaspoon dried Italian seasoning
- 1 teaspoon dried basil
- 1 teaspoon garlic powder
Instructions
- Preheat the oven: Set your oven to 350°F (175°C) to prepare for baking the rolls.
- Prepare the biscuit pieces: Open the can of refrigerated biscuit dough and separate each biscuit. Cut each biscuit into quarters and place all the pieces into a large mixing bowl.
- Mix garlic herb butter: In a small bowl, combine the melted butter with salt, dried Italian seasoning, dried basil, and garlic powder. Stir well to blend the flavors.
- Coat biscuit pieces: Pour the garlic herb butter mixture over the biscuit pieces in the large bowl. Use a spoon or your hands to gently toss and coat all the pieces evenly with the buttery mixture.
- Arrange in muffin tin: Divide the coated biscuit pieces evenly into 6 wells of a muffin tin, pressing them lightly to fit well but still loose enough to pull apart after baking.
- Bake the rolls: Place the muffin tin in the preheated oven and bake for 16 to 18 minutes, or until the rolls are puffed, golden brown, and cooked through.
- Cool and serve: Remove the muffin tin from the oven and allow the rolls to cool for about 5 minutes. Carefully take the rolls out of the tin and serve warm for the best flavor and pull-apart texture.
Notes
- You can customize the herb mixture by adding other dried herbs such as oregano or thyme if desired.
- For an extra cheesy version, sprinkle some shredded mozzarella or parmesan between the biscuit pieces before baking.
- These rolls are best enjoyed warm but can be reheated gently in the oven or microwave.
- Make sure not to pack the biscuit pieces too tightly in the muffin tin to allow for even baking and easy pulling apart.
Nutrition
- Serving Size: 1 roll
- Calories: 241
- Sugar: 5 g
- Sodium: 665 mg
- Fat: 14 g
- Saturated Fat: 7 g
- Unsaturated Fat: 2.3 g
- Trans Fat: 0.3 g
- Carbohydrates: 27 g
- Fiber: 0.3 g
- Protein: 4 g
- Cholesterol: 20 mg
