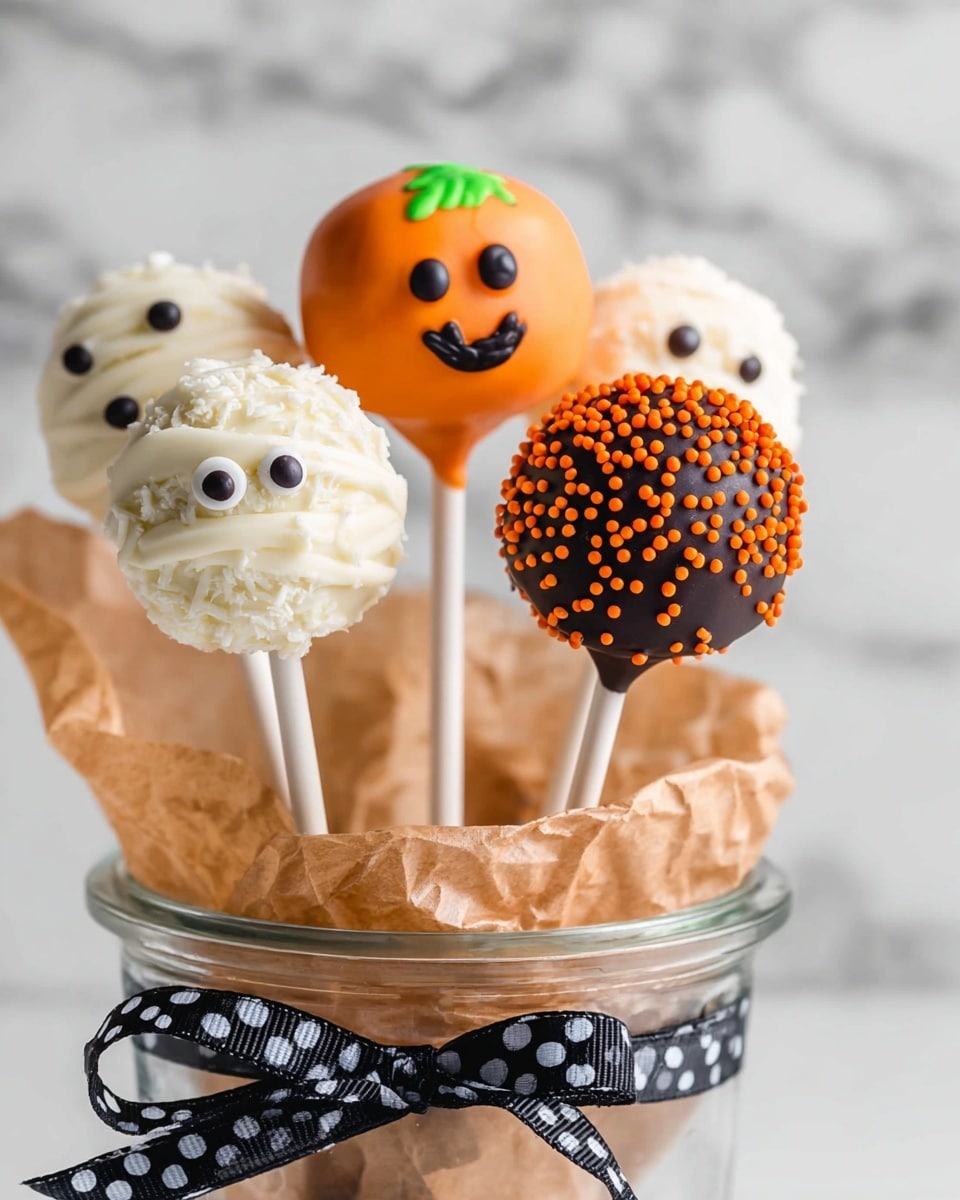
If you’re looking to wow your guests this spooky season, I’ve got a treat you’ll absolutely adore. This Halloween Cake Pops Recipe is fan-freaking-tastic—bite-sized, fun, and bursting with festive flavor! Whether you’re hosting a party or just craving something sweet that screams Halloween, these cake pops are the perfect little delights that will have everyone coming back for more.
Why You’ll Love This Recipe
- Simple Ingredients: You don’t need anything fancy or hard to find—everything comes together from staples and fun halloween-colored chocolate melts.
- Perfect Portion Size: These bite-sized cake pops are great for parties, school events, or just a cozy night in without overindulging.
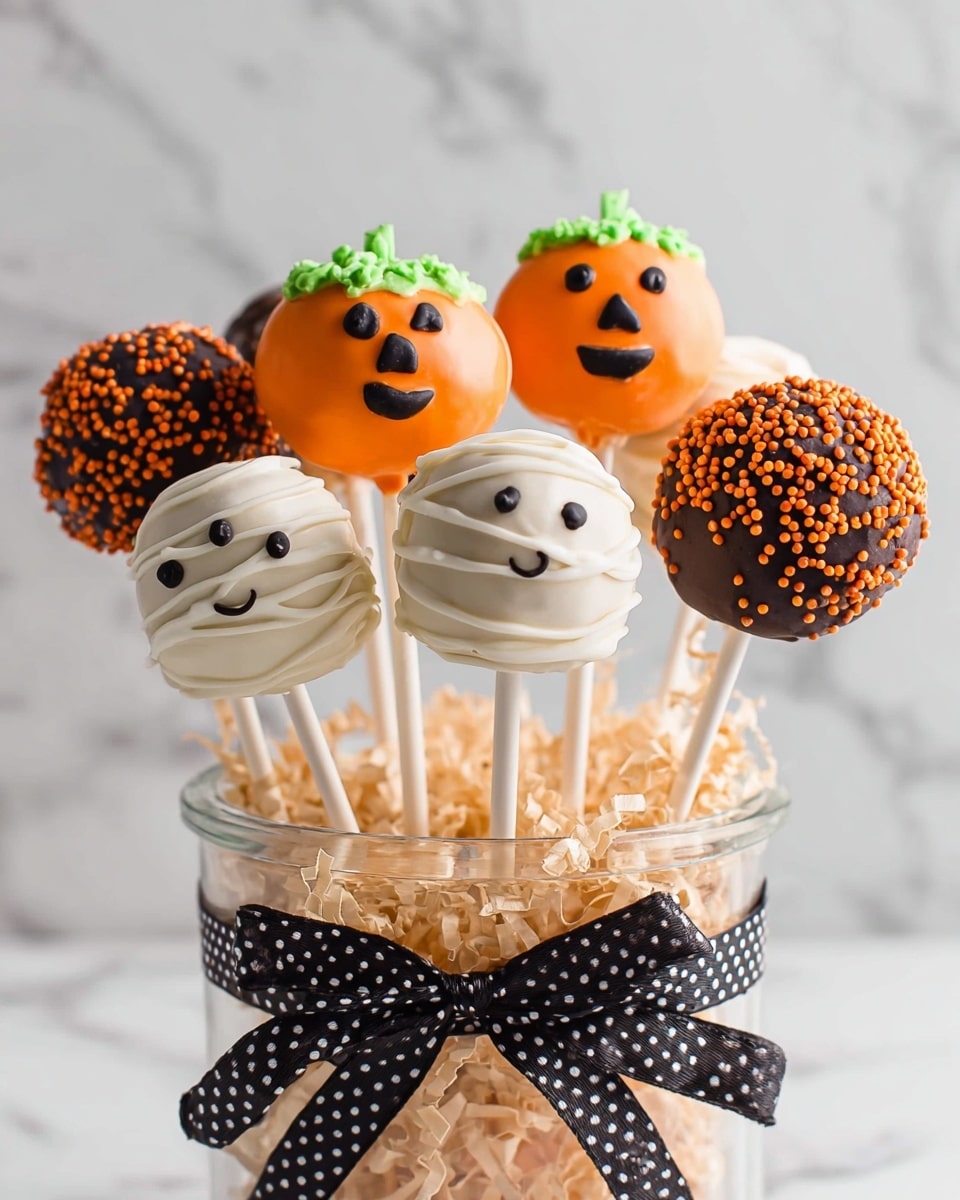
- Creative and Customizable: You can decorate them as pumpkins, mummies, or use your favorite spooky sprinkles to suit your mood.
- Family-Friendly Fun: Kids love helping with the decorating—and eating the finished product (trust me, it’s a win-win!).

Ingredients You’ll Need
The magic of these Halloween cake pops comes from a combination of moist, flavorful cake and smooth, sweet frosting, all wrapped in a beautifully colored chocolate coating. I always recommend using a good quality white chocolate melting wafer for the best result—trust me, it makes a world of difference!
- White cake mix: A box mix saves time but delivers great flavor and texture—perfect for cake pops.
- Chocolate melting wafers (chocolate and white): They melt smoothly and harden with a lovely shine—Ghirardelli white wafers are my fave!
- Salted butter: Adds richness and balances sweetness, making the cake pop filling delicious.
- Powdered sugar: Helps create a creamy frosting that holds the cake crumbs together without being too sweet.
- Vanilla extract: Brings depth and warmth to the cake pop mixture.
- Heavy cream or milk: Adjusts texture for the perfect consistency—don’t skip this step!
- Orange melting wafers: For that iconic Halloween pumpkin color—makes your pops pop visually.
- Green frosting: To create authentic pumpkin stems or accents.
- Black edible ink pen: For adding fun faces and details to your cake pops—so much personality here!
Variations
I love how versatile this Halloween Cake Pops Recipe is—you can totally make it your own. Feel free to mix up the chocolate colors or decorate them in styles that fit your Halloween vibe. After all, half the fun is in the creativity!
- Chocolate Lovers’ Twist: Swap out the white cake for a rich chocolate cake and use dark or semi-sweet melting wafers. My family goes crazy for this version!
- Spooky Mummies: Instead of pumpkins, try drizzling white chocolate in stripes and using tiny candy eyes for a fun mummy look—I discovered this trick last year and it was a hit at school parties.
- Dietary Modifications: Gluten-free cake mixes work great here, just adjust baking time accordingly. I’ve done this with a gluten-free mix that kids couldn’t even tell the difference.
- Seasonal Swaps: Don’t limit yourself to Halloween—switch coating colors for Christmas, birthdays, or themed gatherings.
How to Make Halloween Cake Pops Recipe
Step 1: Bake Your Base Cake
Start by baking the white cake mix according to the package instructions—use a 9×13″ pan so you get a nice, even slab. Once it’s baked and cooled completely, crumble it finely into a big bowl. This step is key: no big chunks, or your pops won’t hold as well. I snap the clumps apart with my fingers to get just the right texture.
Step 2: Make the Frosting Mixture
Next, mix softened butter, powdered sugar, vanilla extract, and heavy cream until smooth and creamy. Then, add this frosting to your crumbled cake—start with 2 cups powdered sugar and maybe add more if needed. The goal is a dough-like consistency that holds together when rolled into balls. Don’t make it too wet or too dry—this part took me a couple tries to perfect, but once you get it, it’s easy.
Step 3: Shape Your Cake Pops
Roll the cake-frosting mixture into 1-inch balls and place them on a parchment-lined baking sheet. Pop them in the fridge for at least 30 minutes to firm up before dipping. This chilling step helps the pops hold their shape perfectly when coating with chocolate.
Step 4: Dip in Chocolate Coating
Melt your orange melting wafers according to the package directions—smooth and warm but not too hot. Dip each chilled cake ball into the melted candy, tapping off excess, then stick them into a styrofoam block or stand upright to set. This is where your Halloween magic begins with that bright orange coating making these look like mini pumpkins.
Step 5: Decorate and Detail
After the coating hardens, pipe green frosting on top as stems and use your black edible ink pen to draw cute or spooky faces—your choice! Honestly, I love this step the most because it lets your personality shine through each pop. Kids especially love adding eyes, mouths, and funny expressions.
Pro Tips for Making Halloween Cake Pops Recipe
- Use Quality Melting Wafers: I discovered these melt smoother and harden shinier, giving your pops that professional finish.
- Chill Twice: Chilling the cake balls before and after dipping keeps your pops sturdy and less likely to crack.
- Avoid Overmixing Cake and Frosting: Mix just enough to hold—too much butter or sugar will make the pops greasy or too sweet.
- Handle Delicate Decorating Gently: Wait until the coating is fully set before adding details to avoid smudges or bleeding colors.
How to Serve Halloween Cake Pops Recipe
Garnishes
I usually add green frosting “stems” and then draw faces with a black edible pen—makes them look like cute pumpkins! Occasionally, I sprinkle a little edible glitter or use Halloween-themed sprinkles to give them an eye-catching shimmer that friends always compliment.
Side Dishes
These cake pops pair wonderfully with a warm apple cider or hot chocolate on a chilly October evening. For a party spread, I like to offer them alongside some salty popcorn or roasted pumpkin seeds to balance out the sweetness.
Creative Ways to Present
Presentation is everything! I’ve set up fun “pumpkin patches” using green shredded paper grass in baskets or placed pops upright in mini pumpkin containers. For parties, arranging them on tiered stands gives a festive vibe, and you can label each style—pumpkins, mummies, ghost pops—for a cute effect.
Make Ahead and Storage
Storing Leftovers
You can store your leftover cake pops in an airtight container at room temperature for a day or two, but I find they last best when refrigerated—just bring them to room temp before serving so the flavor and texture shines.
Freezing
If you want to make these ahead of time, freezing works great! Place the decorated pops on a tray, freeze until solid, then transfer to a freezer-safe bag. They thaw quickly at room temp, and I always pop them back in the fridge before serving for best taste.
Reheating
Because these are cold treats, I don’t really reheat them—just let them sit out for about 15 minutes if refrigerated or frozen to take the chill off. This helps the chocolate coating soften just enough without losing that lovely snap.
FAQs
-
Can I use other cake flavors for this Halloween Cake Pops Recipe?
Absolutely! While I love white cake for the bright look, chocolate, red velvet, or even spice cake can work beautifully and add unique flavors that complement the Halloween theme.
-
What’s the best way to melt the chocolate wafers without burning them?
I recommend melting them in short bursts in the microwave (20-30 seconds) stirring between each or using a double boiler to gently melt without overheating, which helps maintain a smooth texture.
-
How do I prevent cake pops from falling off the sticks?
A little trick I learned is to dip the tip of your stick into melted chocolate before inserting it into the cake ball—this acts like glue and keeps the pop securely in place.
-
Can I make these cake pops ahead of time?
Yes! They can be made and decorated a day or two in advance and stored in the fridge or freezer until you’re ready to serve.
-
What if I don’t have an edible ink pen?
No worries! You can use melted dark chocolate piped with a toothpick or a fine piping bag for faces and details. Just be patient with your design, and it’ll look great!
Final Thoughts
I absolutely love how this Halloween Cake Pops Recipe turns out every single time. It’s not just about the taste (though they’re irresistibly delicious), it’s about the joy of making and sharing something festive and fun. I remember the first time I handed these to my kids’ friends—they were instant favorites! I hope you’ll give this recipe a try and make some sweet memories in your kitchen this Halloween.
Print
Halloween Cake Pops Recipe
- Prep Time: 40 min
- Cook Time: 20 min
- Total Time: 60 min
- Yield: 24 cake pops
- Category: Dessert
- Method: No-Cook
- Cuisine: American
- Diet: Vegetarian
Description
Delightfully festive and bite-sized, these Halloween Cake Pops combine moist white cake with creamy frosting and a luscious chocolate coating. Perfect for spooky celebrations, they can be decorated as pumpkins, mummies, or adorned with fun sprinkles to create a festive treat everyone will love.
Ingredients
Cake
- 15 ounce box white cake mix
Frosting and Coating
- 1 stick salted butter, softened
- 2 to 2 1/2 cups powdered sugar
- 1 teaspoon vanilla extract
- 1 Tablespoon heavy cream or milk
Chocolate Melting Wafers
- 5 ounce chocolate melting wafers
- 10 ounce package white chocolate melting wafers (preferably Ghirardelli)
- 10 ounces orange melting wafers
Decorations
- Green frosting
- Black edible ink pen
Instructions
- Bake the Cake: Prepare the white cake according to the package directions and bake it in a 9×13 inch pan. Allow the cake to cool completely before proceeding to the next step.
- Make the Frosting: In a mixing bowl, cream the softened salted butter. Gradually beat in powdered sugar, vanilla extract, and heavy cream or milk until smooth and spreadable. Adjust the powdered sugar or cream amount to achieve the right consistency.
- Crumble the Cake: Once the cake is cooled, crumble it into fine crumbs in a large bowl, ensuring no large chunks remain for easier mixing.
- Mix Cake and Frosting: Combine the cake crumbs with the frosting a little at a time, mixing thoroughly until the mixture holds together and can be shaped into balls without falling apart.
- Shape Cake Pops: Using your hands, form the mixture into small bite-sized balls. Place them on a parchment-lined baking sheet and chill in the refrigerator for at least 30 minutes to firm up.
- Melt Chocolate Coatings: Melt the chocolate melting wafers, white chocolate melting wafers, and orange melting wafers separately in microwave-safe bowls following package instructions until smooth.
- Coat Cake Pops: Dip each cake ball into the melted chocolate of choice, tapping off excess, then place back on parchment to set. Repeat until all pops are coated.
- Decorate: Use green frosting and black edible ink pens to decorate the cake pops as pumpkins, mummies, or with festive sprinkles according to personal creative preference.
- Allow to Set: Refrigerate the decorated cake pops until the coating hardens completely before serving.
Notes
- These cake pops are fun to decorate for Halloween but can be adapted with any design or color for other occasions.
- Make sure the cake is completely cooled before crumbling to avoid clumping.
- Chilling the cake balls before coating prevents them from falling apart when dipped in chocolate.
- Use good quality melting wafers for a smooth and shiny coating.
- Store cake pops refrigerated and consume within 3-4 days for best freshness.
Nutrition
- Serving Size: 1 cake pop
- Calories: 110
- Sugar: 15 g
- Sodium: 36 mg
- Fat: 6 g
- Saturated Fat: 4 g
- Unsaturated Fat: 2 g
- Trans Fat: 0 g
- Carbohydrates: 15 g
- Fiber: 0.5 g
- Protein: 1 g
- Cholesterol: 9 mg


