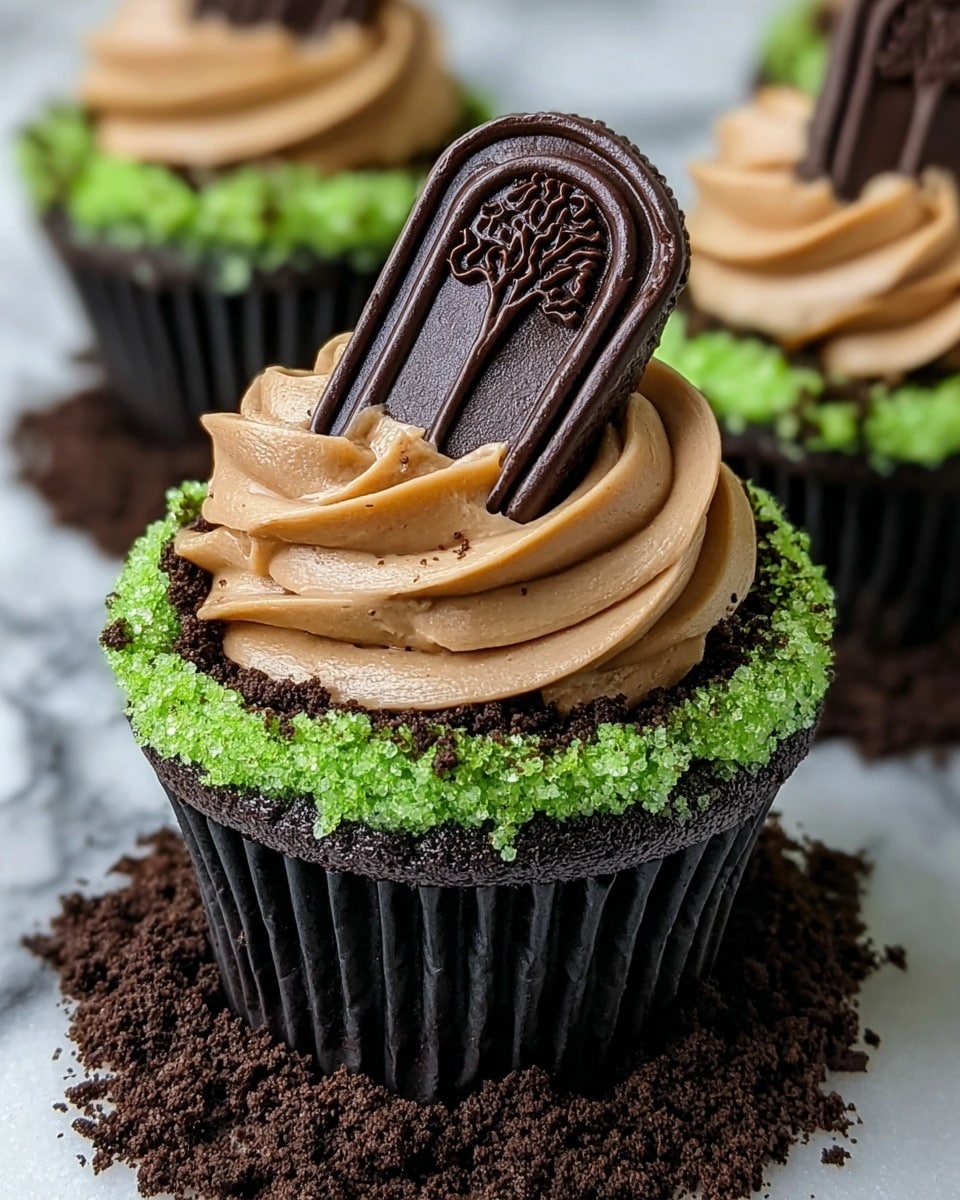
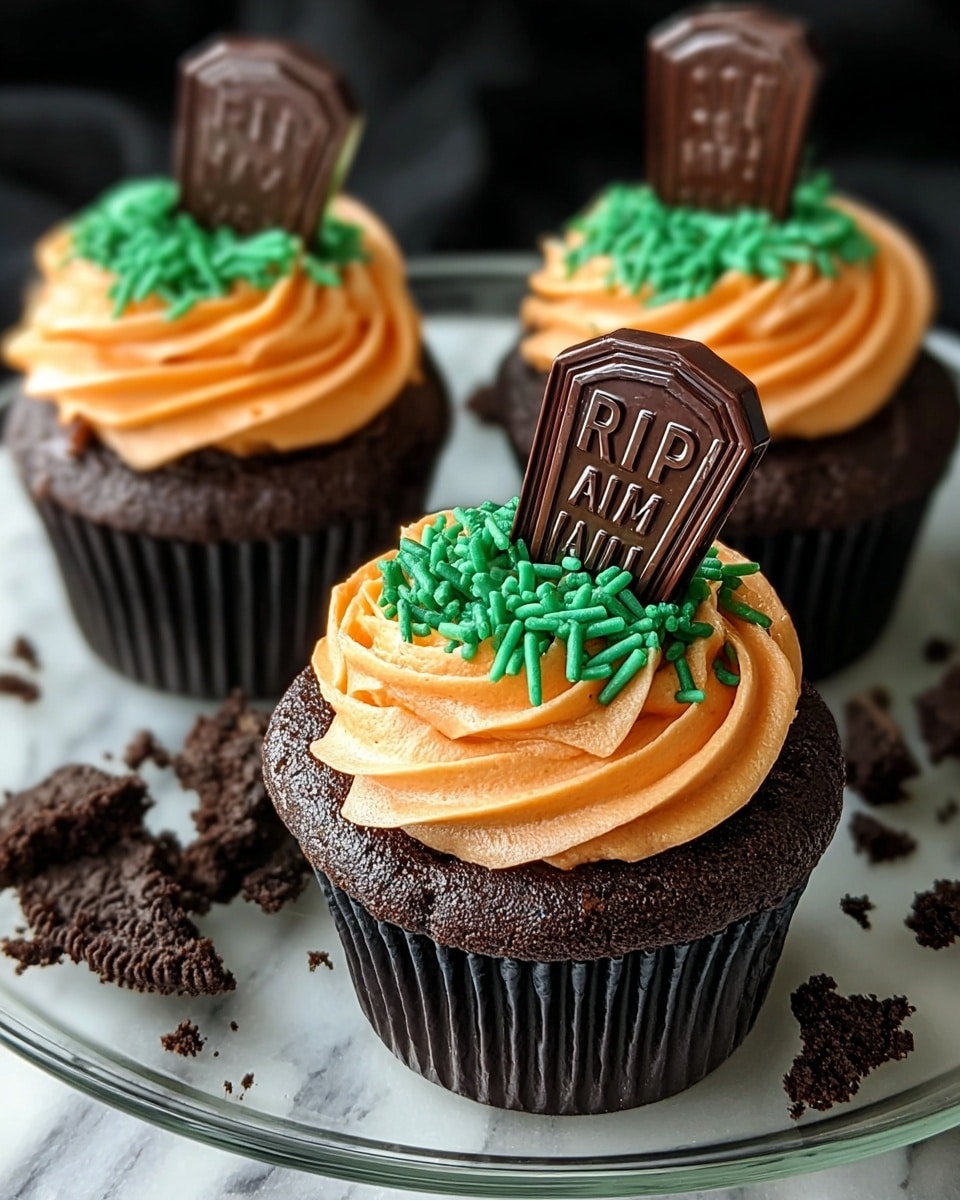
If you’re looking to wow your friends and family with a spooktacular treat this season, I absolutely adore sharing this Halloween Graveyard Cupcakes Recipe with you. It’s more than just cupcakes—it’s a whole fun experience of delicious chocolate cake hiding a creamy Oreo cheesecake center, topped with chocolate buttercream, crushed Oreo “soil,” and whimsical Biscoff biscuit gravestones. Trust me, once you try it, these creepy yet cute cupcakes become an instant Halloween favorite!
Why You’ll Love This Recipe
- Fun and Creative: Decorating with biscuit gravestones and green grass buttercream adds a delightful Halloween vibe without extra stress.
- Flavor Explosion: The combo of chocolate cake and creamy Oreo cheesecake filling keeps everyone coming back for more.
- Kid-Friendly Baking: This recipe is a fantastic way to get the little ones involved in seasonal baking and decorating.
- Perfect for Parties: Impress your guests with cupcakes that look amazing and taste even better.

Ingredients You’ll Need
This Halloween Graveyard Cupcakes Recipe uses pantry staples mixed with fun elements like biscuits and crushed Oreos to build layers of flavor and texture. Here’s a bit about why these ingredients work so well together and how to choose the best ones.
- Lotus Biscoff biscuits: These make the perfect crunchy, spicy “gravestones” thanks to their caramelized touch.
- Dark chocolate: Use good quality melted dark chocolate for rich, deep flavor in the cupcake batter.
- White chocolate: It’s for a subtle drizzle and extra sweetness in the decoration stage.
- Baking spread or unsalted butter: Make sure it’s softened to get smooth, airy cupcakes.
- Caster sugar: It dissolves better than granulated, making your cupcakes tender.
- Eggs: Large eggs bind everything together and add moisture.
- Milk: Just a splash to keep your batter silky.
- Self-raising flour: This adds the perfect lift to your cupcakes without extra leaveners.
- Cocoa powder: For that unmistakable rich chocolate flavor in the cupcakes and frosting.
- Baking powder: A touch helps with rise and fluffiness.
- Full-fat cream cheese: Essential for that creamy, tangy cheesecake filling.
- Icing sugar: For sweetening frosting and filling into smooth perfection.
- Oreos (crushed): Both mix in the cheesecake and act as “soil” on top—double the fun!
- Vanilla extract: Adds warmth and depth to all your sweet components.
- Green food coloring: To tint your buttercream into spooky “grass.”
Variations
One of the best parts of this Halloween Graveyard Cupcakes Recipe is how easy it is to tweak based on your taste or special diets. I like to play with the filling sometimes, and you’ll find some delicious adaptations here.
- Make it Vegan: I tried swapping the butter and cream cheese for dairy-free versions, and it turned out surprisingly indulgent while still keeping that spooky vibe.
- Spice it Up: Adding a pinch of cinnamon and nutmeg to the cake batter gave a lovely autumnal feel that pairs beautifully with the chocolate.
- Alternative Fillings: If Oreos aren’t your thing, try using cookie crumbs from your favorite chocolate chip cookies or a dollop of pumpkin cheesecake filling for an extra seasonal twist.
- Nutty Touch: For extra texture, sprinkle chopped toasted pecans into the frosting or on top for a little crunch.
How to Make Halloween Graveyard Cupcakes Recipe
Step 1: Prep and Whip Your Batter
Start by preheating your oven to 140°C fan (or 160°C conventional). Line your cupcake tin with cases to keep things tidy. Now, grab your softened butter and caster sugar and cream them together until they’re fluffy—this is key to a light, tender cupcake. Then, add your eggs one at a time, beating well after each addition. Don’t rush here; you want everything fully combined. Next, gently fold in the self-raising flour, cocoa powder, and baking powder, being careful not to overmix or you’ll lose that fluffiness.
Step 2: Bake and Cool Your Cupcakes
Divide the batter evenly among your cupcake cases. I like to fill each about 2/3 full so they rise nicely without spilling over. Bake in your preheated oven for around 25-30 minutes. You’ll know they’re done when a toothpick inserted comes out clean or with a few moist crumbs. Let them cool completely on a wire rack before moving on — if you try filling them while still warm, the cheesecake filling might melt and make a mess.
Step 3: Make the Oreo Cheesecake Filling
While your cupcakes cool, mix the cream cheese with icing sugar until smooth. Stir in the crushed Oreos and a hint of vanilla extract for that classic flavor. This filling is thick enough to hold its shape but creamy enough to be a yummy surprise in each cupcake bite.
Step 4: Core and Fill Your Cupcakes
Use a small knife or cupcake corer to gently remove the center from each cooled cupcake—about an inch deep. Don’t throw those tops away! Fill each cavity with your Oreo cheesecake filling, then return the cake “lid” if you like, to keep a neat look.
Step 5: Create the Chocolate Buttercream and Decorate
The chocolate buttercream is the star here. Beat your softened butter until creamy, then gradually beat in icing sugar and cocoa powder. Add 1-2 teaspoons of milk if needed to get a lovely spreadable texture. Use a piping bag or simply a knife to cover each cupcake. Then sprinkle crushed Oreos on top to resemble “soil.” Break up the Lotus Biscoff biscuits and stand them upright as “gravestones.” Finish by piping green-tinted buttercream in little bunches to mimic creepy grass growing around the graves. I love how this little extra touch transforms the cupcakes into a mini Halloween graveyard scene.
Pro Tips for Making Halloween Graveyard Cupcakes Recipe
- Softened Butter Matters: I learned the hard way that cold butter makes it tough to get a smooth, creamy frosting—so always soften it well.
- Don’t Rush Cooling: If your cupcakes are even slightly warm before you core and fill, the cheesecake filling can melt, leading to a messier cupcake.
- Crush Oreos Fresh: Crushing Oreos right before decorating keeps them crunchy and adds great “soil” texture for the graveyard.
- Pipe Grass Last: Adding green buttercream grass after placing gravestones creates a fun 3D effect—try different piping tips for more variation.
How to Serve Halloween Graveyard Cupcakes Recipe
Garnishes
I like to keep the garnishes playful and simple to maintain that spooky vibe. The crushed Oreo “soil,” broken Lotus Biscoff biscuit gravestones, and vibrant green buttercream grass give these cupcakes their unmistakable graveyard charm. You can drizzle a little melted white chocolate for an eerie spider web effect—just a personal touch I adore for parties.
Side Dishes
Pair these cupcakes with a cozy cup of hot cocoa or spiced apple cider for the perfect seasonal treat. They hold up well alongside lighter fare like fruit skewers or a simple green salad if you’re serving a full spread at a Halloween gathering.
Creative Ways to Present
One Halloween, I served these cupcakes on a large platter lined with crumbled Oreos and a few faux moss patches to simulate a graveyard setting. Adding tiny plastic skeletons and candles made my display a real conversation starter. You could even name your gravestones with edible markers for a creepy customizable touch—kids love that!
Make Ahead and Storage
Storing Leftovers
If you have any leftovers (which rarely happens!), store the cupcakes in an airtight container in the refrigerator. They’ll keep well for 2-3 days. I wrap mine individually in plastic wrap before placing them in the container so the frosting stays intact and fresh.
Freezing
Freeze the cupcakes without filling or frosting if you want a quick bake-ahead option. Once baked and cooled, wrap them tightly in plastic wrap and place in a freezer bag. Thaw overnight in the fridge before filling and decorating fresh. This way, your dessert will still look and taste amazing without any soggy textures.
Reheating
Since these are best served chilled or at room temperature, reheating isn’t usually necessary. However, if you want to warm a cupcake slightly, gently microwave it for 5-7 seconds, just enough to take the chill off without melting the frosting or filling.
FAQs
-
Can I use other types of biscuits instead of Lotus Biscoff for the gravestones?
Absolutely! While Lotus Biscoff’s caramelized flavor complements the chocolate beautifully, you can use ginger snaps, graham crackers, or even chocolate wafer cookies as gravestones. Just pick something sturdy that breaks into tombstone-like shapes.
-
What’s the best way to crush Oreos for the soil topping?
I like using a zip-top bag and a rolling pin to crush Oreos into coarse crumbs so there’s still some texture. Avoid crushing them into powder for the best “soil” effect and crunch.
- Can I make the cupcakes dairy-free or vegan?
Yes, you can substitute dairy butter and cream cheese with plant-based alternatives. Use a dairy-free baking spread and vegan cream cheese. Note that texture might be slightly different but still delicious.
- How far ahead can I make these cupcakes?
You can bake the cupcakes up to 2 days in advance and keep them refrigerated. Assemble and decorate them on the day you plan to serve for the best flavor and appearance.
- Is it necessary to core the cupcakes for the cheesecake filling?
Coring gives a fun surprise center that I love! But if you’re short on time, you can also pipe the cheesecake on top or dollop it on the side—though the center filling adds an extra wow factor.
Final Thoughts
This Halloween Graveyard Cupcakes Recipe holds a special place in my heart because it combines festive fun with seriously delicious flavors. The joy of surprising someone with the creamy Oreo cheesecake center wrapped in a rich chocolate cake is unbeatable. Plus, decorating those spooky graves inspires a little creative play, making it perfect for baking with kids or friends. So, I highly encourage you to try this recipe this October—you won’t regret bringing these hauntingly good treats to your Halloween table!
Print
Halloween Graveyard Cupcakes Recipe
- Prep Time: 30 min
- Cook Time: 30 min
- Total Time: 1 hr
- Yield: 12 cupcakes (12 servings)
- Category: Dessert
- Method: Baking
- Cuisine: American
Description
Halloween Graveyard Cupcakes are a festive and spooky treat perfect for Halloween celebrations. These chocolate cupcakes are moist and rich, filled with creamy Oreo cheesecake, and topped with luscious chocolate buttercream. Decorative Biscoff biscuit gravestones, crushed Oreos mimicking soil, and vibrant green buttercream grass complete the eerie graveyard scene. Ideal for parties or fun baking with kids, these cupcakes combine delightful flavors with creative decoration to impress guests and celebrate the spooky season.
Ingredients
Cupcakes
- 175 g baking spread or unsalted butter, softened
- 175 g caster sugar
- 3 large eggs
- 2 tbsp milk
- 150 g self-raising flour
- 25 g cocoa powder
- 1/4 tsp baking powder
Oreo Cheesecake Filling
- 115 g full-fat cream cheese
- 15 g icing sugar
- 15 g Oreos, crushed
- 1/8 tsp vanilla extract
Chocolate Buttercream
- 100 g unsalted butter, softened
- 165 g icing sugar
- 35 g cocoa powder
- 1-2 tsp milk
Green Grass Buttercream
- 25 g unsalted butter, softened
- 50 g icing sugar
- 1/8 tsp vanilla extract
- Green food coloring
Decorations
- 12 Lotus Biscoff biscuits
- 30 g dark chocolate, melted
- 30 g white chocolate, melted
- 35 g Oreos, crushed
Instructions
- Preheat Oven: Set your oven to 140°C fan / 160°C conventional / 325°F and prepare a cupcake tin by lining it with cupcake cases.
- Make Cupcake Batter: Cream together the softened baking spread or butter and caster sugar until fluffy and light. Add the eggs one at a time, beating well after each addition. Stir in the milk to combine.
- Incorporate Dry Ingredients: Sift together the self-raising flour, cocoa powder, and baking powder. Gently fold these dry ingredients into the wet mixture until just combined, careful not to overmix.
- Bake Cupcakes: Divide the batter evenly among the cupcake cases. Bake in the preheated oven for 25 to 30 minutes or until a skewer inserted into the center comes out clean. Remove from the oven and allow to cool completely before filling.
- Prepare Oreo Cheesecake Filling: In a bowl, mix together full-fat cream cheese, icing sugar, crushed Oreos, and vanilla extract until smooth and well combined.
- Core and Fill: Use a small knife or cupcake corer to gently remove the center of each cooled cupcake, creating a hole. Fill this cavity with the Oreo cheesecake mixture evenly among cupcakes.
- Make Chocolate Buttercream: Beat softened butter until creamy. Gradually add icing sugar and cocoa powder, then add milk a teaspoon at a time until desired spreading consistency is reached.
- Decorate Cupcakes: Spread or pipe the chocolate buttercream over the filled cupcakes. Insert Lotus Biscoff biscuits upright into the cupcakes to mimic gravestones. Sprinkle crushed Oreos around as soil.
- Make Green Grass Buttercream: Beat softened butter, icing sugar, vanilla extract, and green food coloring until fluffy. Pipe grass details around the cupcake edges using a grass piping tip to complete the graveyard look.
- Final Touches: Optional decoration includes drizzling melted dark and white chocolate over the biscuits for added detail and effect of eerie gravestones.
Notes
- Use room temperature ingredients for better mixing and texture.
- Do not overmix the batter to keep cupcakes light and fluffy.
- Allow cupcakes to cool completely before coring and filling to prevent filling from melting.
- Biscoff biscuits make perfect grave markers and add a delicious caramel flavor.
- Adjust green food coloring to get the desired grass shade.
- These cupcakes can be stored in an airtight container in the refrigerator for up to 3 days.
- Bring to room temperature before serving for best taste and texture.
Nutrition
- Serving Size: 1 cupcake
- Calories: 375
- Sugar: 35g
- Sodium: 150mg
- Fat: 20g
- Saturated Fat: 10g
- Unsaturated Fat: 8g
- Trans Fat: 0g
- Carbohydrates: 44g
- Fiber: 2g
- Protein: 4g
- Cholesterol: 70mg


