If you’re looking for a festive treat that’s not only spooky but also seriously delicious, you’re in the right place. This Halloween Graveyard Pudding Cups Recipe is a total crowd-pleaser and comes together faster than you’d think. I absolutely love how these pudding cups look like mini haunted graveyards—and the best part? They taste incredible, creamy with just the right amount of chocolate and crunch. Stick around because I’m sharing all my tricks to make your Halloween dessert stand out this year!
Why You’ll Love This Recipe
- Effortless Halloween Fun: This recipe is simple enough to whip up on a busy day but impressively festive in appearance.
- Crowd Pleaser: My family goes crazy for these, especially the crunchy Oreo “dirt” topping and rich chocolate mousse.
- Customizable & Kid-Friendly: You can add gummy worms or fun decorations and get the kids involved in crafting their spooky cups.
- Make-Ahead Convenience: You can prepare these a few hours ahead, making party day a breeze.

Ingredients You’ll Need
The magic happens when creamy whipped topping meets bittersweet melted chocolate and Oreo crumbs for texture. Each ingredient plays its part to create that perfect spooky graveyard vibe with luscious chocolate flavor. Here are the key players you’ll want to grab:
- Heavy whipping cream: This is the base of your mousse—make sure it’s cold for fluffier peaks.
- Semi-sweet chocolate wafers or chocolate chips: Melts smoothly and balances sweetness.
- Oreo cookies: Crushed for the “dirt” effect on top and bottom layers.
- Milano double chocolate cookies: Perfect to turn into spooky tombstones.
- Black frosting or edible marker: To write “RIP” on your tombstone cookies for authenticity.
- Gummy worms (optional): Adds a creepy-crawly fun touch if you like a bit of extra Halloween flair.
Variations
I love how flexible this Halloween Graveyard Pudding Cups Recipe is! Over time, I’ve experimented with a few fun tweaks—feel free to make it your own, whether you want to keep it dairy-free or just add more flair.
- Dairy-Free Version: I swapped heavy cream for coconut cream once, and it still whipped up nicely—plus, it adds a subtle coconut twist.
- Different Cookie Bases: Instead of Oreos, try chocolate graham crackers or chocolate wafer cookies for the “dirt” crumbs to change the texture.
- Halloween Toppings: I’ve added edible eyes and candy bones before for extra creepy fun perfect for little guests.
- Flavor Boost: Add a teaspoon of espresso powder to your melted chocolate—it deepens the chocolate flavor without making it taste like coffee.
How to Make Halloween Graveyard Pudding Cups Recipe
Step 1: Craft Your Spooky Tombstones
Start off by using black frosting or an edible marker to write “RIP” on six Milano double chocolate cookies. This step is so much fun—I even got my kids involved one Halloween! Set these aside carefully because they’re going to be the centerpiece of your graveyard cups.
Step 2: Whip Your Cream to Stiff Peaks
Grab your chilled heavy whipping cream and whip it in a clean bowl until stiff peaks form—this usually takes about 3-5 minutes with an electric mixer. If you’ve never whipped cream before, the key is to keep an eye on it so it doesn’t turn into butter!
Step 3: Melt the Chocolate Gently
Place your semi-sweet chocolate wafers or chips in a microwave-safe bowl and heat at 50% power for 30 seconds intervals. Stir between each heating to ensure smooth melting and prevent burning. Once melted, let it cool for about 10 minutes before mixing it with the cream.
Step 4: Fold Chocolate into Whipped Cream
Slowly fold the cooled melted chocolate into the whipped cream. This folding method keeps your mousse light and fluffy. Take your time here, gently combining layers until you have a luscious chocolate mousse ready for layering.
Step 5: Assemble the Graveyard Layers
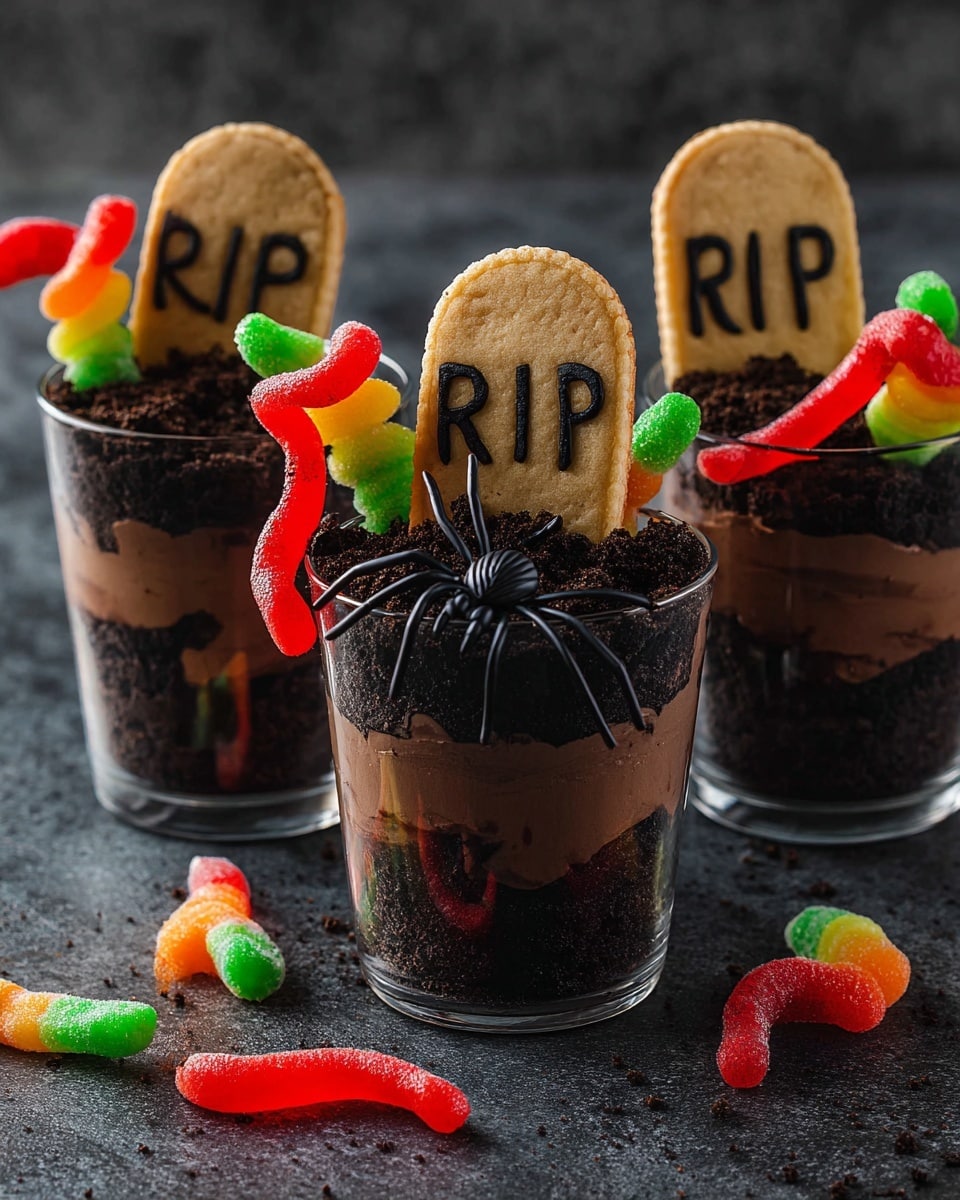
Crush about 3-4 tablespoons of Oreo cookies until you have a fine crumb. Spoon some at the bottom of each clear 9 oz cup to create your “dirt” base. Add a layer of the chocolate mousse on top, then repeat with another crushed Oreo layer and mousse. Finish with a generous sprinkle of cookie crumbs at the top right to the edge of each cup—this makes it look just like soil ready for your tombstone.
Step 6: Chill and Decorate
Refrigerate the pudding cups for at least 2 hours to let everything set perfectly. Just before serving, pop one “RIP” Milano cookie tombstone into the center of each cup. If you want to add some wriggly fun, tuck gummy worms in around the tombstones. It always gets a giggle or two!
Pro Tips for Making Halloween Graveyard Pudding Cups Recipe
- Chill Your Bowls and Whisk: I discovered this trick when I chilled my mixing bowl and whisk in the freezer for 10 minutes before whipping cream – it whips faster and holds peaks better.
- Don’t Overheat the Chocolate: Microwave at half power and check often to avoid burnt chocolate, which can ruin the flavor.
- Fold, Don’t Stir Vigorously: Folding preserves the mousse’s light texture, letting it stay fluffy and airy.
- Use Clear Cups for Maximum Effect: I love using clear cups so you and your guests can see all the beautiful layers—it’s almost too pretty to eat!
How to Serve Halloween Graveyard Pudding Cups Recipe
Garnishes
I really enjoy topping these cups with a dollop of freshly whipped cream just before serving for extra creaminess. Adding a few gummy worms winding their way around the tombstones is my favorite spooky touch—it’s playful and definitely kid-friendly. Sometimes I’ll dust a pinch of cocoa powder on top for a “dirtier” look or add tiny candy bones for a graveyard vibe that wows.
Side Dishes
Since these pudding cups are pretty rich on their own, I like pairing them with simple fruit platters or light finger sandwiches if it’s a party. Fresh berries add a nice tart contrast, and veggie sticks with hummus keep things balanced if you want to keep everything kid-friendly but nutritious.
Creative Ways to Present
One Halloween, I presented these pudding cups on a tray layered with crushed cookie crumbs and plastic “spooky” spider rings scattered around—it made the cups look like little tombs in a haunted garden. Another fun idea is to use mini terracotta pots lined with parchment paper for a “plant a grave” look that’s unique and perfect for an adult Halloween gathering.
Make Ahead and Storage
Storing Leftovers
Leftover pudding cups can be covered with plastic wrap and refrigerated for up to 2 days. I’ve found they hold their texture beautifully without the pudding or cookie crumbs getting soggy, especially if you add the tombstones right before serving.
Freezing
Freezing isn’t my go-to for this recipe; the whipped cream can separate upon thawing. But if you ever need to freeze, try scooping the mousse part separately in an airtight container and defrost gently in the fridge before assembling with cookies and decorations.
Reheating
Because this is a cold dessert, reheating isn’t necessary. I recommend serving straight from the fridge for best texture and taste. If it’s been frozen, let it thaw completely before enjoying.
FAQs
-
Can I make the chocolate mousse ahead of time?
Absolutely! You can whip and fold the chocolate mousse up to a day in advance. Just cover it well with plastic wrap and keep it refrigerated. Before assembling, give it a gentle stir to refresh the texture.
-
What can I use instead of Milano cookies for tombstones?
If you can’t find Milano cookies, chocolate-covered graham crackers or rectangular shortbread cookies work great. Just decorate with black frosting or edible markers to add the “RIP” message.
-
Can I use store-bought whipped cream?
You definitely can use store-bought whipped cream in a pinch, but I highly recommend whipping your own heavy cream for richer flavor and better texture in this recipe.
-
How do I keep the Oreo crumbs crunchy?
Layer them just before serving or refrigerate assembled cups but put the crumbs on top freshly right before serving. Sealing cups tightly also helps prevent moisture from making the crumbs soggy.
Final Thoughts
This Halloween Graveyard Pudding Cups Recipe holds a special place in my heart—not just because it’s easy and festive, but because it brings everyone together around a fun, interactive dessert. Whether it’s for a kid’s party or a grown-up Halloween bash, these pudding cups get rave reviews every time. Give it a try—you’ll enjoy the smooth chocolate mousse, the crunchy cookie dirt, and the silly, spooky decorations that make this treat truly unforgettable.
Print
Halloween Graveyard Pudding Cups Recipe
- Prep Time: 10 minutes
- Cook Time: 0 minutes
- Total Time: 2 hours 10 minutes
- Yield: 6 servings
- Category: Dessert
- Method: No-Cook
- Cuisine: American
- Diet: Vegetarian
Description
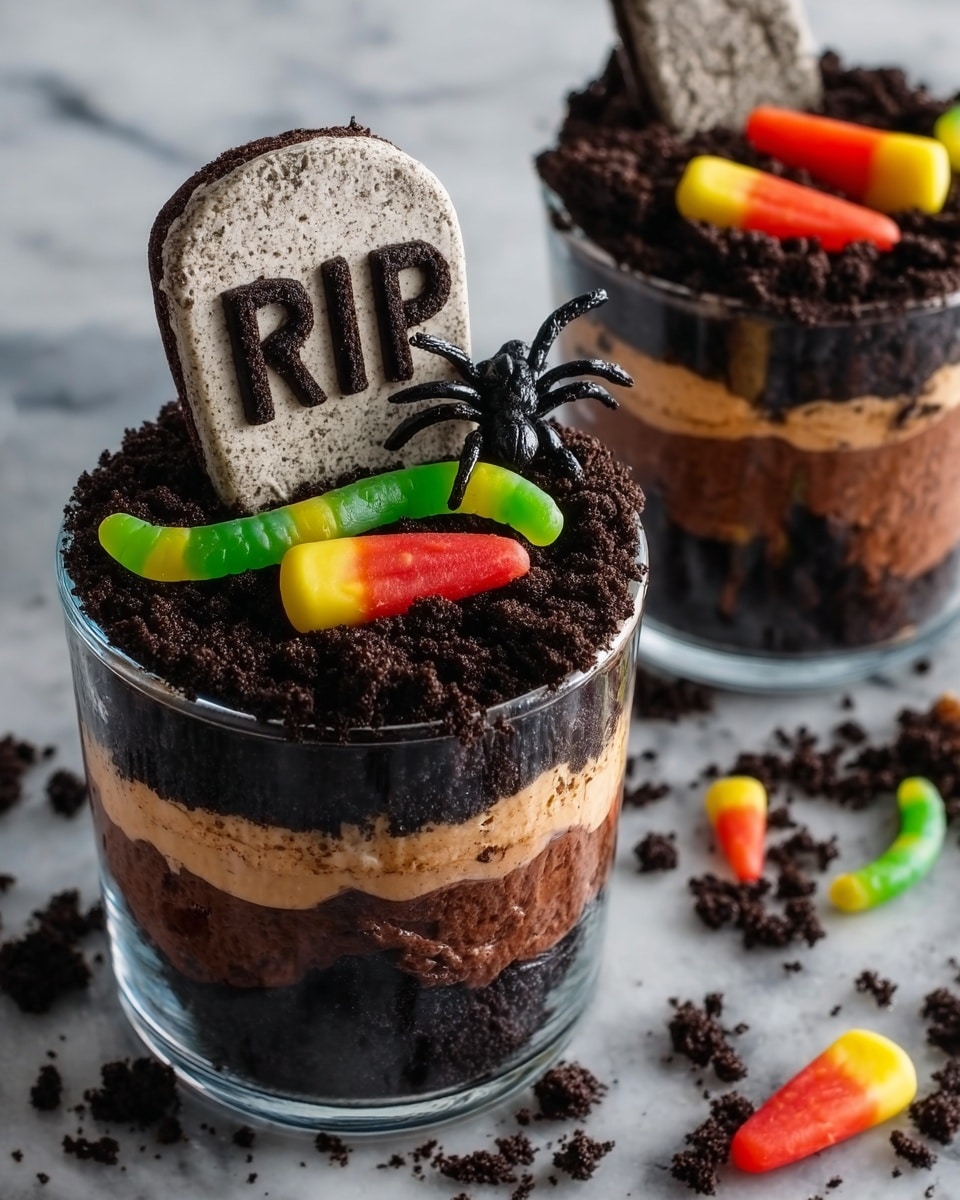
These Halloween Graveyard Pudding Cups are spooky and delicious dessert treats perfect for Halloween parties. Layers of rich chocolate mousse and crushed Oreo cookie crumbs create a dirt-like texture, topped with tombstone cookies decorated with “RIP” and optional gummy worms for a creepy graveyard effect. Creamy, chocolaty, and fun, they are easy to make and sure to impress kids and adults alike.
Ingredients
Chocolate Mousse
- 2 cups heavy whipping cream
- 6 oz semi-sweet chocolate wafers or chocolate chips
Graveyard Decorations
- 24 Oreo cookies (crushed)
- 6 Milano double chocolate cookies
- Black frosting or edible marker
- Gummy worms (optional)
Instructions
- Prepare Tombstone Cookies: Use black frosting or an edible marker to write “RIP” on 6 Milano double chocolate cookies to create tombstones. Set them aside carefully to let the frosting set.
- Whip Cream: In a mixing bowl, whip 2 cups of heavy whipping cream until stiff peaks form. This will provide a light and airy base for the mousse.
- Melt Chocolate: Place 6 oz of semi-sweet chocolate wafers or chips in a microwave-safe bowl. Microwave at 50% power for 30 seconds intervals, stirring between each until the chocolate is mostly melted and smooth. Allow it to cool for about 10 minutes to prevent curdling when mixed.
- Make Mousse: Gradually fold the melted chocolate into the whipped cream gently until fully combined, creating a fluffy chocolate mousse.
- Layer Cups: Crush 3-4 tablespoons of Oreo cookies and sprinkle the crumbs evenly at the bottom of six 9 oz clear cups.
- Add Mousse Layer: Spoon a layer of the chocolate mousse over the Oreo crumbs in each cup.
- Repeat Layers: Repeat the Oreo crumb and mousse layers once more, finishing with a top layer of crushed Oreo crumbs to resemble soil.
- Chill: Refrigerate the completed cups for 2 hours to set the mousse and allow flavors to meld.
- Decorate: After chilling, insert one decorated Milano cookie tombstone into the center of each cup.
- Optional Decoration: Add gummy worms around the tombstone for an extra spooky effect.
- Serve: Serve the graveyard pudding cups chilled, optionally topped with extra whipped cream and chocolate shavings for garnish.
Notes
- Use dark chocolate wafers or chips for a richer chocolate flavor.
- If you don’t have Milano cookies, use any chocolate sandwich cookie for tombstones and decorate with black frosting or edible marker.
- Gummy worms add a fun and spooky touch but are optional.
- For easier whipped cream, chill your mixing bowl and beaters before whipping.
- Make sure the melted chocolate has cooled before folding into whipped cream to keep the mousse light and airy.
- Can be assembled a day ahead and stored covered in the refrigerator.
Nutrition
- Serving Size: 1 cup (approx. 150g)
- Calories: 350 kcal
- Sugar: 24 g
- Sodium: 120 mg
- Fat: 25 g
- Saturated Fat: 15 g
- Unsaturated Fat: 8 g
- Trans Fat: 0 g
- Carbohydrates: 28 g
- Fiber: 2 g
- Protein: 4 g
- Cholesterol: 90 mg


