
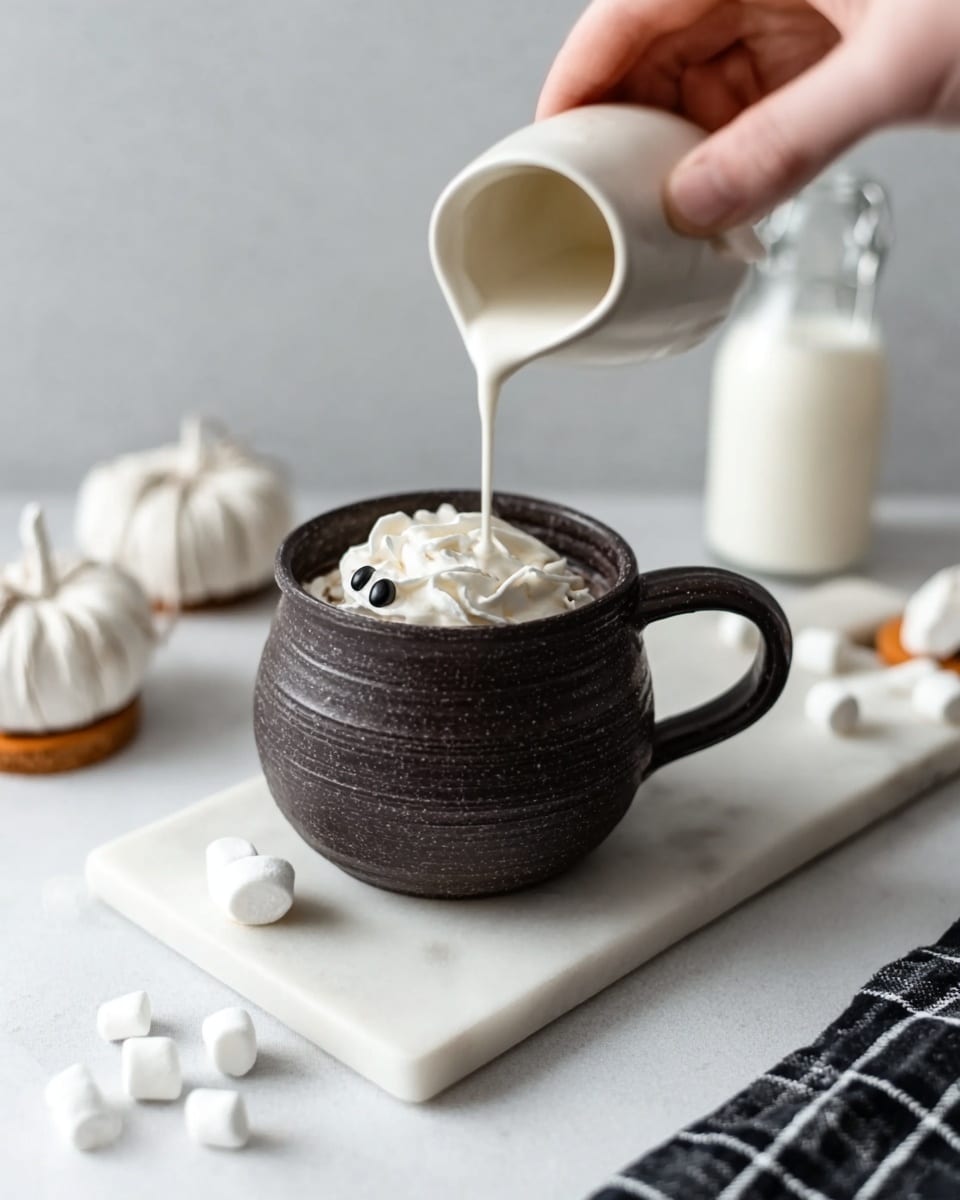
If you’re looking to wow your guests or just treat yourself this spooky season, you absolutely need to try this Halloween Hot Chocolate Bombs Recipe. These little spheres of chocolate magic are not only fun to make but explode with creamy, dreamy hot chocolate when you drop them into a cup of steaming milk. I love this recipe because it’s festive, customizable, and makes cold evenings a bit cozier. Plus, your kids (and your neighbor’s kids) will think you’re the coolest. Keep reading — I’ve got all the tips and tricks to help you nail these Halloween treats!
Why You’ll Love This Recipe
- Super Fun and Festive: These Halloween hot chocolate bombs turn an ordinary cup of cocoa into a theatrical treat that kids and adults adore.
- Simple Ingredients, Big Impact: Made mostly with white chocolate and a homemade cocoa mix, it’s easy to find what you need at any grocery store.
- Great for Gifting: Once you master the technique, these bombs are perfect little presents for parties, neighbors, or teachers.
- Customizable Decoration: Add candy eyes, sprinkles, or drizzle for totally unique Halloween vibes.

Ingredients You’ll Need
All you really need are a handful of ingredients that come together beautifully — the white chocolate shell is sweet and creamy, while the powdered cocoa mix holds the rich spicy flavor of classic hot chocolate. Here’s a quick rundown of what makes each ingredient shine.
- Powdered sugar: This sweetens the cocoa blend and helps balance the bitterness from the cocoa powder.
- Unsweetened cocoa powder: I prefer Dutch-process for a smooth, deep chocolate flavor that pairs perfectly with white chocolate.
- Finely chopped white chocolate: Melts easily and adds extra creaminess inside your bomb and on top if you like.
- Mini marshmallows: Tiny, fluffy little clouds of sweetness—essential for that classic hot chocolate feel inside the bomb.
- White chocolate bark or tempered white chocolate: The shell of your bomb and decorating base, so pick a good-quality chocolate you love to eat.
- Candy eyes and additional white chocolate or bark: For the fun Halloween decorations that bring your bombs to life.
- Very hot milk: The magic happens when your bomb melts into hot milk, so make sure it’s steaming for the best experience.
Variations
I’ve played around with a few fun twists on the Halloween Hot Chocolate Bombs Recipe, and honestly, that’s the best part — it’s so easy to make your own signature style. You might find yourself experimenting with flavors, colors, or even dietary swaps to suit your taste buds or your family’s needs.
- Spiced Bombs: I like to add a pinch of cinnamon and a dash of cayenne to the cocoa powder mixture for a little pumpkin spice vibe — perfect for fall!
- Dairy-Free Version: Swap the white chocolate and milk for dairy-free versions like coconut milk and vegan white chocolate; results are just as dreamy.
- Colorful Shells: Use black and orange candy melts instead of plain white chocolate to amp up the Halloween theme visually.
- Peanut Butter Surprise: Hide a tiny dollop of peanut butter inside before sealing the bomb for a delicious surprise that my family loves.
How to Make Halloween Hot Chocolate Bombs Recipe
Step 1: Melt and Prepare Your Chocolate Shells
Start by melting the white chocolate bark gently—either in a double boiler or microwave in short bursts, stirring often so it doesn’t scorch. This step takes patience; I once rushed it, and ended up with chunky clumps instead of smooth chocolate. Once melted, spoon the chocolate into silicone half-sphere molds, spreading evenly to the edges. Pop these in the fridge to set—this creates the shell of your bombs that needs to be sturdy but not too thick, or it won’t melt properly later.
Step 2: Mix Your Cocoa Filling
While your shells are chilling, whisk together powdered sugar, cocoa powder, finely chopped white chocolate, and mini marshmallows in a bowl. This homemade hot chocolate powder is the secret to a rich and creamy drink that’s a cut above the packet stuff. I like to add a touch of vanilla extract here sometimes, but keep it simple for best effect.
Step 3: Fill and Seal the Bombs
Once your chocolate shells are set, gently remove them from the molds. Fill one half with your cocoa mix, then carefully heat the edges of an empty half with a hot plate or warm pan to “melt” the chocolate just enough to press the two halves together. This part was tricky for me at first — don’t rush warming the edges or press too hard, or they’ll break. Wipe any spills to keep it neat and refrigerate again to seal.
Step 4: Decorate Your Halloween Hot Chocolate Bombs
Drizzle some extra melted white chocolate over the bombs and add candy eyes or other spooky accents before it sets. This is where your creative side shines! I’ve made everything from ghost faces to little pumpkin eyes by layering candy and chocolate. Let them chill fully so decorations stick well.
Pro Tips for Making Halloween Hot Chocolate Bombs Recipe
- Chocolate Tempering Is Key: Try to temper your white chocolate for a shiny, snap-worthy shell that melts correctly without being brittle.
- Don’t Overfill: Be careful not to pack the cocoa filling too tightly inside the bombs, or they might crack when melting.
- Use Silicone Molds: These molds release the chocolate easily and make cleanup a breeze — a must for Halloween fun.
- Practice Makes Perfect: Your first bomb might wobble, but don’t stress—each one you make gets better and faster!
How to Serve Halloween Hot Chocolate Bombs Recipe
Garnishes
I love topping the hot chocolate with a swirl of whipped cream, a sprinkle of cinnamon, or some crushed candy canes for a pop of color and extra sweetness. Marshmallow ghosts or little Halloween-themed sprinkles always get oohs and aahs, too. You can also rim the cups with colored sugar for a little sparkle!
Side Dishes
Because these bombs are so rich and sweet, I often serve them with simple treats like pumpkin cookies, biscotti, or even popcorn drizzled with dark chocolate. They make a lovely pairing that balances the cozy cocoa perfectly.
Creative Ways to Present
For parties, I’ve presented the bombs in clear cellophane bags tied with orange and black ribbons, nestled in mini hay bales, or arranged on a spooky platter with dry ice fog for dramatic effect. Handing them out as “potions” with a spoon looks super cute, too!
Make Ahead and Storage
Storing Leftovers
Store any extra Halloween hot chocolate bombs in an airtight container in a cool, dry place—my kitchen pantry works great if it’s not too warm. They’ll keep well for about a week, so you can enjoy hot chocolate magic on several chilly nights.
Freezing
If you want to keep your bombs longer, freezing works like a charm. I wrap each bomb individually in plastic wrap and place them in a freezer-safe container. When I’m ready for a cozy night, I just let them thaw in the fridge for a few hours before use to avoid sweating or cracking.
Reheating
Reheating isn’t necessary since these are made to melt in hot milk. But if you want to touch up decorations or gently warm them for party prep, a quick 5-10 seconds in the microwave on low power helps soften the chocolate without melting it completely.
FAQs
-
Can I use milk chocolate instead of white chocolate for the shells?
Absolutely! Milk chocolate works perfectly if you prefer a richer, less sweet shell. Just be mindful that milk chocolate melts faster, so handle it with care when sealing the bombs.
-
How do I prevent the chocolate shells from cracking?
Use tempered chocolate and ensure your shells are thick enough but not too thick—about ⅛ inch. Also, avoid rapid temperature changes when removing from molds or sealing the bombs, as this can cause cracking.
-
Can I prepare these Halloween hot chocolate bombs ahead of time?
Yes! They hold up well when stored properly for up to a week, and you can freeze them for longer storage. Just keep them in a cool, dry place or airtight containers.
-
What type of milk should I use to serve with the bombs?
Whole milk gives the creamiest result, but any milk (including plant-based milks like almond or oat) will work great. The key is that it’s very hot when you pour it over the bomb to melt it properly.
Final Thoughts
Honestly, making these Halloween Hot Chocolate Bombs has become one of my favorite seasonal traditions. They’re a perfect blend of creative fun and comfort food magic. Whether you’re surprising little ones or treating yourself after a long day, these bombs are a sweet reminder that sometimes the best recipes are the ones that bring a little extra joy and warmth. Trust me, once you try making these, you’ll be hooked—and I can’t wait for you to share the experience with your own friends and family!
Print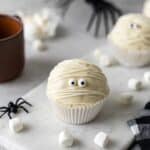
Halloween Hot Chocolate Bombs Recipe
- Prep Time: 20 minutes
- Cook Time: 15 minutes
- Total Time: 35 minutes
- Yield: 6 hot chocolate bombs
- Category: Dessert
- Method: No-Cook
- Cuisine: American
Description
Create spooky and delicious Halloween Hot Chocolate Bombs filled with rich cocoa powder, mini marshmallows, and white chocolate. These festive treats melt perfectly in hot milk, making them a fun and cozy way to celebrate the Halloween season.
Ingredients
Hot Chocolate Filling
- 1/4 cup (40 grams) powdered sugar
- 2 tablespoons (15 grams) unsweetened cocoa powder (preferably Dutch-process)
- 1/4 cup (22 grams) finely chopped white chocolate
- 1/2 cup (30 grams) mini marshmallows
Chocolate Shell
- 2 pounds (907 grams) white chocolate bark or tempered white chocolate
Decoration and Serving
- Candy eyes
- Additional white chocolate or bark for decorating
- 1 to 1 1/2 cups (240ml-355ml) very hot milk per bomb for serving
Instructions
- Prepare the Filling: In a bowl, mix together the powdered sugar, unsweetened cocoa powder, finely chopped white chocolate, and mini marshmallows to create the hot chocolate filling mixture.
- Melt the Chocolate: Gently melt the white chocolate bark or tempered white chocolate in a microwave-safe bowl in 20-30 second intervals, stirring in between until smooth and fully melted.
- Create Chocolate Shells: Using a silicone sphere mold or half-sphere molds, spoon melted white chocolate into each mold, coating evenly. Place the molds in the refrigerator to harden for about 10-15 minutes.
- Fill the Bombs: Once the chocolate shells are set, carefully remove them from the molds. Add a spoonful of the hot chocolate filling mixture into one half of each chocolate sphere.
- Seal the Bombs: Warm a plate or flat surface slightly and briefly press the edges of another chocolate half to slightly melt the edges. Quickly seal the two halves together to form a complete sphere. Chill again to fully set the seam.
- Decorate: Use melted white chocolate to attach candy eyes and create fun Halloween faces on each bomb. Allow decorations to set.
- Serve: To enjoy, place one hot chocolate bomb in a mug and pour 1 to 1 1/2 cups (240ml-355ml) of very hot milk over it. Stir as the bomb melts, releasing the hot chocolate mixture and marshmallows for a festive treat.
Notes
- Use tempered white chocolate or chocolate bark for better shell stability. If using regular white chocolate, temper it for best results.
- Be careful when melting and molding the chocolate to avoid burnt or seizing chocolate.
- Customize filling flavors by adding peppermint extract or cinnamon to the hot chocolate mixture for a seasonal twist.
- Store assembled hot chocolate bombs in a cool, dry place or refrigerate for up to 1 week.
- Warm the milk just before serving; boiling milk can cause the chocolate to seize or separate.
Nutrition
- Serving Size: 1 hot chocolate bomb with 1 cup hot milk
- Calories: 350
- Sugar: 30g
- Sodium: 70mg
- Fat: 20g
- Saturated Fat: 12g
- Unsaturated Fat: 7g
- Trans Fat: 0g
- Carbohydrates: 40g
- Fiber: 2g
- Protein: 4g
- Cholesterol: 15mg

