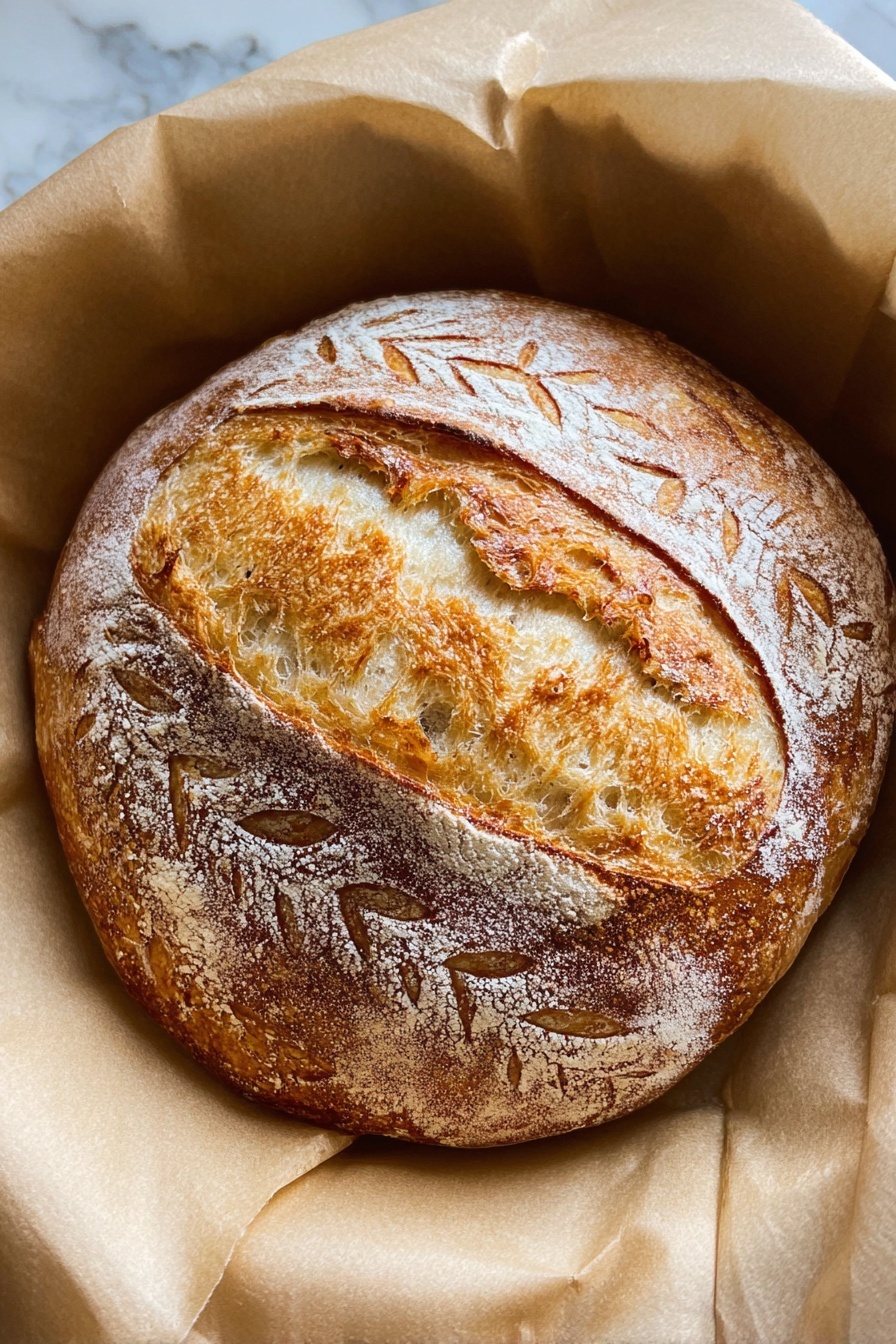
If you’ve ever thought sourdough bread was too intimidating or time-consuming, I’m here to tell you otherwise with this easy, hands-off **Overnight Sourdough Bread Recipe**. I absolutely love how this turns out—crispy crust, chewy crumb, and that perfect tangy flavor that only sourdough can deliver. You’ll find that letting the dough rise slowly overnight makes the whole process so much simpler, and you get fresh, bakery-style bread with minimal fuss. Keep reading, and I’ll walk you through every step so you can enjoy homemade sourdough with zero stress.
Why You’ll Love This Recipe
- Hands-Off Overnight Rise: You mix it up at night, then wake up to dough that’s ready to shape and bake—super convenient!
- Simple Ingredients: Just flour, water, salt, and your sourdough starter — no fancy or hard-to-find items.
- Delicious Texture and Flavor: Expect a crusty exterior with that classic sour tang and open crumb from natural fermentation.
- Adaptable and Forgiving: You can tweak rising times or flour types and still end up with fantastic bread.

Ingredients You’ll Need
For this Overnight Sourdough Bread Recipe, I love using all-purpose flour because it strikes the perfect balance between chewiness and structure. You’ll want a lively sourdough starter that’s bubbly and active but don’t stress if it’s unfed—using it straight from the fridge will give your bread a nice tang.

- Sourdough Starter: Make sure yours is bubbly and ready to go; no need to feed it right before baking unless you want a milder flavor.
- All-Purpose Flour: The base for this dough—easy to find and gives your bread a lovely texture.
- Salt: Enhances flavor and controls fermentation; I use fine sea salt for the best results.
- Water: Lukewarm is perfect to help activate your starter without killing those beneficial bacteria.
Variations
One of the best parts about this Overnight Sourdough Bread Recipe is how easy it is to make it your own. I often switch up flour blends or add mix-ins depending on the season or what’s in my pantry.
- Whole Wheat Addition: I like replacing 25% of the all-purpose flour with whole wheat for a nuttier flavor and denser crumb; just remember to add a bit more water as whole wheat absorbs more.
- Seeds and Nuts: Adding flaxseeds, sunflower seeds, or chopped walnuts during the mixing stage gives a fun texture and extra nutrition.
- Herbs and Spices: Fresh rosemary or a dash of garlic powder can turn this into a savory delight that’s great with soups or cheese boards.
- Gluten-Free Option: While I haven’t tried this exact recipe gluten-free, swapping to a gluten-free bread flour blend and adjusting water might work—you’ll have to experiment a bit here!
How to Make Overnight Sourdough Bread Recipe
Step 1: Mix and Let It Rest
The night before baking, gather your flour, starter, salt, and water in a large bowl. I love using my hands here—it might look messy, but the wet, shaggy dough is totally normal. After mixing until just combined, cover the bowl with a towel and let it sit for 15 minutes. This rest helps the flour absorb water and relaxes the dough, which makes folding easier.
Step 2: Fold the Dough
After the first rest, it’s time to fold the dough to build gluten strength without kneading. Wet your hands lightly so the dough doesn’t stick, then gently lift a corner and fold it over the rest of the dough. Rotate the bowl and repeat about 15 times until the dough feels less stretchy and a bit more elastic. Then cover and rest for another 15 minutes before folding again once more. This method keeps things gentle and helps your bread develop that open crumb I know you’ll love.
Step 3: Overnight Fermentation
Once you’ve finished folding the second time, cover your bowl again and leave it out overnight at room temperature. This slow rise is magic—while you sleep, wild yeast is working to create those classic sourdough flavors and a light, airy structure.
Step 4: Shape and Chill
The next morning, your dough will be puffy and bubbly—I get excited spotting those air bubbles on top! Gently loosen the dough with wet hands and fold it a few more times to shape. Then transfer it into a parchment-lined bowl, tucking the ends underneath for a smooth top. A generous dusting of flour on top adds a rustic look. Pop it into the fridge for 5 hours to develop even more flavor and make it easier to score later.
Step 5: Bake to Perfection
Preheat your oven to 500°F (I love using convection on mine) and place a Dutch oven inside to heat up. When it’s ready, take out your cold dough, score the top with a sharp knife, and use the parchment paper to carefully set it inside the hot Dutch oven. Cover and bake for 25 minutes, then remove the lid and reduce the temperature to 450°F, baking for another 12-14 minutes until the crust turns a gorgeous golden brown. You’ll want to wait about an hour before slicing to let the crumb set—trust me, the patience is worth it!
Pro Tips for Making Overnight Sourdough Bread Recipe
- Wet Hands for Folding: I discovered this trick so my dough doesn’t stick and tears less during folds—it really helps with handling wet sourdough dough.
- Starter Timing: Using unfed starter adds a nice tanginess; if you prefer less sour, feed your starter 8-12 hours before mixing.
- Use Parchment Paper: It’s easier and less messy to transfer your dough into the Dutch oven with parchment—I never skip this step now.
- Don’t Skip the Rest Before Baking: Letting the dough chill for 5 hours in the fridge firms it up, making it easier to score and helping create a better oven spring.
How to Serve Overnight Sourdough Bread Recipe

Garnishes
I love sprinkling a little extra flour or even sesame seeds on top of the bread before baking for a gorgeous finish. When serving, a swipe of good-quality butter and a sprinkle of flaky sea salt really elevate each slice. Sometimes, I’ll also drizzle olive oil mixed with herbs for dipping—so simple and delicious!
Side Dishes
This sourdough is a dream alongside warm soup—think tomato basil or butternut squash—or stacked with your favorite sandwich fixings like avocado, turkey, or sharp cheddar. My family goes crazy for it toasted with a smear of jam too; it turns breakfast into a treat effortlessly.
Creative Ways to Present
For special occasions, I like to slice the sourdough into thick rounds, toast them, and layer with whipped ricotta and roasted cherry tomatoes topped with basil leaves—looks fancy but takes no time. Another fun idea is turning slices into bruschetta or serving as part of an artisanal cheese board with honey and nuts.
Make Ahead and Storage
Storing Leftovers
I usually keep leftover sourdough wrapped in a clean kitchen towel inside a bread box or paper bag at room temperature—this keeps the crust nice and crisp for about 2 days. Avoid plastic wrap because it traps moisture and makes the crust soggy.
Freezing
If I don’t finish the loaf within a couple of days, I slice it and freeze the bread in a resealable bag. When I want a slice, I pop it straight into the toaster and it tastes almost as fresh as that first gorgeous bake.
Reheating
To revive leftover sourdough, I warm slices in a toaster or oven at 350°F for 5-7 minutes. This brings back the crunch and softness without drying it out. For a whole loaf, wrapping it in foil and heating for 10-15 minutes does the trick beautifully.
FAQs
-
Can I use a different type of flour in this overnight sourdough bread recipe?
Absolutely! You can swap some or all of the all-purpose flour for bread flour for a chewier texture or include whole wheat flour for a denser, nuttier loaf. Just keep in mind that whole wheat absorbs more water, so you might need to adjust the hydration slightly to keep the dough manageable.
-
Is it necessary to use a Dutch oven to bake this sourdough?
Using a Dutch oven helps trap steam, which gives the bread that crackly crust and good oven spring. If you don’t have one, you can bake the loaf on a baking stone or sheet and add a tray of water to the oven to create steam. The results might differ slightly but will still be delicious.
-
How do I know when my sourdough starter is ready for this recipe?
Your starter should be bubbly and active, usually about 4-6 hours after feeding at room temperature. However, for this recipe, you can also use unfed starter straight from the fridge if you prefer a tangier loaf. Just keep an eye on how your dough rises to adjust timing as needed.
-
Can I shorten the rising times in this overnight sourdough bread recipe?
If you’re short on time, you can let the dough rise for fewer hours, but the flavor and texture won’t develop as fully. The slow, overnight fermentation is what makes this bread so special. If needed, you can speed it up by placing the dough in a warmer spot, but I recommend planning ahead for the best results.
Final Thoughts
This Overnight Sourdough Bread Recipe really changed how I approach baking. It’s approachable, requires minimal active time, and gives you that amazing homemade bread taste without needing to be a pro baker. If you’re someone who loves a good bake but hates complicated recipes, you’ll enjoy how effortless and rewarding this is. Give it a try—I promise, once you bite into that crusty, tangy bread fresh from your oven, you’ll be hooked just like me!
Print
Overnight Sourdough Bread Recipe
- Prep Time: 40 minutes
- Cook Time: 40 minutes
- Total Time: 18 hours 20 minutes
- Yield: 12 servings
- Category: Bread
- Method: Baking
- Cuisine: American
- Diet: Vegetarian
Description
This Easy Overnight Sourdough Bread recipe yields a crusty, tangy loaf made with a simple sourdough starter and all-purpose flour. The dough requires minimal hands-on time, with folds to develop gluten, an overnight rise, and baking in a Dutch oven to achieve a beautiful crust and airy crumb. Perfect for sourdough beginners, this method uses an unfed starter for a more pronounced sour flavor and produces a delicious homemade artisanal loaf.
Ingredients
Main Ingredients
- 90 grams sourdough starter
- 520 grams all-purpose flour
- 12 grams salt
- 1 7/8 cups water
Instructions
- Mix the dough: The night before baking, combine 520 grams flour, 12 grams salt, and 90 grams sourdough starter in a bowl. Pour in 1 7/8 cups water and mix using your hands until the dough comes together, although it will be wet and not smooth. This is expected.
- First rest and folds: Cover the bowl with a towel and let the dough rest for 15 minutes. Then perform about 15 folds by taking a corner of the dough and folding it over the rest, rotating the bowl each time. Wet your hands slightly to prevent sticking. This helps develop gluten.
- Second rest and folds: Cover again and rest for another 15 minutes. Repeat the folding process once more and then cover and leave the dough out overnight to rise.
- Prepare for shaping: The next morning, the dough should have risen and show air bubbles on the surface. Line a mixing bowl with parchment paper and lightly flour it to hold the shaped dough later.
- Shape and fold the dough: Wet your hands, loosen the dough from the bowl edges, and gently lift the center to tuck the ends underneath. Rotate the bowl a quarter turn and repeat this folding twice more. Finally, lift the dough and transfer it carefully to the prepared bowl, tucking the ends underneath. Sprinkle the top with flour and refrigerate for 5 hours.
- Preheat oven and Dutch oven: Preheat your oven to 500°F (260°C) using the convection setting if available. Place a Dutch oven inside the oven to heat while it preheats.
- Score and bake: Remove the dough from the fridge and score the surface with a sharp knife, typically a long slash down the center plus smaller slashes on each side. Using the parchment paper, transfer the dough into the heated Dutch oven.
- Bake covered: Bake the bread for 25 minutes with the lid on to trap steam and form a crispy crust.
- Bake uncovered: Remove the lid, reduce oven temperature to 450°F (230°C), and bake for an additional 12-14 minutes to achieve a golden crust.
- Cool: Remove the bread from the oven, allow it to cool enough to handle, then place it on a rack to cool completely. For best texture and flavor, wait at least 1 hour before slicing and serving.
Notes
- You can substitute other types of flour but keep a large portion as all-purpose to maintain the bread’s texture.
- Adjust baking times to get your preferred crust color; longer covered baking will lighten the crust while shortening uncovered baking will reduce browning.
- Using unfed starter gives a more sour flavor, but feeding your starter 8-12 hours before baking is also a common method for a milder taste.
Nutrition
- Serving Size: 1 slice (approx. 70g)
- Calories: 170
- Sugar: 0.2g
- Sodium: 250mg
- Fat: 1.3g
- Saturated Fat: 0.2g
- Unsaturated Fat: 1.1g
- Trans Fat: 0g
- Carbohydrates: 35g
- Fiber: 2g
- Protein: 6g
- Cholesterol: 0mg


