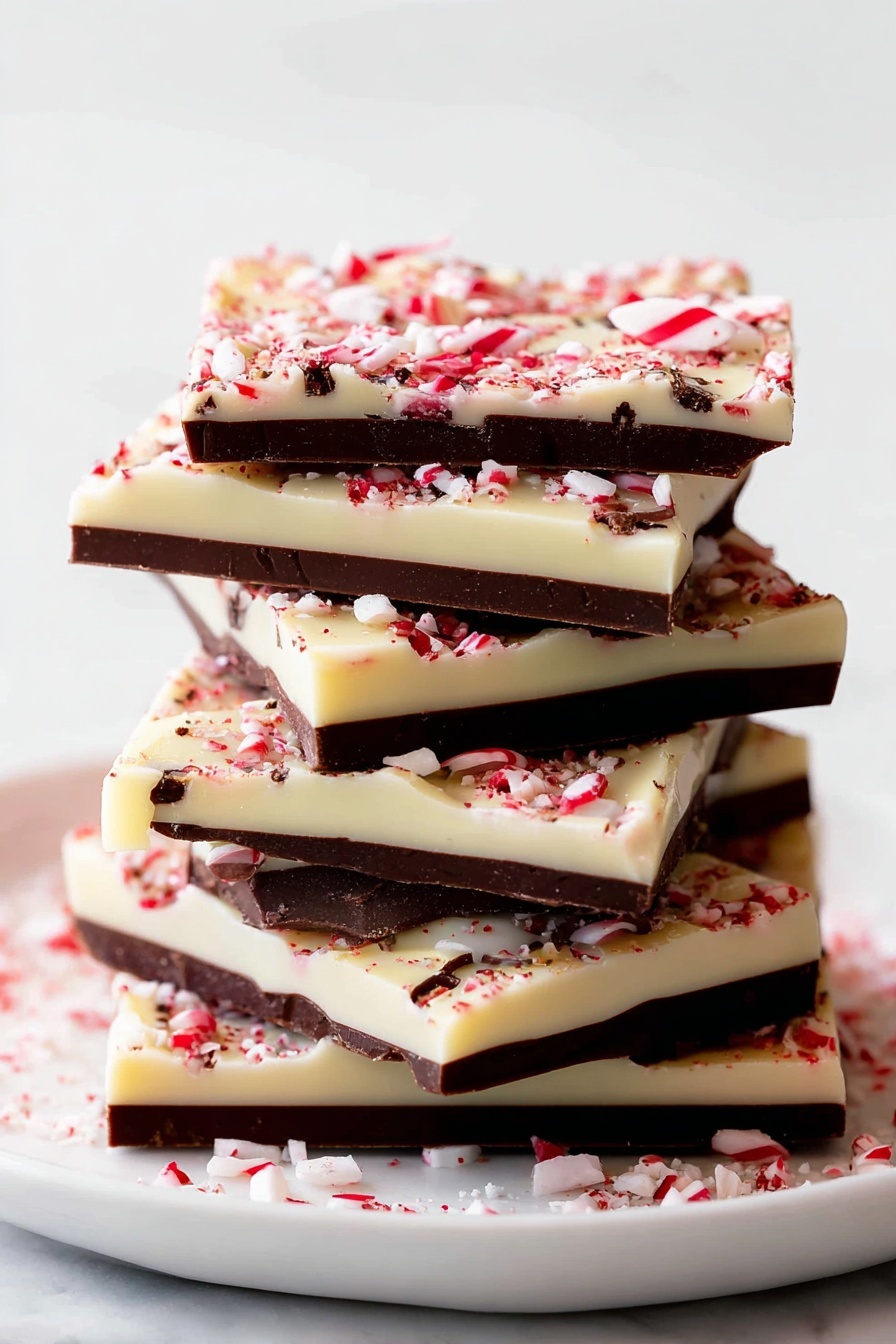
If you’re craving a festive and oh-so-delicious treat that’s crazy easy to whip up, you’re going to adore this Peppermint Chocolate Bark Recipe. I absolutely love how it combines creamy white chocolate, rich semi-sweet layers, and that unmistakable refreshing hit of peppermint—topped with crunchy crushed candy canes that just take it over the top. Trust me, once you try this, you’ll want to keep it around all winter long!
Why You’ll Love This Recipe
- Simple ingredients: You only need a handful of pantry staples that come together so effortlessly.
- Layered flavor magic: The combo of white and semi-sweet chocolate with peppermint is absolutely crave-worthy.
- Perfect for gifting: This bark looks gourmet but takes minutes, making it my go-to holiday gift.
- Customizable crunch: You can adjust the amount or type of candy cane toppings to suit your taste.

Ingredients You’ll Need
This Peppermint Chocolate Bark recipe balances creamy and bittersweet chocolate with a bright, minty pop. When shopping, grab good-quality chocolate since it really makes a difference in texture and flavor.
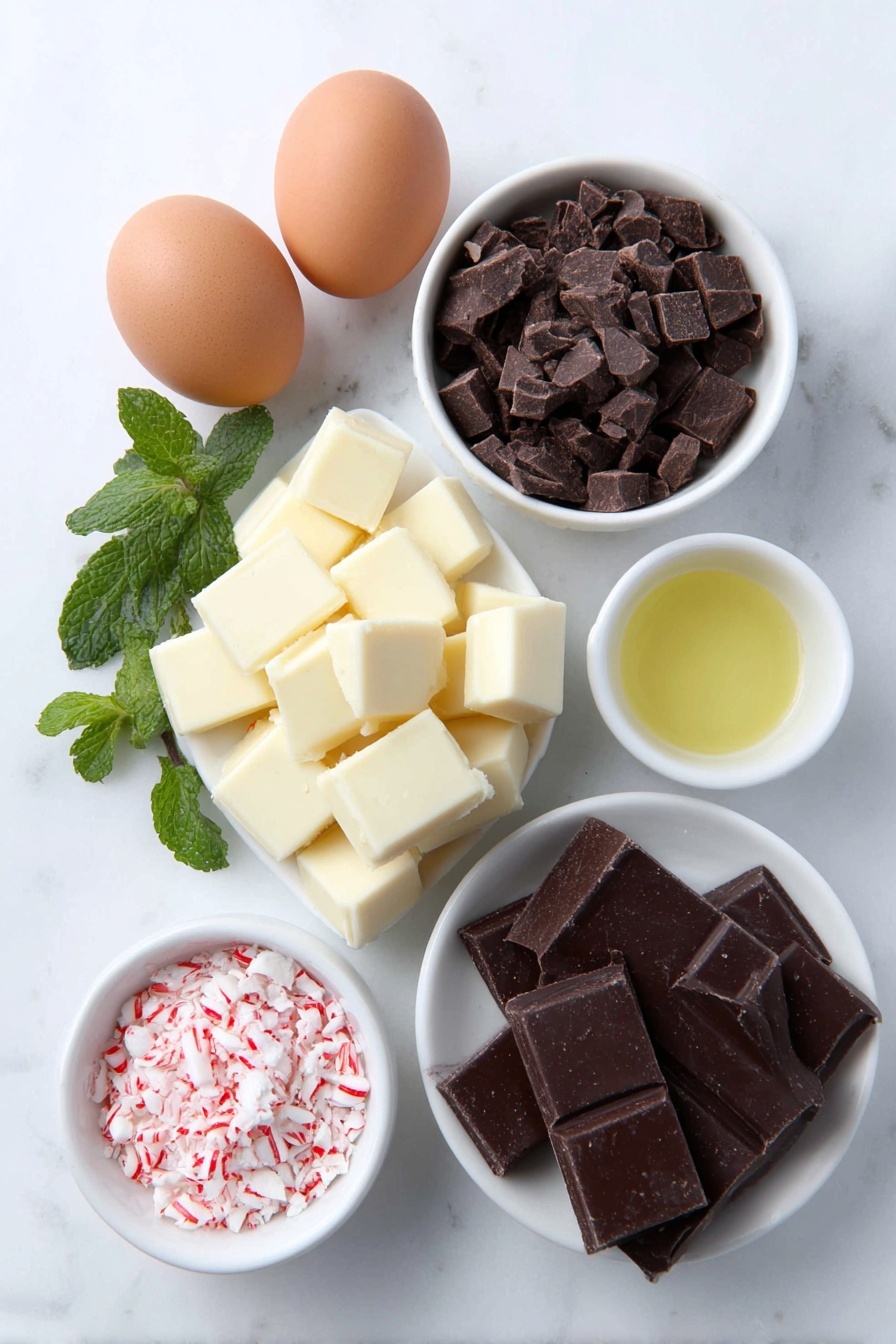
- White chocolate: Look for good-quality bars that melt smoothly; avoid chips as they often contain stabilizers that don’t melt as well.
- Semi-sweet or bittersweet chocolate: Pick a chocolate with at least 60% cacao for that perfect bittersweet contrast.
- Vegetable or coconut oil: A little oil helps the melted chocolate stay glossy and spread nicely without thickening too fast.
- Peppermint extract: Pure peppermint extract gives the best clean, refreshing flavor; start with less and add more if you want.
- Candy canes: Crushing fresh candy canes right before topping keeps them crunchy and vibrant.
Variations
I love mixing things up with this peppermint chocolate bark—once you get the base down, you can personalize it easily. Play with different toppings or even chocolate blends to make it your own.
- Dark chocolate: I swapped in dark chocolate instead of semi-sweet once, and the result was bolder and richer, perfect for serious chocolate lovers.
- Nutty twist: Adding chopped toasted almonds or pistachios on top gives an amazing crunch and an earthy flavor—you’ve got to try it!
- Vegan version: Use dairy-free white and dark chocolate, plus coconut oil, to make this recipe completely vegan-friendly without losing any creaminess.
- Holiday colors: Sprinkle festive red and green sprinkles or edible glitter for a fun party-ready look.
How to Make Peppermint Chocolate Bark Recipe
Step 1: Prepare Your Pan Like a Pro
Start by lining an 8- or 9-inch square baking pan with parchment paper or foil, making sure to smooth out any wrinkles. I learned the hard way that even little wrinkles can make the bark tricky to pop out in one piece. You can also spread it out on a lined baking sheet if you want thinner bark.
Step 2: Melting the First White Chocolate Layer
Place half of your white chocolate and 1/2 teaspoon of your oil in a heatproof bowl or liquid measuring cup. I usually melt mine in the microwave for convenience, heating in 20-second bursts and stirring vigorously after each. White chocolate is so sensitive to heat, so patience here is key to avoid seizing. Once silky smooth, stir in 1/4 teaspoon peppermint extract. Pour this into your prepared pan and spread it evenly with a spatula. Pop it in the fridge for 10–15 minutes until almost set but not fully hardened—this helps the layers stick well.
Step 3: Add the Semi-Sweet Chocolate Layer
Repeat the melting process with your semi-sweet chocolate and the other 1/2 teaspoon oil. Stir in the remaining 1/4 teaspoon peppermint extract once melted. Pour this onto your almost-set white chocolate layer and smooth it out gently. Back in the fridge for another 10–15 minutes to get that perfect almost-set consistency again—you want it to bond but not fully set, so the layers won’t separate later.
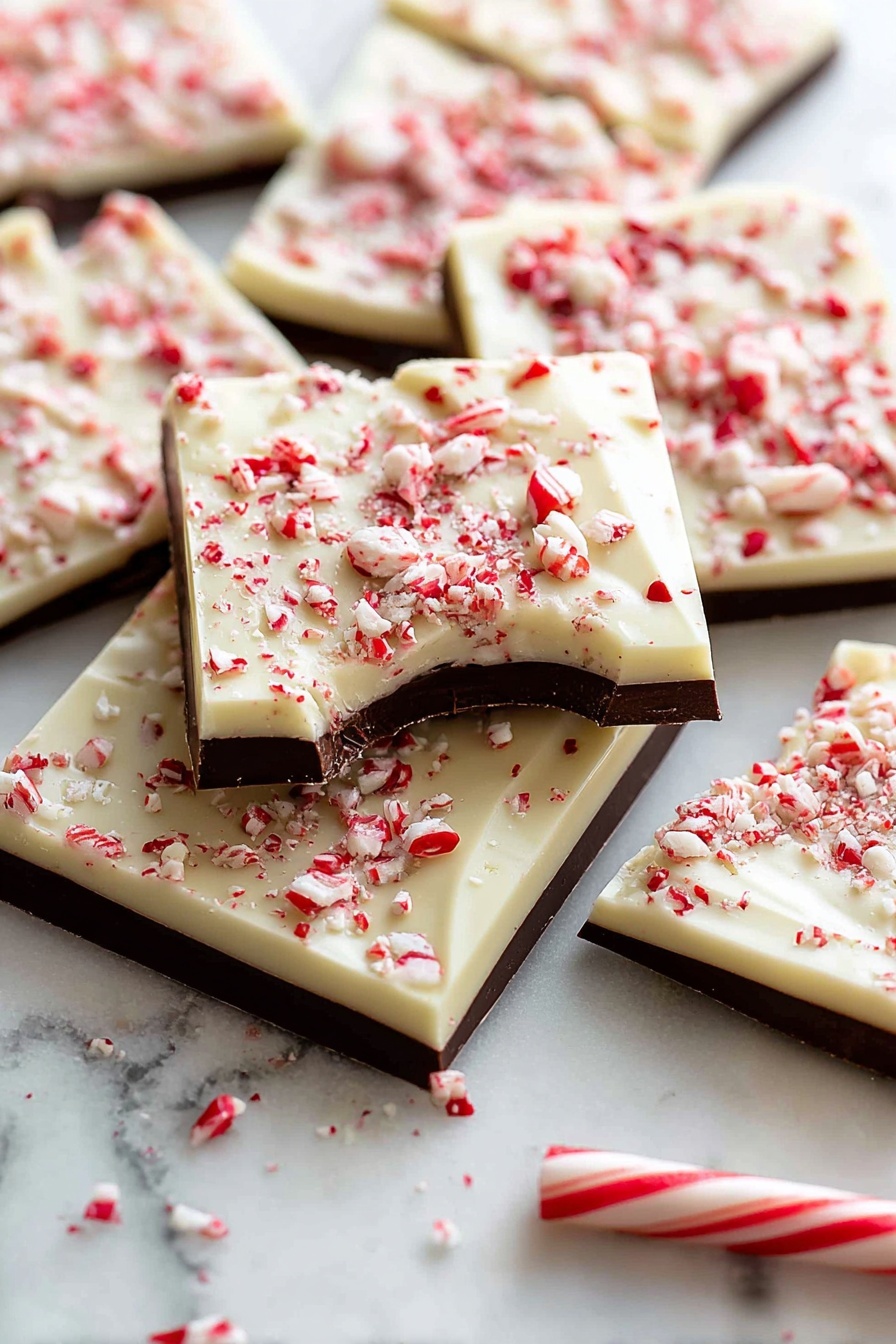
Step 4: Final White Chocolate Layer and Candy Cane Topping
Finally, melt the remaining white chocolate with the last 1/2 teaspoon oil. Unlike before, you won’t add peppermint to this last layer so the candy canes shine through with their own minty fresh flavor. Pour it over the chocolate layers and spread smooth. Now, crush your candy canes by sealing them in a zipped bag and giving them a few good whacks with a rolling pin—this is super satisfying! Sprinkle the crushed candy evenly over the top. Refrigerate the whole pan for about an hour until completely set.
Step 5: Breaking and Storing Your Bark
Once chilled, carefully lift the bark out by the parchment or foil edges. If it’s been longer than a few hours, leave it at room temp for 10–15 minutes to slightly soften—it’ll break more cleanly without cracking. Then break or cut into your favorite sized pieces. Store leftovers covered in the fridge for up to 3 weeks, or at cool room temperature for a few days in the winter months.
Pro Tips for Making Peppermint Chocolate Bark Recipe
- Microwave in short bursts: Heating the chocolate in 20-second increments is a game-changer—it keeps your chocolate smooth and prevents burning.
- Don’t fully set between layers: Waiting for layers to be almost firm, not rock hard, helps the bark hold together well.
- Use good quality peppermint extract: I tried generic brands before and the flavor was flat; pure peppermint extract really lifts this bark.
- Crush candy canes fresh: Crushing your candy canes just before topping keeps the crunch and avoids soggy bits.
How to Serve Peppermint Chocolate Bark Recipe
Garnishes
I like to add a sprinkle of extra crushed candy canes or even a light dusting of edible glitter on top for some festive sparkle. Fresh mint leaves on the side make for a beautiful, fragrant touch if you’re serving as a dessert centerpiece.
Side Dishes
This peppermint bark pairs beautifully with a hot cup of cocoa or a peppermint mocha latte. For parties, I often serve it alongside gingerbread cookies or spiced nuts, which complement the chocolate-mint flavors perfectly.
Creative Ways to Present
For holiday gifts or parties, I like arranging the bark chunks in a decorative tin layered with festive tissue paper. Another fun idea is to break the bark into bite-sized pieces and serve in little cellophane bags tied with colorful ribbons—everyone loves receiving this as a sweet takeaway!
Make Ahead and Storage
Storing Leftovers
I store leftover peppermint bark in an airtight container in the fridge to keep it crisp and prevent any melting or sogginess. It stays fresh for weeks this way, though it rarely lasts that long in my house!
Freezing
If you want to make a big batch ahead, you can freeze the bark wrapped tightly in foil and stored in an airtight bag. When you thaw it in the fridge for a few hours, it keeps its texture and flavor nearly perfectly.
Reheating
Because this is best eaten cold or at room temperature, I usually don’t reheat it. If you want to soften the bark slightly before serving, just leave it out for 15 minutes—warm enough to release flavors but cool enough to keep the crisp candy crunch.
FAQs
-
Can I use milk chocolate instead of semi-sweet chocolate in this peppermint chocolate bark recipe?
Absolutely! Milk chocolate will make your peppermint bark sweeter and creamier. Just keep in mind that it’s a bit softer than semi-sweet, so the texture may be less crisp, but it still tastes fantastic.
-
How do I prevent the layers from separating in peppermint chocolate bark?
The key is to let each chocolate layer chill until almost set—firm but still slightly tacky—before adding the next. This helps them bond as they fully harden, which prevents separation when breaking the bark.
-
Can I make this peppermint chocolate bark recipe without peppermint extract?
Yes, but the peppermint flavor is the star of this bark, so if you skip the extract, you might want to increase the amount of crushed candy canes or add a touch of peppermint oil for that cool mintiness.
-
What’s the best way to crush candy canes for the bark topping?
Place unwrapped candy canes in a sealed zip-top bag and gently crush with a rolling pin or meat mallet. Doing this right before topping keeps the pieces fresh and crunchy.
Final Thoughts
When I first tried making this Peppermint Chocolate Bark Recipe, I was blown away by how simple it was to get that sophisticated, layered flavor right at home. It’s become my go-to treat for holidays and gifting because it’s as fun to make as it is to eat. I really hope you give it a shot—you’ll enjoy the process and be rewarded with festive, melt-in-your-mouth bites that everyone will love!
Print
Peppermint Chocolate Bark Recipe
- Prep Time: 30 minutes
- Cook Time: 15 minutes (melting and layering time, excluding chilling)
- Total Time: 1 hour 45 minutes
- Yield: Just over 1 lb (approximately 12 servings)
- Category: Dessert
- Method: No-Cook
- Cuisine: American
- Diet: Vegetarian
Description
This Peppermint Bark recipe features layers of creamy white chocolate and rich semi-sweet chocolate infused with refreshing peppermint extract, topped with crushed candy canes for a festive crunch. Perfect for holiday gifting or a delightful treat, it is simple to prepare using microwave melting and chilling techniques.
Ingredients
White Chocolate Layers
- 12 ounces (339g) white chocolate, coarsely chopped and divided
- 1 and 1/2 teaspoons vegetable oil or coconut oil, divided
- 1/2 teaspoon peppermint extract, divided
Semi-Sweet Chocolate Layer
- 6 ounces (170g) semi-sweet or bittersweet chocolate, coarsely chopped
- 1/2 teaspoon vegetable oil or coconut oil
- 1/4 teaspoon peppermint extract
Topping
- 2–3 regular-size candy canes (24–36g total), crushed
Instructions
- Prepare Pan: Line an 8-inch or 9-inch square baking pan with parchment paper or aluminum foil, smoothing out any wrinkles. Set aside.
- Melt Bottom White Chocolate Layer: Place 6 ounces of white chocolate and 1/2 teaspoon of oil in a heatproof bowl. Melt in 20-second microwave increments, stirring vigorously after each, until smooth. Stir in 1/4 teaspoon peppermint extract. Pour into pan and spread into a thin, smooth layer. Refrigerate for 10–15 minutes until almost set.
- Melt Semi-Sweet Chocolate Layer: In a heatproof bowl, melt 6 ounces of semi-sweet chocolate with 1/2 teaspoon oil using the same microwave method. Stir in 1/4 teaspoon peppermint extract. Pour over white chocolate layer and spread evenly. Refrigerate for 10–15 minutes until almost set.
- Melt Top White Chocolate Layer: Melt remaining white chocolate (approximately 6 ounces) with 1/2 teaspoon oil as before. Pour over the semi-sweet chocolate layer and spread smoothly. Sprinkle crushed candy canes evenly over the top.
- Set and Serve: Refrigerate the bark for about 1 hour until completely set. Remove from pan, peel off parchment/foil, and break or cut into pieces. If chilled longer than 3–4 hours, let sit at room temperature for 10–15 minutes before slicing to prevent layers from separating.
- Storage: Store leftover bark in the refrigerator for up to 3 weeks. It can be left at room temperature for a few days in colder months but may soften slightly.
Notes
- Melting chocolate slowly in short microwave bursts prevents overheating and blooming.
- Using vegetable or coconut oil helps create a smooth, spreadable chocolate texture.
- Crush candy canes by placing them in a sealed bag and using a rolling pin or mallet.
- If the bark fully sets before layering, the layers may separate; chilling until almost set is ideal.
- Store bark in a cool place to maintain texture; avoid warmth to keep it firm.
Nutrition
- Serving Size: 1 piece (approx. 30g)
- Calories: 150
- Sugar: 18g
- Sodium: 15mg
- Fat: 9g
- Saturated Fat: 6g
- Unsaturated Fat: 2.5g
- Trans Fat: 0g
- Carbohydrates: 18g
- Fiber: 1g
- Protein: 1g
- Cholesterol: 5mg


