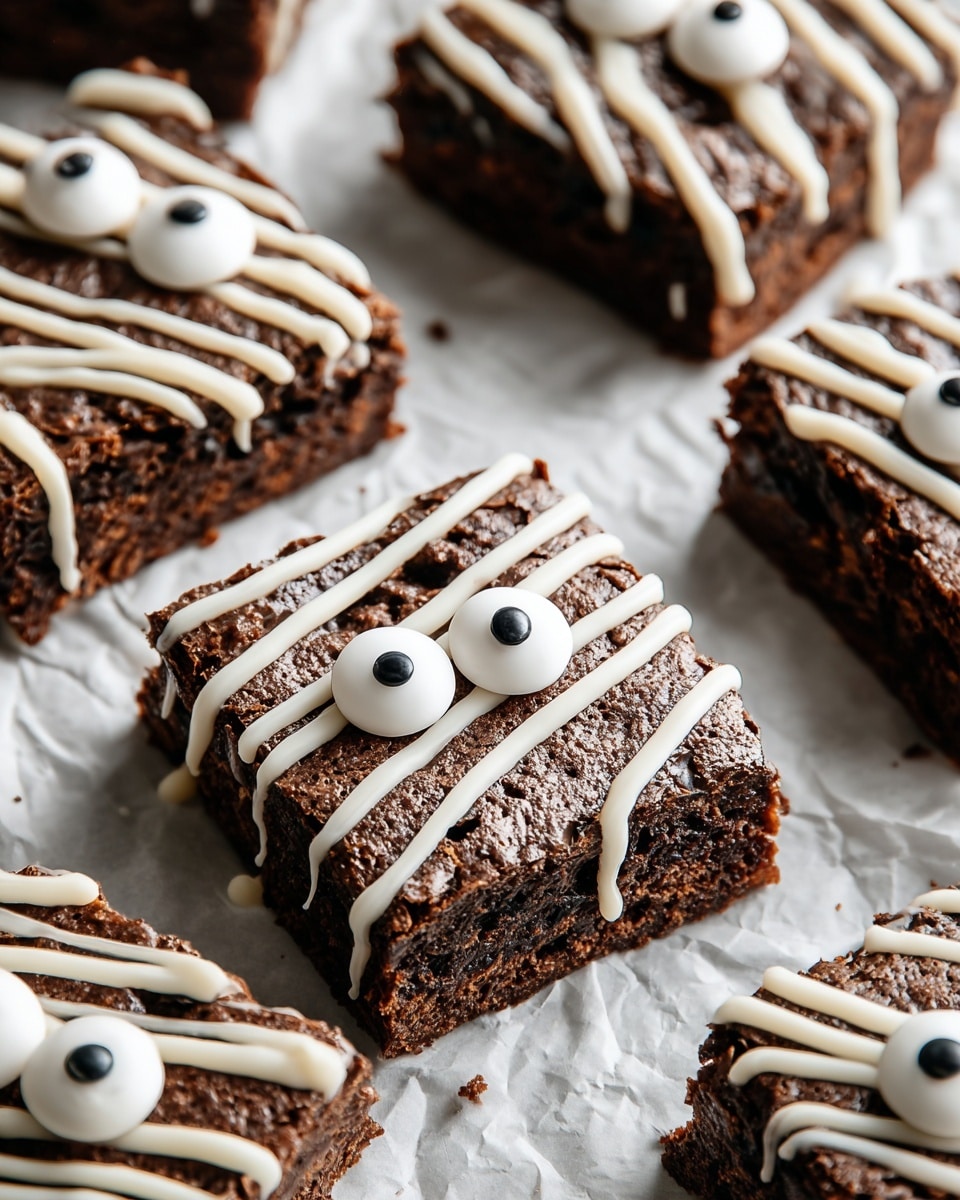
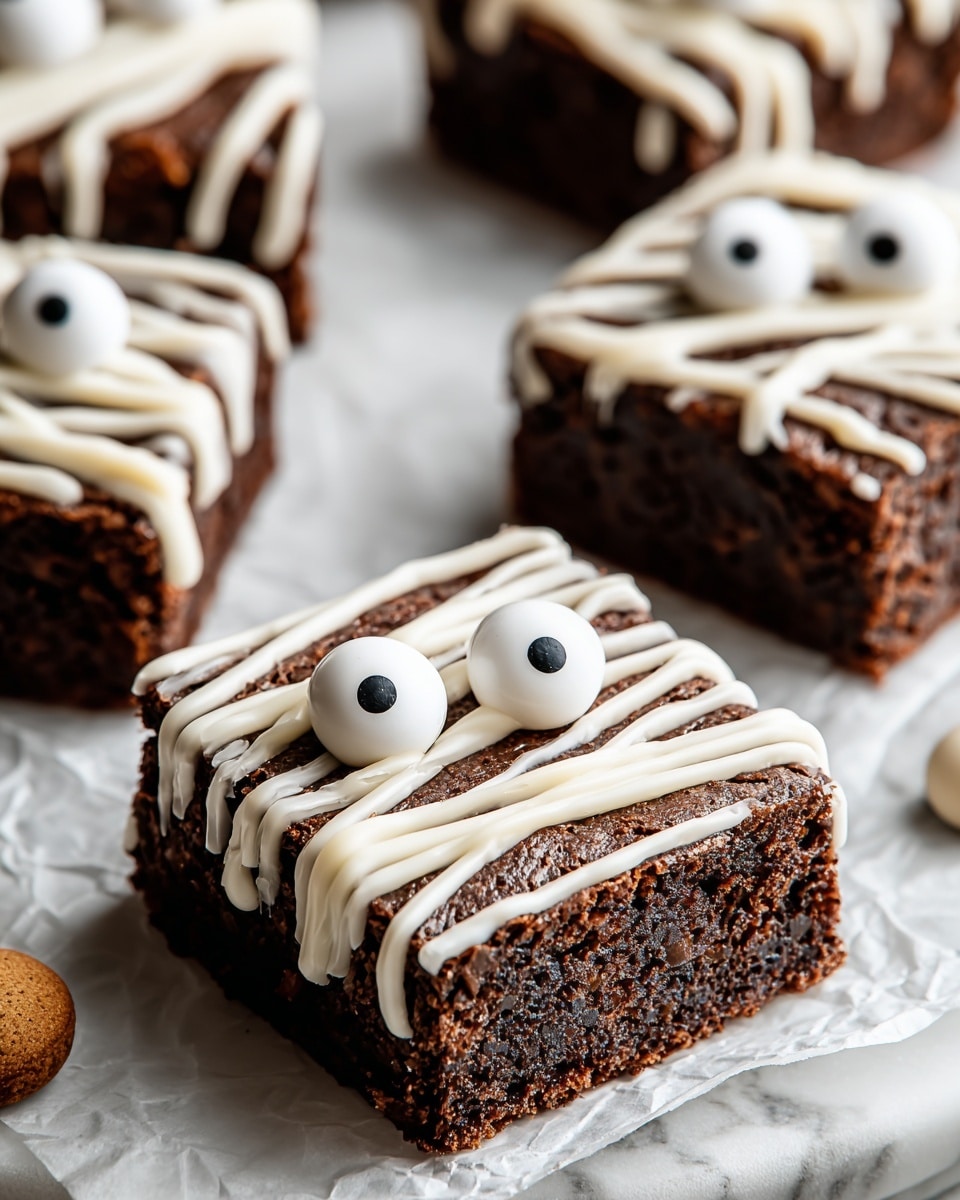
If you’re on the hunt for a fun, festive treat that’s as delicious as it is adorable, you’ve got to try this Spooky Mummy Brownies Recipe. I absolutely love how these brownies turn out—rich, fudgy, and covered in those cute white chocolate “bandages” that bring Halloween vibes to life. Whether you’re baking for a party or just to delight your family, this recipe is fan-freaking-tastic and surprisingly simple to pull off!
Why You’ll Love This Recipe
- Effortlessly Cute: The mummy design is so simple but makes a big spooky impression for Halloween gatherings.
- Quick & Easy: Using a boxed brownie mix means less fuss and no guesswork—yet the results feel homemade.
- Kid-Friendly Fun: My kids love helping with the decorating, making this a perfect family activity.
- Versatile & Delicious: You get that classic fudgy brownie taste balanced with sweet white chocolate and creepy candy eyes.

Ingredients You’ll Need
The beauty of this Spooky Mummy Brownies Recipe is how straightforward the ingredient list is. I find that starting with a good brownie mix sets you up for success, and those simple add-ons transform the look dramatically without extra baking skills.
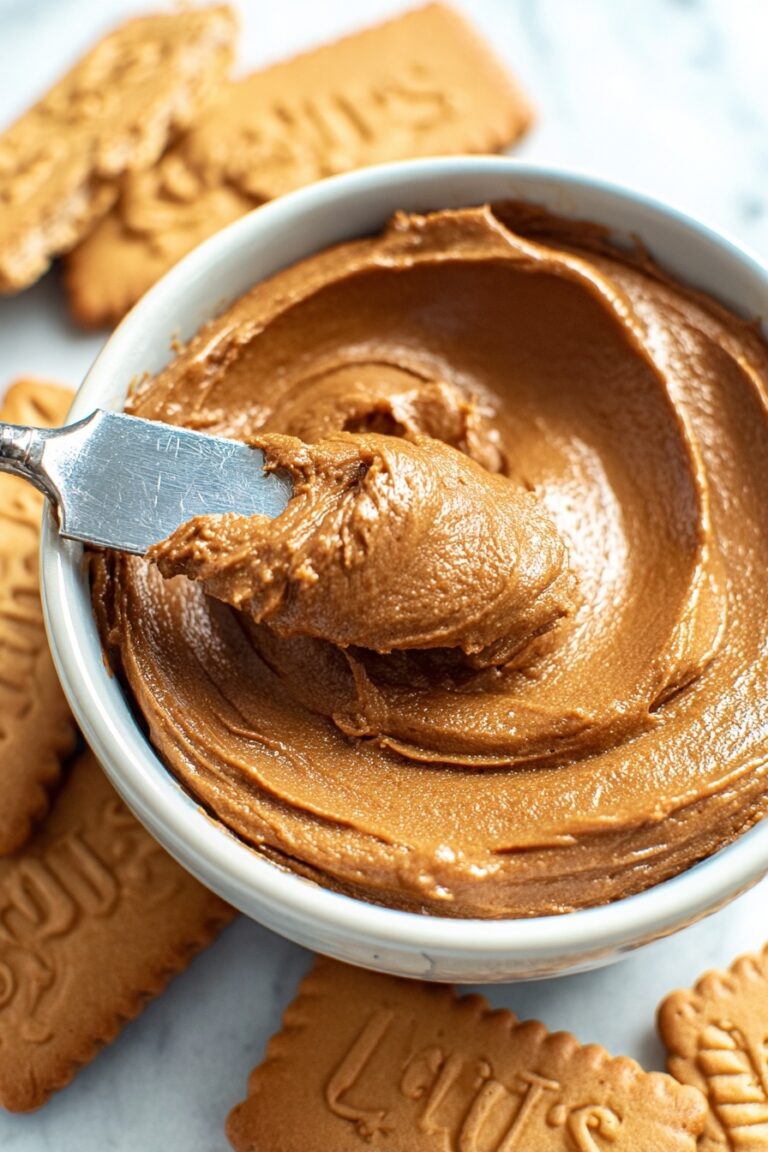
- Brownie mix: I like a fudgy mix – it creates a moist, rich base perfect for the mummy design.
- White chocolate chips: Melts smoothly for piping those iconic mummy bandages.
- Candy eyes: This little addition brings the mummies to life – you can find these at most craft or baking stores during Halloween season.
Variations
I love customizing this Spooky Mummy Brownies Recipe depending on the crowd and occasion. You can totally make it your own by switching up the toppings or swapping ingredients for dietary needs.
- Gluten-free version: Use a gluten-free brownie mix; I’ve had great results with bites just as moist and tasty.
- Dark chocolate drizzle: Sometimes I swap the white chocolate for dark or even mix in orange-colored candy melts for extra Halloween flair.
- Decorate with sprinkles: Add edible glitter or Halloween-themed sprinkles over the wet chocolate for sparkle and texture.
- Mini mummy bites: Cut brownies into smaller squares to serve at parties or school events, perfect for little hands and fewer crumbs!
How to Make Spooky Mummy Brownies Recipe
Step 1: Bake Your Fudgy Brownies
Start by preparing the brownie mix following the package instructions exactly. Don’t skip greasing your baking pan well—a non-stick spray or butter works wonders. When I first tried this, uneven baking caused cracked brownies, so even spreading the batter helps prevent that. Bake as directed, then let the brownies cool completely before cutting them into squares; hot brownies won’t hold the decoration well, and you could end up with melted, sloppy messes instead of cute mummies.
Step 2: Melt and Pipe the White Chocolate Bandages
While brownies cool, melt your white chocolate chips gently—either in a microwave in short bursts or over a double boiler. I discovered using a piping bag (or a plastic sandwich bag with a tiny corner snipped off) gives you the best control for creating those signature mummy stripes. Don’t worry if your drizzle isn’t perfect; the charm is in the rustic, uneven “bandages.” Aim for zigzag patterns that cross the brownie pieces at different angles.
Step 3: Add Candy Eyes and Let Set
As soon as you finish drizzling the white chocolate, quickly press two candy eyes onto each brownie square. I find it easier to do this before the chocolate hardens, so they stick perfectly. If your eyes don’t stick well, a tiny dab of melted chocolate underneath them helps act like glue. Then, let the chocolate set at room temperature or pop them briefly in the fridge. Once firm, your spooky mummies are ready to be gobbled up!
Pro Tips for Making Spooky Mummy Brownies Recipe
- Choose the Right Pan Size: Using the pan size suggested on your brownie box ensures the texture comes out as intended—avoid dark pans that can over-brown edges.
- Don’t Overheat White Chocolate: I learned that overheating makes white chocolate grainy; melt slowly and stir frequently for silky smooth piping consistency.
- Use Room Temp Brownies: Decorating while brownies are cool but not refrigerated prevents cracks and helps the chocolate adhere seamlessly.
- Secure the Candy Eyes: If they fly off, especially during transport, a little additional melted chocolate glue keeps them stuck like magic.
How to Serve Spooky Mummy Brownies Recipe
Garnishes
I usually keep it simple with just the candy eyes and white chocolate bandages because that’s enough to make them super cute. But if I want to step it up, I add a sprinkle of edible glitter or crushed Halloween colored candy bits for texture and extra sparkle. Sometimes, a tiny dollop of raspberry sauce on the side makes a creepy “bloody” effect that’s always a crowd-pleaser.
Side Dishes
These brownies pair wonderfully with a cold glass of milk—or a hot cup of coffee if you’re serving adults. For a more thematic spread, I like bringing out orange pumpkin spice cookies or spooky themed marshmallow treats to go alongside, creating a fun Halloween dessert platter everyone enjoys.
Creative Ways to Present
To amp up the Halloween party vibe, I sometimes serve these brownies on a black slate board with fake spider webs and mini plastic spiders scattered around. Another fun idea is stacking brownies pyramid-style on a cake stand with witch’s fingers cookies poking out for a creepy hands effect. Presentation is half the fun—so get creative and enjoy watching guests delight in your spooky efforts!
Make Ahead and Storage
Storing Leftovers
I keep leftover Spooky Mummy Brownies in an airtight container at room temperature for up to 3 days. I’ve found that refraining from refrigerating helps preserve that fudgy texture. If it’s hot or humid, a cool spot in the house works best to avoid melting the white chocolate bandages.
Freezing
Freezing works alright if you’re in a pinch! I wrap individual brownies tightly in plastic wrap and store them in a freezer-safe container or bag. When thawed, they’re delicious, though the candy eyes can lose a bit of their charm. For best results, freeze before decorating and add eyes after thawing and warming a bit.
Reheating
If you want warm brownies, I warm them briefly in the microwave for about 10-15 seconds. I avoid reheating too long to keep the white chocolate drizzle intact. Alternatively, enjoy them chilled — either way, these spooky treats stay rich and satisfying.
FAQs
-
Can I make the Spooky Mummy Brownies Recipe from scratch instead of using a mix?
Absolutely! If you prefer homemade brownies, go for your favorite fudgy brownie recipe—the trick is ensuring they aren’t too cakey. Just bake as usual, cool completely, and then decorate with melted white chocolate and candy eyes. It might take a bit more time but yields a rich, personal touch.
-
What if I can’t find candy eyes?
No worries! You can make “eyes” by dotting two small drops of white icing or melted white chocolate on each brownie, then adding a tiny dot of dark chocolate or black gel food coloring for pupils. It’s a fun DIY hack that still looks super cute.
-
How long can I make these ahead of time?
The mummies show up best if decorated the day you plan to serve. You can bake and cut brownies a day or two ahead, but add the white chocolate and candy eyes shortly before serving to keep everything looking fresh.
-
Can I use colored candy melts instead of white chocolate?
Definitely! Colored candy melts work well and add a fun pop of color. Just make sure to melt gently and use a piping bag for neat application. Orange or green melts can amp up the spooky aesthetic.
Final Thoughts
This Spooky Mummy Brownies Recipe has become a favorite in my family, especially around Halloween. It’s one of those treats that’s easy to make yet makes a big impression, bringing smiles and a little bit of spooky fun to the table. I’m confident you’ll enjoy making it just as much as eating it. So grab your brownie mix, candy eyes, and chocolate, and whip up these adorable mummies—your friends and family will thank you!
Print
Spooky Mummy Brownies Recipe
- Prep Time: 15 minutes
- Cook Time: 25-35 minutes
- Total Time: 45-50 minutes
- Yield: 12 brownies
- Category: Dessert
- Method: Baking
- Cuisine: American
Description
Spooky Mummy Brownies are a fun and festive Halloween treat featuring rich, fudgy brownies decorated with white chocolate drizzle to resemble mummy bandages and topped with candy eyes. Perfect for parties or a themed dessert, these brownies combine classic chocolate flavor with a playful twist that’s sure to delight kids and adults alike.
Ingredients
Brownie Base
- 1 box brownie mix (including ingredients listed on the box such as eggs, oil, and water)
Decorations
- 1/2 cup white chocolate chips
- Candy eyes (quantity to top brownies, approx. 24 for 12 brownies, 2 per brownie)
Instructions
- Prepare the Brownies: Follow the brownie mix box instructions by combining the mix with the specified eggs, oil, and water. Pour the batter into a greased baking pan, spreading evenly.
- Bake and Cool: Bake the brownies according to package directions until a toothpick inserted comes out clean or with a few moist crumbs. Allow the brownies to cool completely before cutting.
- Cut into Squares: Once cooled, cut the brownies into 12 even squares for uniform mummy treats.
- Melt the White Chocolate: Place the white chocolate chips in a microwave-safe bowl and heat in 20-30 second intervals, stirring between each, until smooth and fully melted. Alternatively, melt using a double boiler.
- Pipe the Bandages: Transfer the melted white chocolate into a piping bag or a plastic sandwich bag with a small corner cut off. Drizzle a zigzag pattern over each brownie square to mimic mummy bandages.
- Add Candy Eyes: Place two candy eyes on each brownie while the white chocolate is still warm so they adhere properly.
- Set the Chocolate: Allow the white chocolate decorations to set and harden completely at room temperature before serving.
Notes
- Ensure brownies are completely cooled before decorating to prevent melting the white chocolate decorations.
- Use good quality white chocolate for smooth and easy piping.
- If candy eyes are unavailable, you can use small dots of black icing or edible markers on white chocolate dabs.
- Store decorated brownies in an airtight container at room temperature for up to 3 days.
- For a richer flavor, consider adding a teaspoon of vanilla extract to the brownie batter.
Nutrition
- Serving Size: 1 brownie (approx. 1/12th of batch)
- Calories: 220
- Sugar: 22g
- Sodium: 150mg
- Fat: 10g
- Saturated Fat: 6g
- Unsaturated Fat: 3g
- Trans Fat: 0g
- Carbohydrates: 30g
- Fiber: 1g
- Protein: 2g
- Cholesterol: 15mg


